Your One-Stop Wire Mesh Fence Supplier | POLYMETAL

If you are sourcing 1.8mx2.4m garrison fencing panels for Australia, the biggest risk is not the quoted price—it’s the “looks-the-same” panel that arrives with the wrong rail thickness, weak posts, incorrect picket density, or powder coating that won’t survive real outdoor handling. One wrong spec can trigger a fence line that twists, rattles, fails inspection expectations, and forces rework when the site is already under pressure.
Brand Overview
POLYMETAL supplies steel tubular garrison fencing systems engineered for clean alignment, repeated handling, and practical site performance. The system is designed as a matched set: panels, posts, and accessories packed and delivered as a build-ready package so installers avoid “make it fit” improvisation that creates weak points. For projects where corrosion resistance logic and material selection discussions matter, you can also review 304L stainless steel ultimate guide.
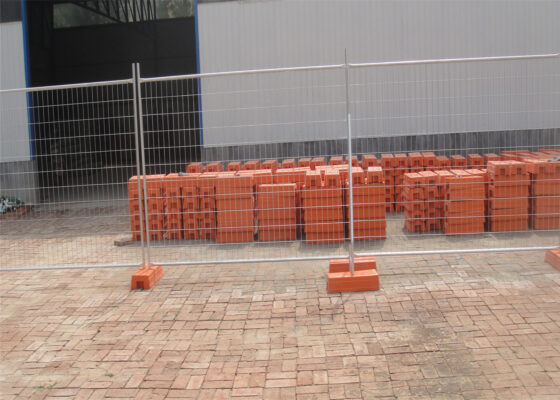
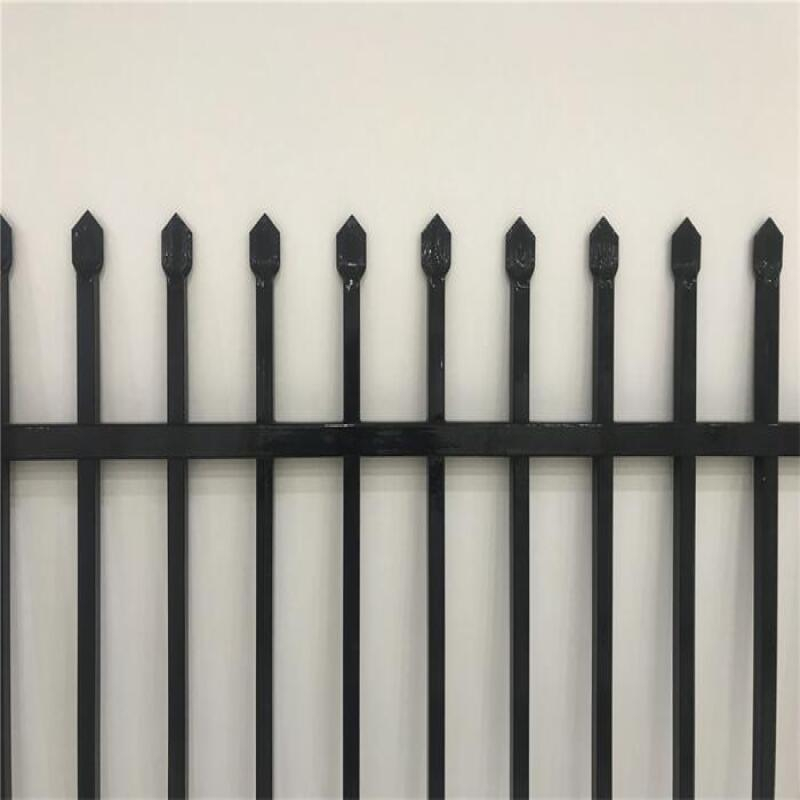
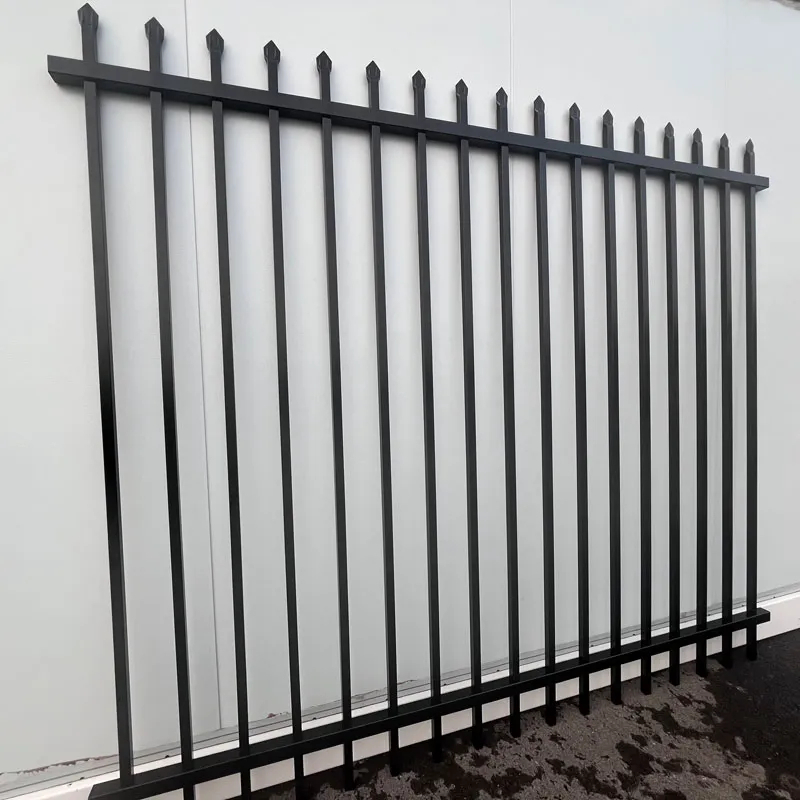
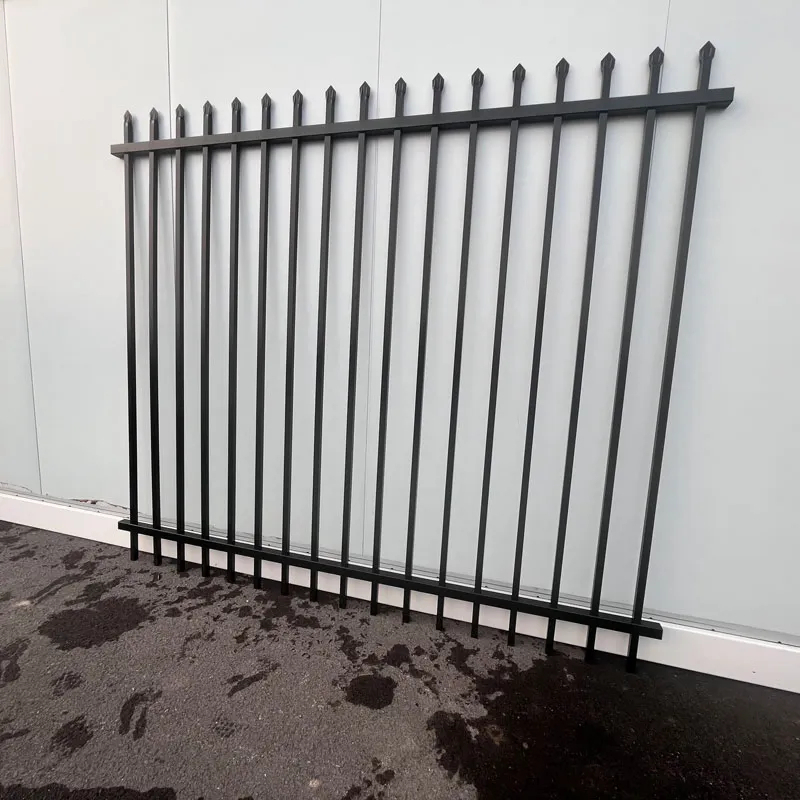
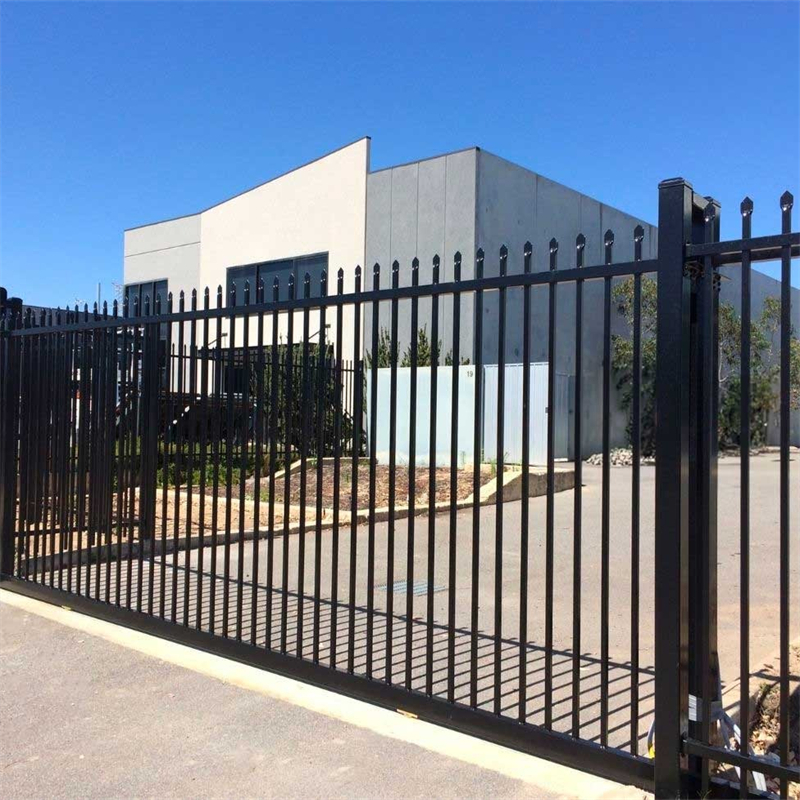
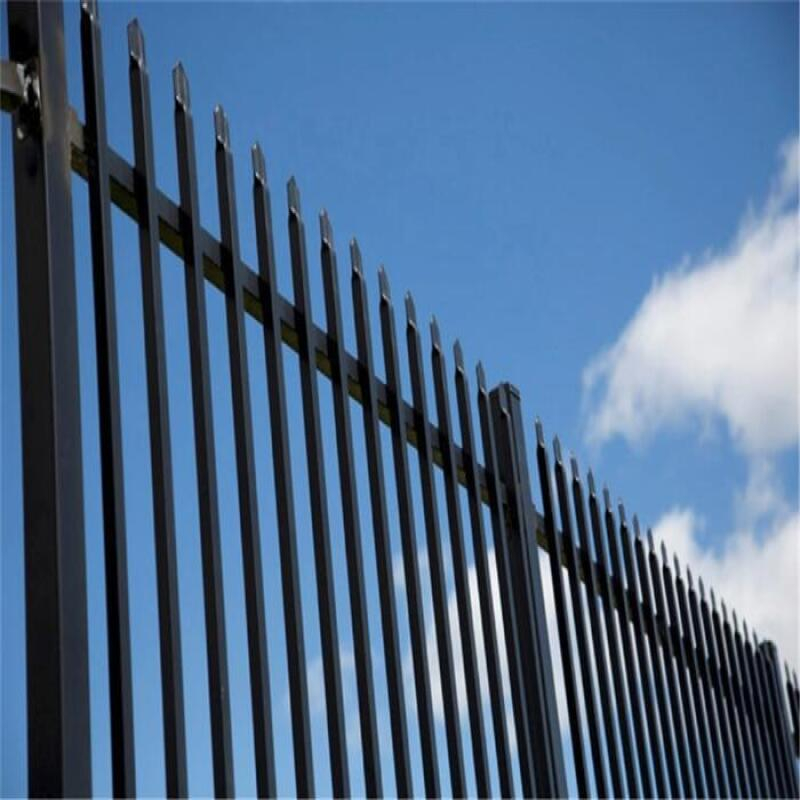
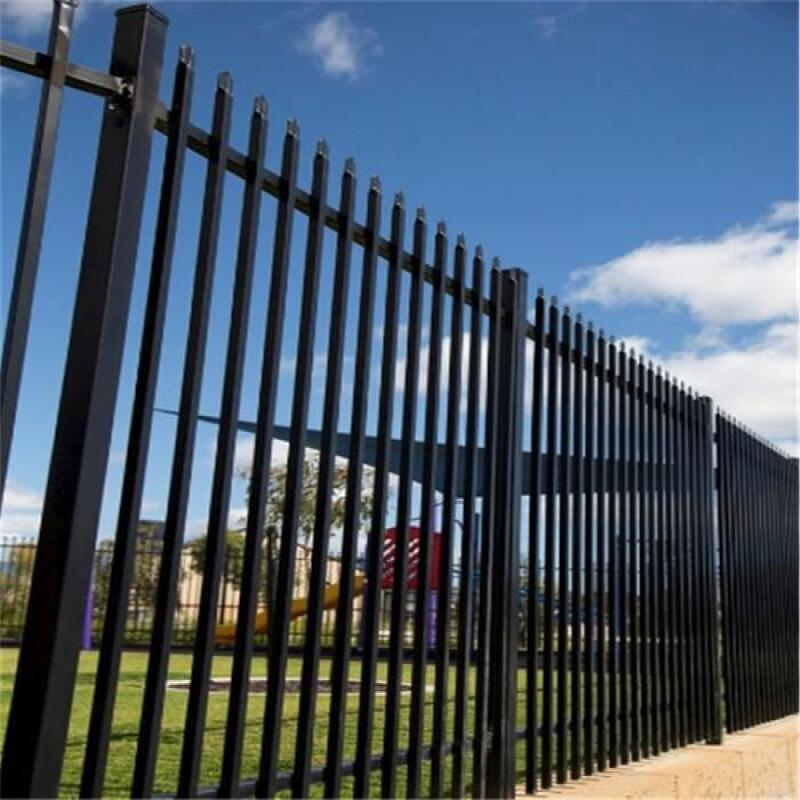
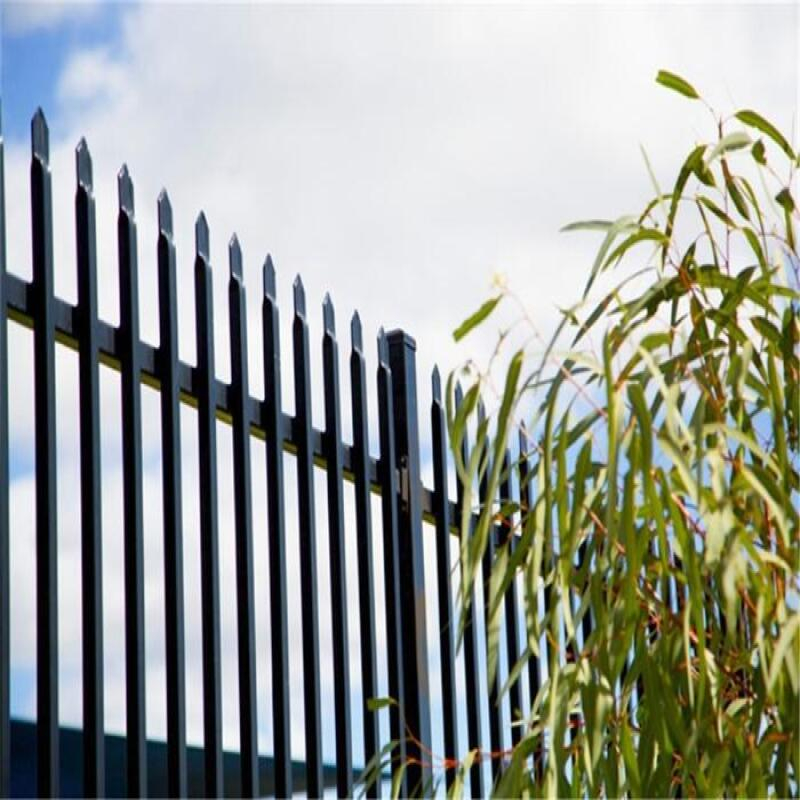
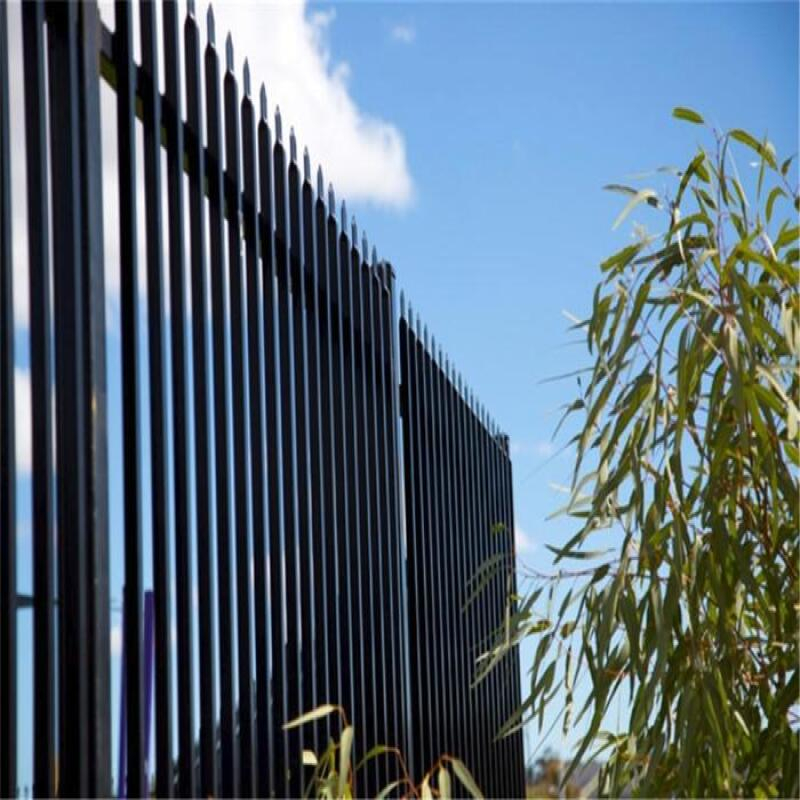
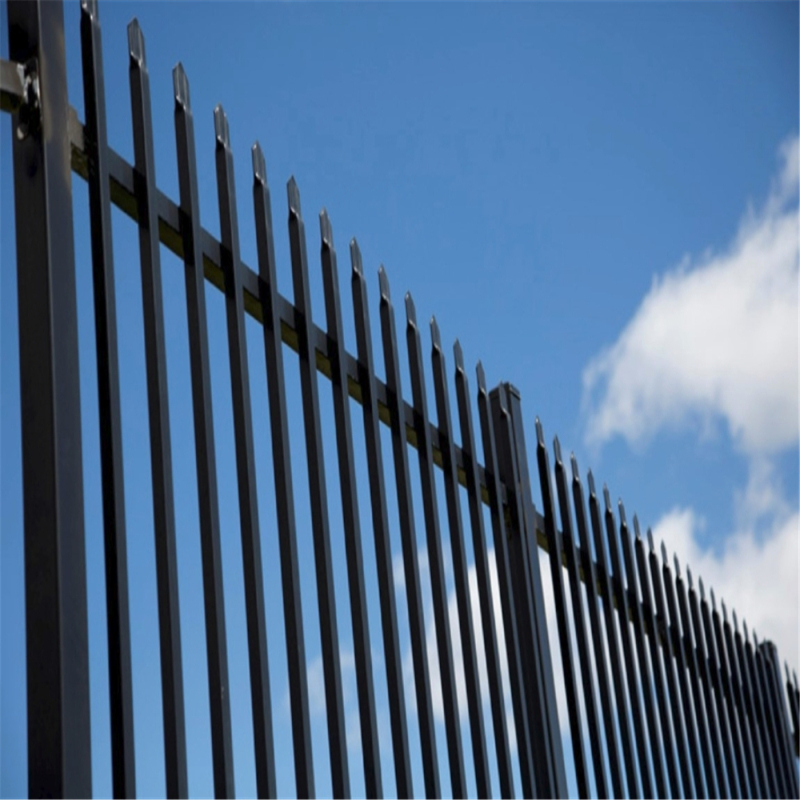
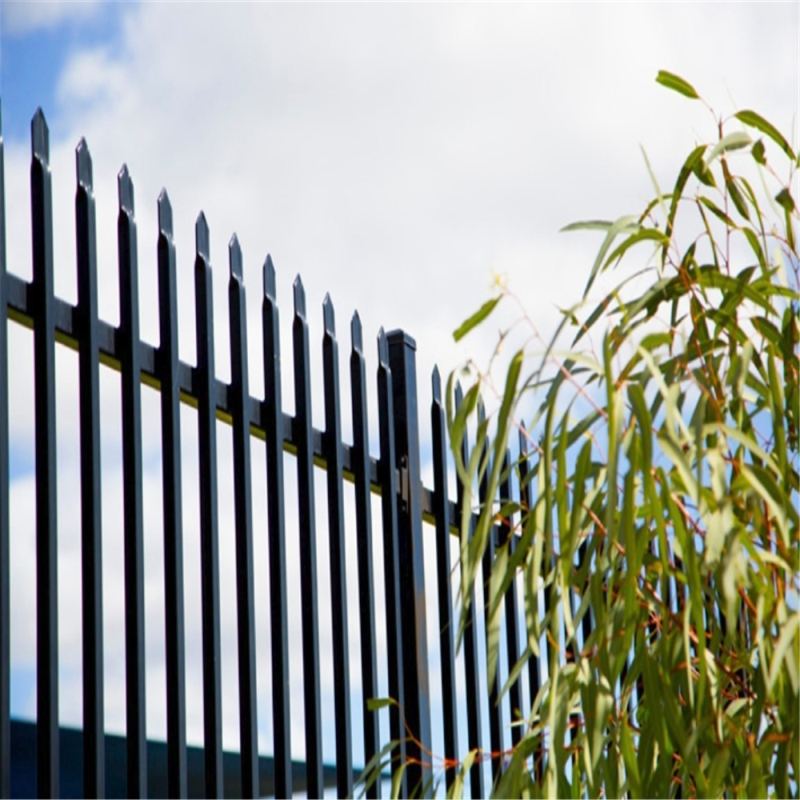
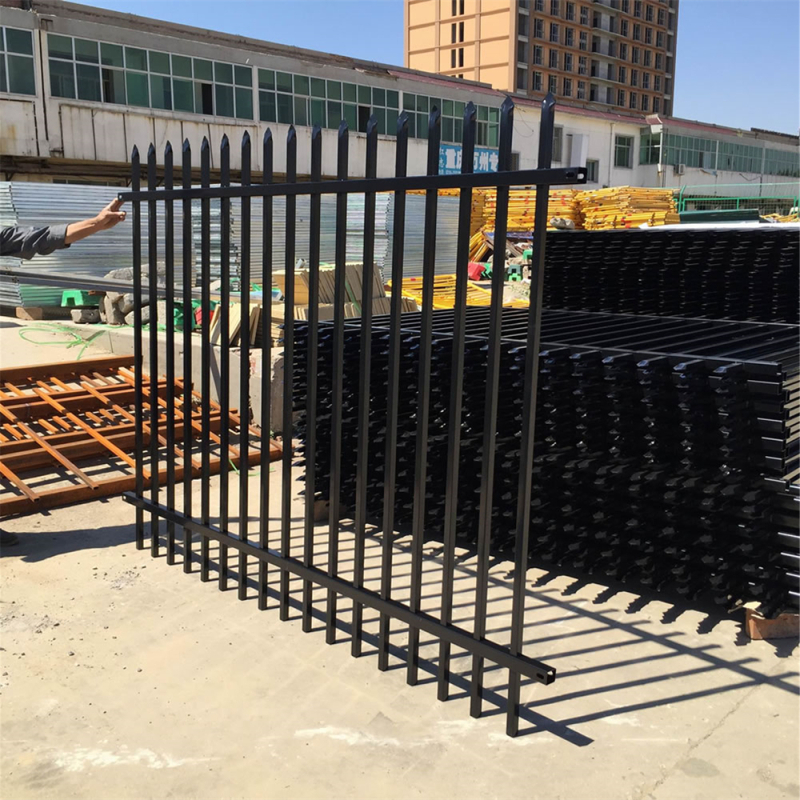
Visual Reference: 1.8mx2.4m Garrison Fencing Panels
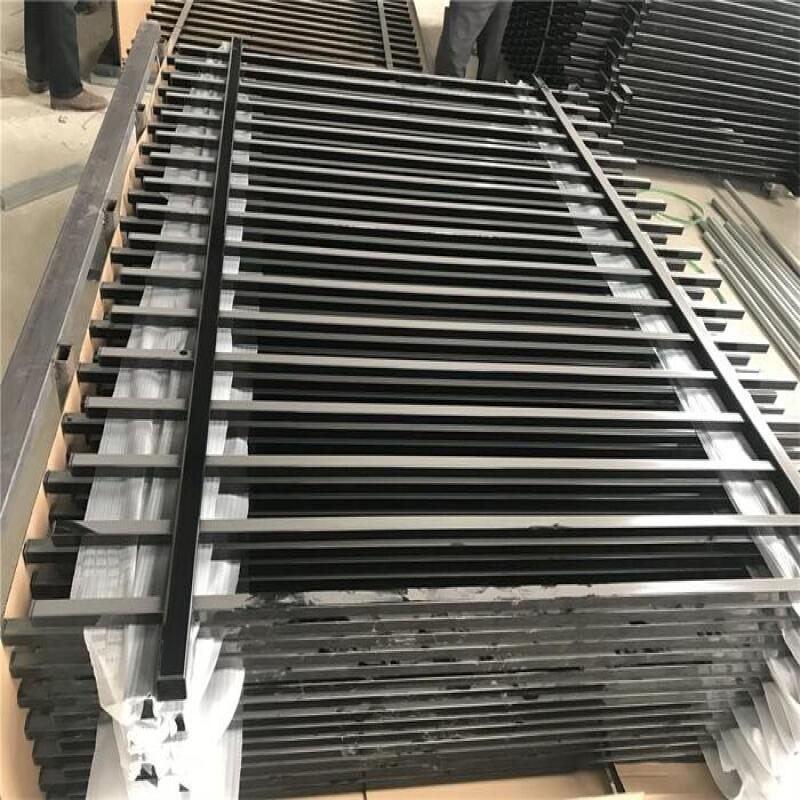
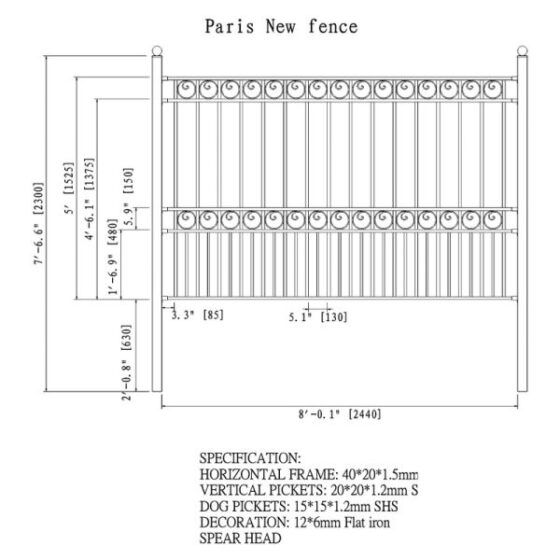
Product Description: POLYMETAL 1.8mx2.4m Garrison Fencing Panels (AU Market)
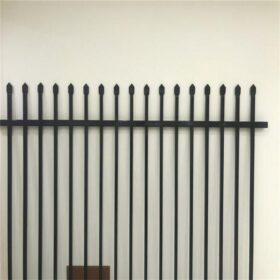
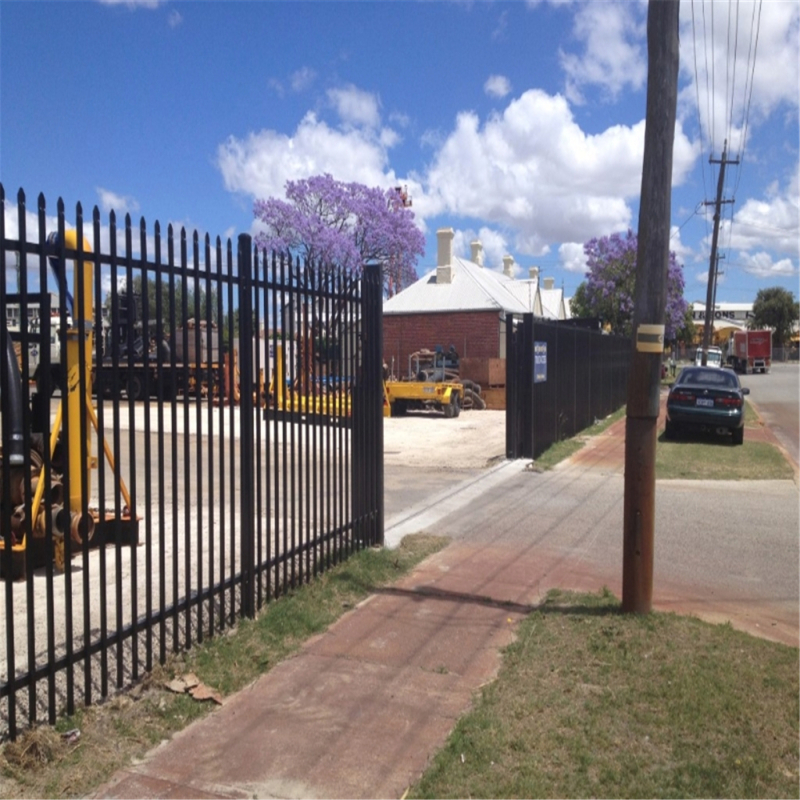
POLYMETAL 1.8mx2.4m garrison fencing panels are manufactured from galvanized steel tube and finished with durable powder coating to deliver a clean “wrought-iron look” with stronger steel rigidity for long-term use. This panel format is widely selected for Australian residential boundaries, commercial frontages, schools, and public-area perimeters where the fence must look straight, feel solid, and stay consistent across long runs.
The system is commonly configured with square rail frames such as 40×40mm, 45×45mm, or 50×50mm and upright (picket) profiles such as 16×16mm, 25×25mm, or 30×30mm. Upright density is a critical “hidden cost lever”: buyers typically choose 16 pcs (about 115mm spacing), 17 pcs (about 108mm spacing), or 18 pcs (about 100mm spacing) depending on the look, rigidity target, and climb-gap control needs.
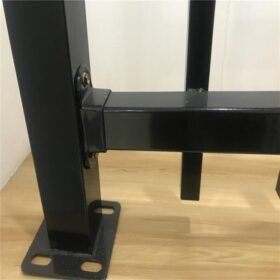
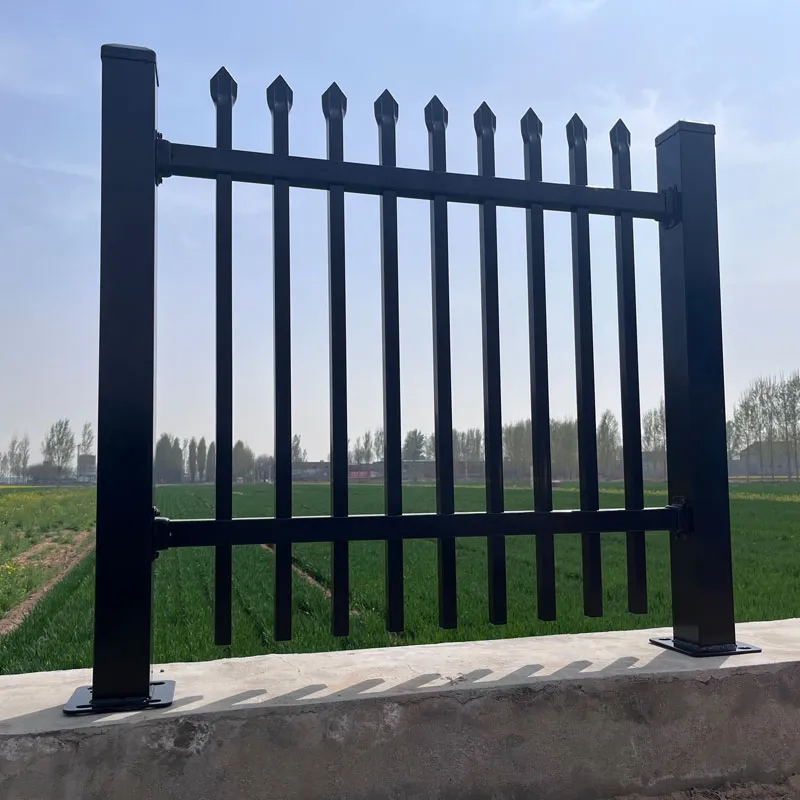
Post planning is where straight fence lines are either won or lost. POLYMETAL post options commonly include 60×60, 65×65, 75×75, 80×80, and 100×100 with wall thickness options such as 1.6mm, 2.00mm, and 2.50mm. For in-ground installation reliability, post height is typically selected at panel height + 600mm to support stable embedment and reduce leaning over time.
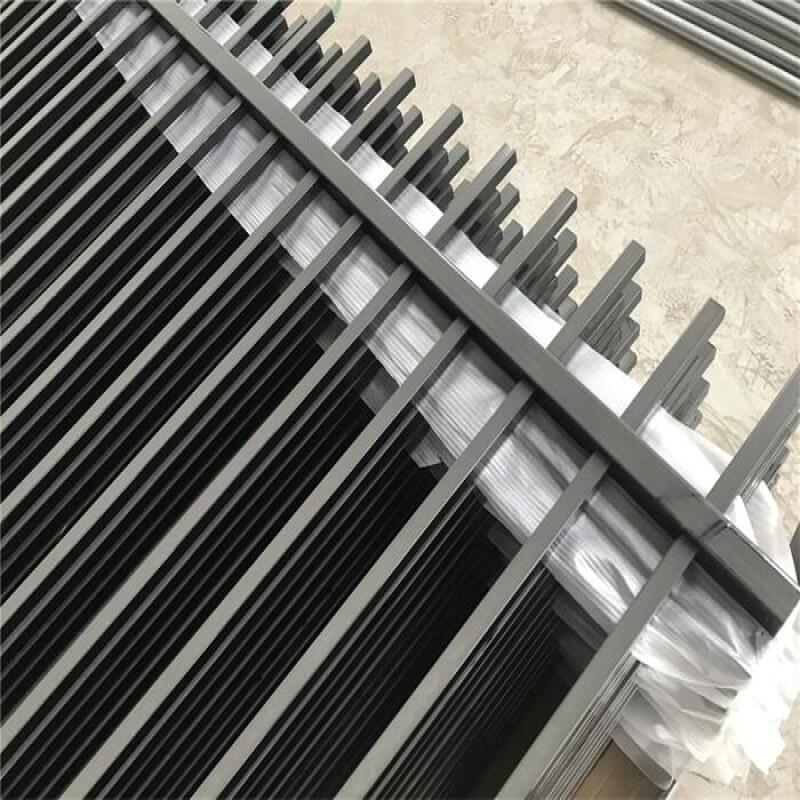
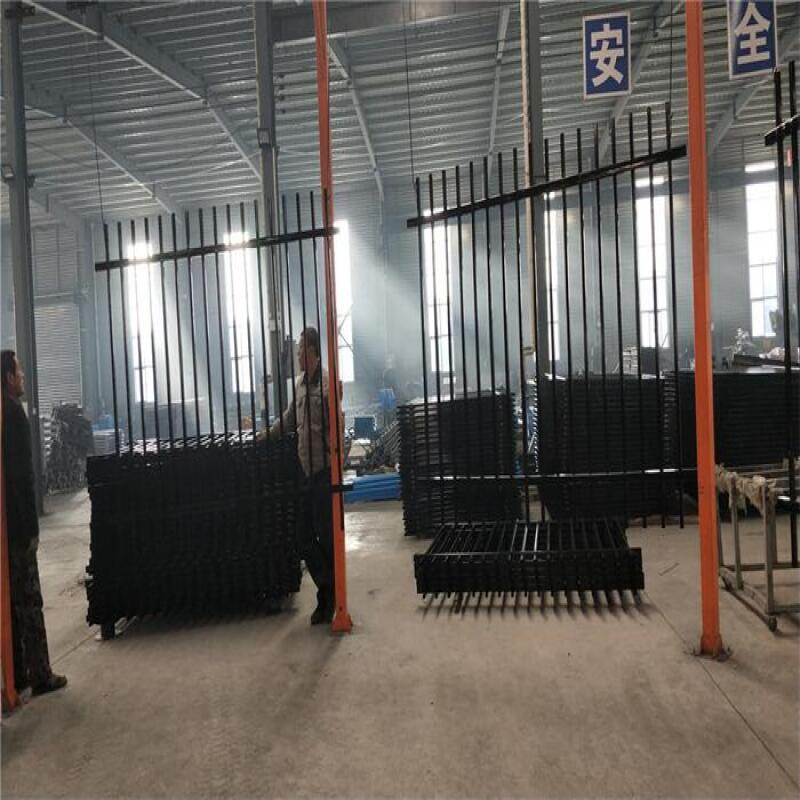
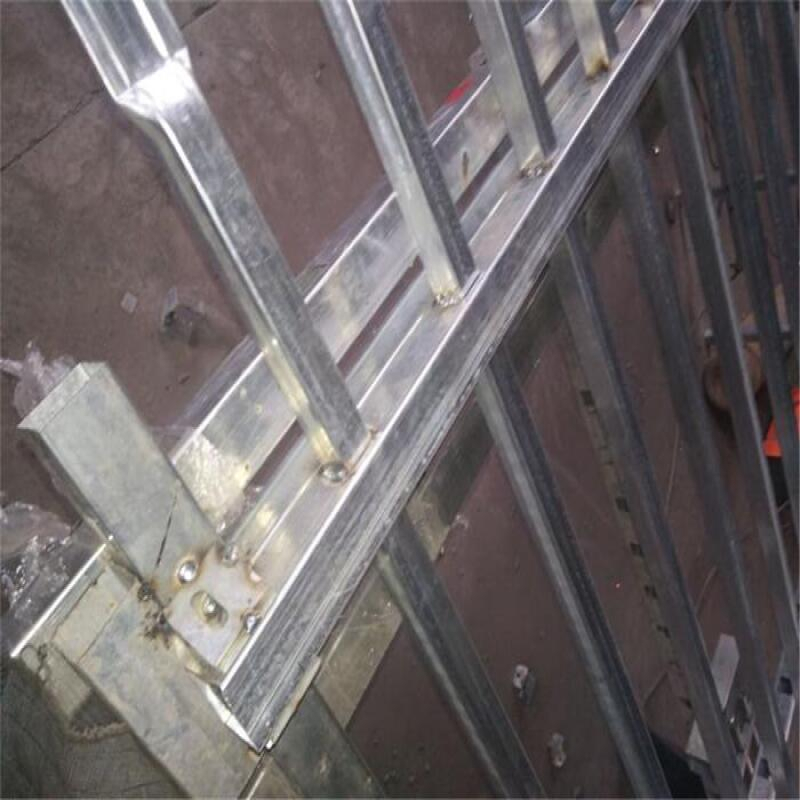
Production & Powder Coating (Visual)
Specifications
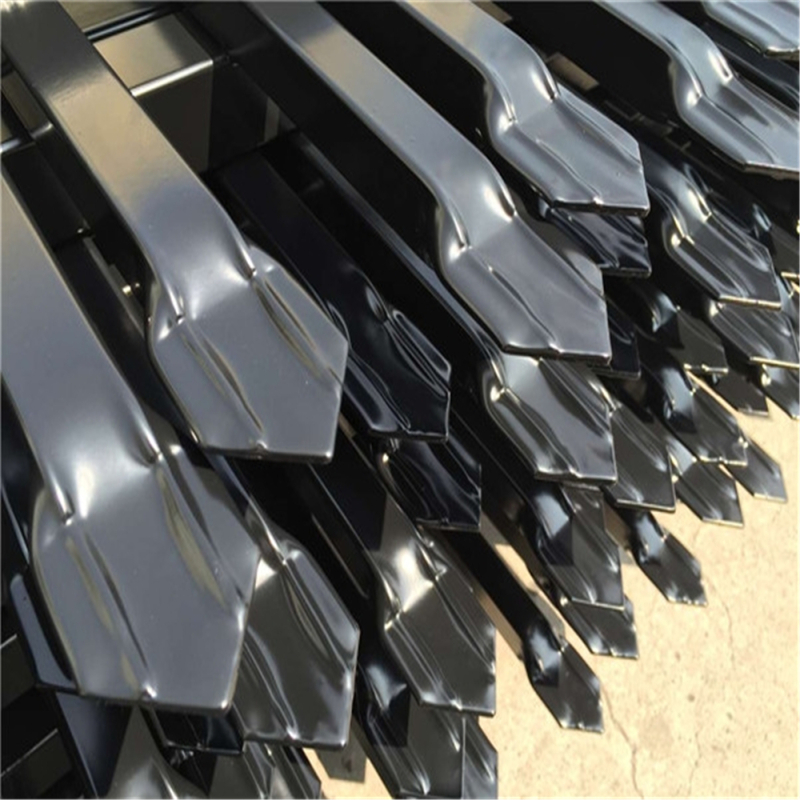
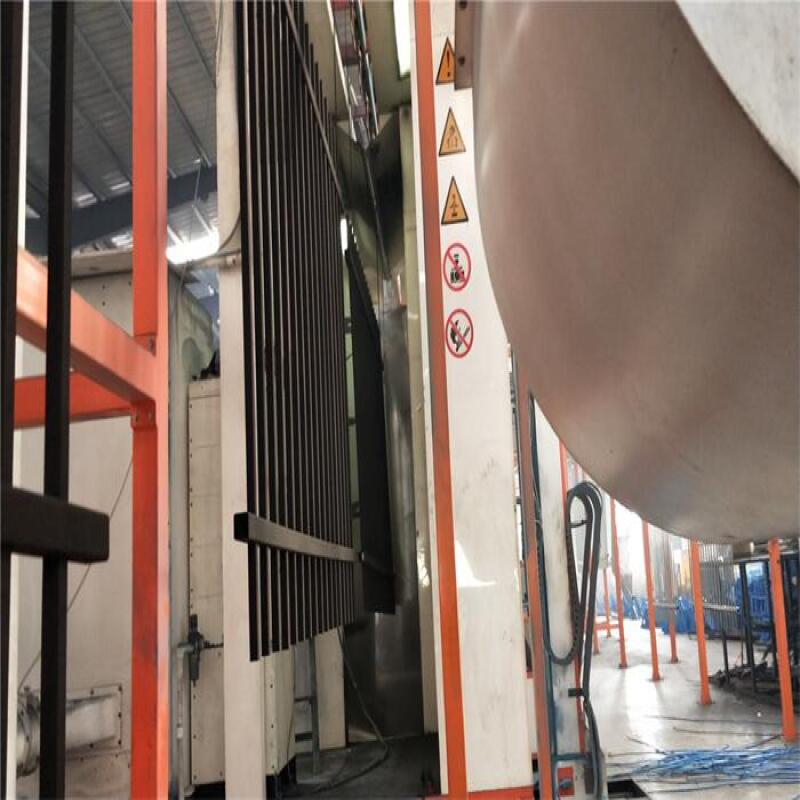
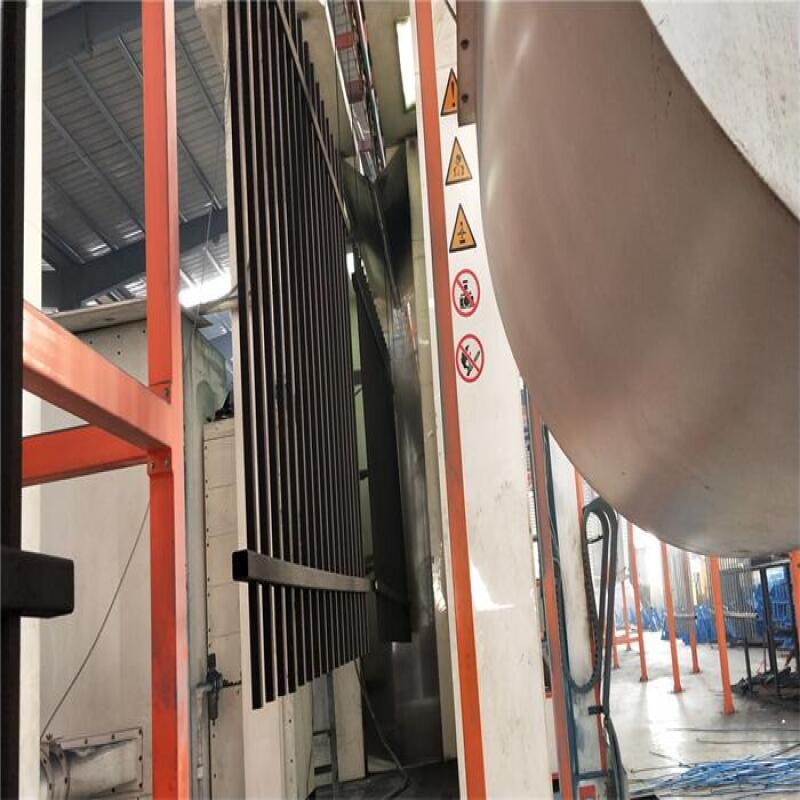
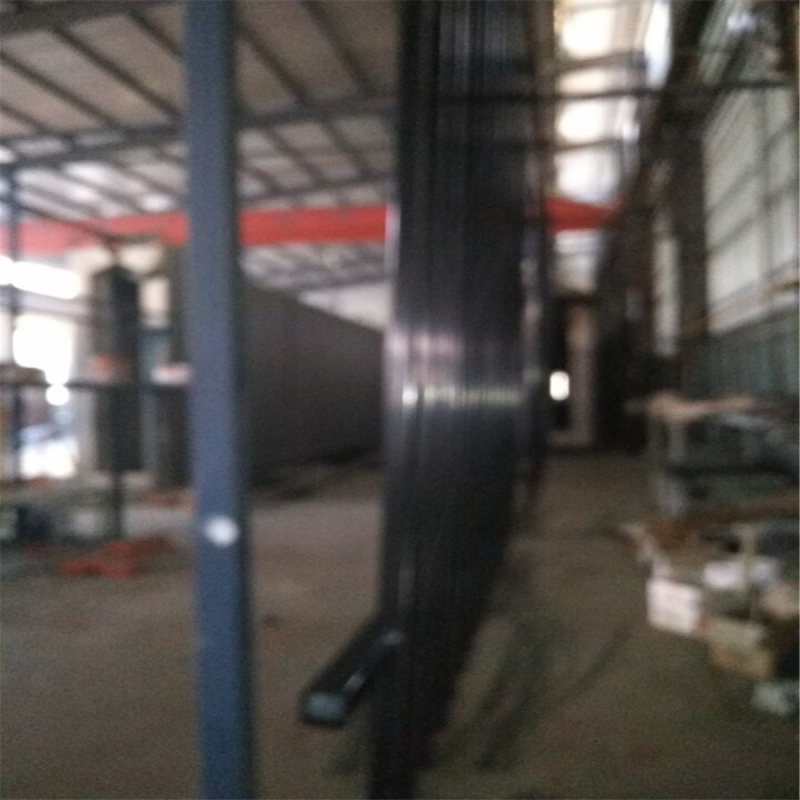
Table 1: 1.8m(H) × 2.4m(W) Core Builds (AU Market)
| Fence Height | Fence Width | Rail Frame | Rails Thickness | Upright | Upright Thickness | Upright Qty (Spacing) | Post Option | Post Wall | Post Height (Panel+600) | Finish / Top |
|---|---|---|---|---|---|---|---|---|---|---|
| 1800mm | 2400mm | 40×40mm | 1.60mm | 25×25mm | 1.20mm | 18 pcs (100mm) | 60×60mm | 2.00mm | 2400mm | Powder coated / spear top |
| 1800mm | 2400mm | 40×40mm | 2.00mm | 25×25mm | 1.20mm | 17 pcs (108mm) | 60×60mm | 2.00mm | 2400mm | Powder coated / crimp top |
| 1800mm | 2400mm | 45×45mm | 2.00mm | 25×25mm | 1.20mm | 18 pcs (100mm) | 65×65mm | 2.00mm | 2400mm | Powder coated / spear top |
| 1800mm | 2400mm | 45×45mm | 2.50mm | 30×30mm | 1.20mm | 18 pcs (100mm) | 75×75mm | 2.00mm | 2400mm | Powder coated / spear top |
| 1800mm | 2400mm | 50×50mm | 2.50mm | 30×30mm | 2.00mm | 18 pcs (100mm) | 80×80mm | 2.50mm | 2400mm | Powder coated / spear top |
| 1800mm | 2400mm | 40×40mm | 1.60mm | 16×16mm | 1.00mm | 16 pcs (115mm) | 65×65mm | 1.60mm | 2400mm | Powder coated / flat top |
| 1800mm | 2400mm | 45×45mm | 2.50mm | 25×25mm | 1.00mm | 17 pcs (108mm) | 75×75mm | 2.00mm | 2400mm | Powder coated / flat top |
| 1800mm | 2400mm | 50×50mm | 3.00mm | 30×30mm | 2.00mm | 18 pcs (100mm) | 100×100mm | 2.00mm | 2400mm | Powder coated / spear top |
| 1800mm | 2450mm | 45×45mm | 2.00mm | 25×25mm | 1.20mm | 18 pcs (100mm) | 80×80mm | 2.00mm | 2400mm | Powder coated / spear top |
| 1800mm | 2450mm | 50×50mm | 2.50mm | 30×30mm | 2.00mm | 18 pcs (100mm) | 100×100mm | 2.50mm | 2400mm | Powder coated / spear top |
Table 2: Height Range Matrix (1200–2400mm) Using 2400/2450mm Width
| Fence Height | Fence Width | Rail Frame | Rails Thickness | Upright | Upright Thickness | Upright Qty (Spacing) | Post Option | Post Wall | Post Height (Panel+600) | Finish / Top |
|---|---|---|---|---|---|---|---|---|---|---|
| 1200mm | 2400mm | 40×40mm | 1.60mm | 16×16mm | 0.80mm | 18 pcs (100mm) | 60×60mm | 1.60mm | 1800mm | Powder coated / flat top |
| 1200mm | 2450mm | 45×45mm | 2.00mm | 25×25mm | 1.00mm | 18 pcs (100mm) | 65×65mm | 2.00mm | 1800mm | Powder coated / spear top |
| 1500mm | 2400mm | 40×40mm | 2.00mm | 25×25mm | 1.00mm | 18 pcs (100mm) | 65×65mm | 1.60mm | 2100mm | Powder coated / flat top |
| 1500mm | 2450mm | 45×45mm | 2.50mm | 25×25mm | 1.20mm | 18 pcs (100mm) | 75×75mm | 2.00mm | 2100mm | Powder coated / spear top |
| 1800mm | 2400mm | 45×45mm | 2.00mm | 25×25mm | 1.20mm | 18 pcs (100mm) | 75×75mm | 2.00mm | 2400mm | Powder coated / spear top |
| 1800mm | 2450mm | 50×50mm | 2.50mm | 30×30mm | 2.00mm | 18 pcs (100mm) | 80×80mm | 2.50mm | 2400mm | Powder coated / spear top |
| 2100mm | 2400mm | 50×50mm | 2.50mm | 30×30mm | 2.00mm | 18 pcs (100mm) | 100×100mm | 2.00mm | 2700mm | Powder coated / spear top |
| 2100mm | 2450mm | 45×45mm | 2.50mm | 25×25mm | 1.20mm | 18 pcs (100mm) | 80×80mm | 2.50mm | 2700mm | Powder coated / flat top |
| 2400mm | 2400mm | 50×50mm | 3.00mm | 30×30mm | 2.00mm | 18 pcs (100mm) | 100×100mm | 2.50mm | 3000mm | Powder coated / spear top |
| 2400mm | 2450mm | 50×50mm | 3.00mm | 30×30mm | 2.00mm | 18 pcs (100mm) | 100×100mm | 2.50mm | 3000mm | Powder coated / spear top |
Table 3: Upright Density Control (16 / 17 / 18 Uprights) — Appearance vs Rigidity
| Fence Height | Fence Width | Rail Frame | Rails Thickness | Upright | Upright Thickness | Upright Number | Spacing | Post Option | Post Wall | Post Height (Panel+600) |
|---|---|---|---|---|---|---|---|---|---|---|
| 1800mm | 2400mm | 40×40mm | 1.60mm | 25×25mm | 1.20mm | 16 pcs | 115mm | 60×60mm | 2.00mm | 2400mm |
| 1800mm | 2400mm | 40×40mm | 2.00mm | 25×25mm | 1.20mm | 17 pcs | 108mm | 60×60mm | 2.00mm | 2400mm |
| 1800mm | 2400mm | 45×45mm | 2.00mm | 25×25mm | 1.20mm | 18 pcs | 100mm | 65×65mm | 2.00mm | 2400mm |
| 1500mm | 2400mm | 40×40mm | 1.60mm | 16×16mm | 1.00mm | 16 pcs | 115mm | 65×65mm | 1.60mm | 2100mm |
| 1500mm | 2450mm | 45×45mm | 2.00mm | 25×25mm | 1.00mm | 17 pcs | 108mm | 75×75mm | 2.00mm | 2100mm |
| 1500mm | 2450mm | 45×45mm | 2.50mm | 30×30mm | 1.20mm | 18 pcs | 100mm | 80×80mm | 2.00mm | 2100mm |
| 1200mm | 2400mm | 40×40mm | 1.60mm | 16×16mm | 0.80mm | 16 pcs | 115mm | 60×60mm | 1.60mm | 1800mm |
| 1200mm | 2450mm | 45×45mm | 2.00mm | 25×25mm | 1.00mm | 17 pcs | 108mm | 65×65mm | 2.00mm | 1800mm |
| 2100mm | 2400mm | 50×50mm | 2.50mm | 30×30mm | 2.00mm | 18 pcs | 100mm | 100×100mm | 2.50mm | 2700mm |
| 2400mm | 2450mm | 50×50mm | 3.00mm | 30×30mm | 2.00mm | 18 pcs | 100mm | 100×100mm | 2.50mm | 3000mm |
Table 4: Post Strength Map (How to Stop Leaning, Rattle, and Rework)
| Fence Height | Fence Width | Rail Frame | Upright | Upright Thickness | Spacing Target | Post Size | Post Wall | Post Height (Panel+600) | Best-Fit Use |
|---|---|---|---|---|---|---|---|---|---|
| 1200mm | 2400mm | 40×40mm | 16×16mm | 0.80mm | 100mm | 60×60mm | 1.60mm | 1800mm | Garden / light boundaries |
| 1200mm | 2450mm | 45×45mm | 25×25mm | 1.00mm | 100mm | 65×65mm | 2.00mm | 1800mm | Frontage / cleaner line |
| 1500mm | 2400mm | 45×45mm | 25×25mm | 1.00mm | 100mm | 75×75mm | 2.00mm | 2100mm | Schools / public areas |
| 1500mm | 2450mm | 45×45mm | 30×30mm | 1.20mm | 100mm | 80×80mm | 2.00mm | 2100mm | Higher traffic perimeters |
| 1800mm | 2400mm | 40×40mm | 25×25mm | 1.20mm | 100mm | 60×60mm | 2.00mm | 2400mm | Residential security look |
| 1800mm | 2450mm | 45×45mm | 25×25mm | 1.20mm | 100mm | 75×75mm | 2.00mm | 2400mm | Commercial frontage |
| 1800mm | 2450mm | 50×50mm | 30×30mm | 2.00mm | 100mm | 80×80mm | 2.50mm | 2400mm | High use + straight lines |
| 2100mm | 2400mm | 50×50mm | 30×30mm | 2.00mm | 100mm | 100×100mm | 2.00mm | 2700mm | Industrial perimeter |
| 2100mm | 2450mm | 50×50mm | 30×30mm | 2.00mm | 100mm | 100×100mm | 2.50mm | 2700mm | High visibility boundary |
| 2400mm | 2450mm | 50×50mm | 30×30mm | 2.00mm | 100mm | 100×100mm | 2.50mm | 3000mm | Maximum presence + control |
Table 5: Finish & Packing Build Choices (Durability Before It Hits Site)
| Fence Height | Fence Width | Rail Frame | Upright | Post Option | Powder Coat | Color | Panel Packing | Post Packing | Typical Lead Time |
|---|---|---|---|---|---|---|---|---|---|
| 1800mm | 2400mm | 40×40mm | 25×25mm | 60×60mm | Polyester | Black | Air bubble film + metal pallet | Plastic film bag + pallet | 7–15 days |
| 1800mm | 2450mm | 45×45mm | 25×25mm | 75×75mm | Polyester | Black | Air bubble film + metal pallet | Plastic film bag + pallet | 7–15 days |
| 1500mm | 2400mm | 45×45mm | 25×25mm | 75×75mm | Polyester | Black | Air bubble film + metal pallet | Plastic film bag + pallet | 7–15 days |
| 1200mm | 2400mm | 40×40mm | 16×16mm | 60×60mm | Polyester | Black | Air bubble film + metal pallet | Plastic film bag + pallet | 7–15 days |
| 2100mm | 2400mm | 50×50mm | 30×30mm | 100×100mm | Polyester | Black | Air bubble film + metal pallet | Plastic film bag + pallet | 10–20 days |
| 2400mm | 2450mm | 50×50mm | 30×30mm | 100×100mm | Polyester | Black | Air bubble film + metal pallet | Plastic film bag + pallet | 10–20 days |
| 1800mm | 2400mm | 45×45mm | 30×30mm | 80×80mm | Polyester | Black | Air bubble film + metal pallet | Plastic film bag + pallet | 7–15 days |
| 1800mm | 2450mm | 50×50mm | 30×30mm | 100×100mm | Polyester | Black | Air bubble film + metal pallet | Plastic film bag + pallet | 7–15 days |
| 1500mm | 2450mm | 45×45mm | 25×25mm | 80×80mm | Polyester | Black | Air bubble film + metal pallet | Plastic film bag + pallet | 7–15 days |
| 1200mm | 2450mm | 45×45mm | 25×25mm | 65×65mm | Polyester | Black | Air bubble film + metal pallet | Plastic film bag + pallet | 7–15 days |
Applications
POLYMETAL garrison fencing panels are widely used for residential property boundaries, schools and campus perimeters, commercial frontage lines, walkways and public-area control, facility separation, light-security boundaries, and projects that need a strong tubular steel appearance with clean powder-coated presentation.
Benefits
POLYMETAL garrison fencing delivers a professional straight-line finish, strong steel rigidity, and repeatable panel-to-post alignment when the correct post size and rail frame are selected. Powder coating improves corrosion resistance and appearance retention, while controlled picket density supports a cleaner look and better climb-gap control. The system is also easier to install cleanly when posts are planned at panel height + 600mm and the accessories are supplied as a matched set.
Packing
| Packaging Details: | 1> Fence panel: Air bubble flim + metal pallet 2> Fence post: every post pack with a plastic film bag + pallet 3> Fence accessories: Carton |
| Delivery Detail: | 7–15 days, according to your order quantity |
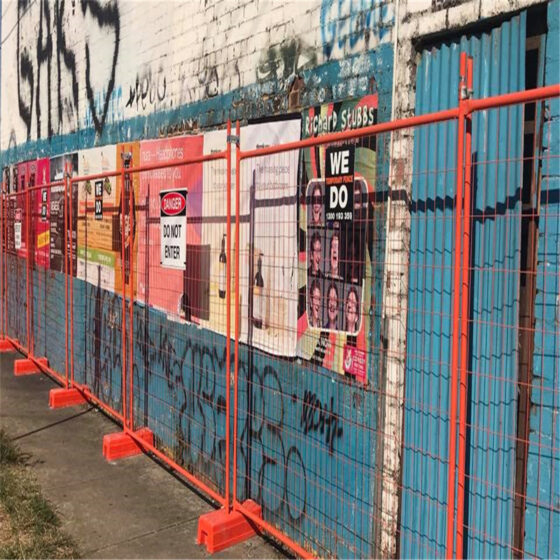
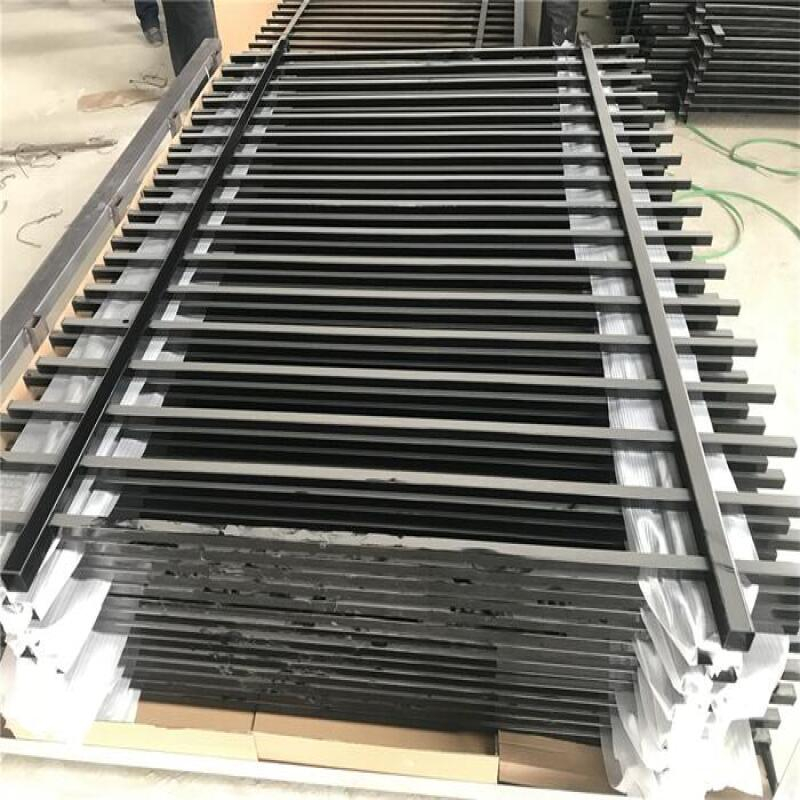
Packing & Loading (Visual)


Standard
POLYMETAL garrison fencing panels can be specified and manufactured to match project requirements, including correct panel geometry, picket density, post pairing, and installation planning. The strongest outcomes happen when the fence is treated as a complete system—not just panels—so the installed line remains straight, stable, and consistent from day one through repeated use.
Top 28 Buyer Warnings for 1.8mx2.4m Garrison Fencing Panels (Especially #21)
Trap #1: Buying “1.8m × 2.4m” without confirming the real rail thickness.
Many panels are advertised by height and width only, but the rail thickness (1.60mm vs 2.0mm vs 2.5mm vs 3.0mm) decides how the panel survives handling, leaning loads, and long straight runs. If the rails are thinner than expected, the frame can “rack” out of square and the fence line starts to look wavy even with correct posts. Lock the rail thickness in writing before production so every batch matches.
Trap #2: Choosing 40×40 rails for a job that needs 45×45 or 50×50 rigidity.
40×40mm rails can be perfectly fine for lower-contact boundaries, but higher-traffic perimeters often need 45×45mm or 50×50mm rail frames to resist flex and vibration. When rail size is under-specified, installers over-tighten fixings to “force alignment,” which can distort the panel and damage coating at contact points. Match rail frame size to site pressure level (public areas, repeated impacts, or long runs).
Trap #3: Ignoring upright thickness—thin uprights bend during unloading and never look straight again.
Upright thickness (0.80mm / 1.00mm / 1.20mm / 2.00mm) is one of the fastest hidden-cost triggers because thin uprights dent or bow from forklift bumps and stacking pressure. Even small bends create a “cheap” look when sunlight hits the line, and the panel can’t be made visually perfect again without replacement. Specify upright thickness based on handling cycles and choose stronger thickness for rental fleets or high-abuse sites.
Trap #4: Ordering a “nice-looking” panel with weak weld control at joints.
A panel can look clean in photos but still have inconsistent weld fusion where uprights meet rails, especially if heat control is poor. Weak welds often fail later—after transport vibration, thermal expansion, or repeated gate/impact loads—causing rattling and loose uprights. Require consistent weld finish and stable joint strength so the fence stays quiet and rigid after installation.
Trap #5: Treating post size like an accessory instead of the backbone of the fence line.
Posts carry the real load: they resist wind, alignment drift, and cumulative lean pressure across long runs. If you buy strong panels but under-size posts, the fence line still leans and “snakes” because the backbone is weak. Choose post size first (60×60, 65×65, 75×75, 80×80, 100×100) and then match the panel.
Trap #6: Using 60×60 posts where 75×75 or 80×80 is required for stability.
60×60 posts can work for lighter duty or shorter runs, but higher-contact areas and longer straight lines often need 75×75 or 80×80 for cleaner stiffness. When posts are too small, installers chase alignment all day—tighten, re-tighten, and still see drift. Up-sizing posts reduces wobble, keeps gaps consistent, and lowers call-backs.
Trap #7: Choosing 1.6mm post wall where 2.0mm or 2.5mm is needed for long-term straightness.
Post wall thickness (1.6mm / 2.00mm / 2.50mm) controls twist resistance and how well the post stays true after ground movement and repeated vibration. Thin-wall posts may look acceptable on day one, then rotate or bow slightly under tension and weather cycles. Specify heavier wall thickness when the project demands “stay-straight” outcomes, especially for high fences or long runs.
Trap #8: Skipping the “panel height + 600mm” post rule and inviting leaning and looseness.
If post height is not at least fence panel height + 600mm, the set depth is often too shallow to hold the line under wind and daily movement. The result shows up as lean, shake, and progressive loosening—especially near gates and corners. Plan post height correctly for each fence height (e.g., 1800mm panel → 2400mm post minimum) and keep it consistent across the run.
Trap #9: Mixing post sizes on one run and creating uneven stiffness and visible waves.
Mixing 60×60 with 80×80 (or mixed wall thicknesses) creates sections that move differently under the same load. The fence line then develops a “wave” effect: some bays stay tight while others drift. Standardize post size and wall thickness across the run, and only upgrade at corners/ends intentionally (not randomly).
Trap #10: Selecting upright density without considering the final appearance and rigidity.
Upright quantity changes both security feel and visual finish: 16 pcs (115mm spacing) looks more open; 18 pcs (100mm spacing) looks denser and often feels more rigid. If you pick density only for price, you may dislike the look when installed across a large frontage. Decide the target spacing and appearance early and apply it consistently.
Trap #11: Choosing 16 uprights for cost, then regretting the “too open” look later.
Lower upright count can reduce cost, but it can also reduce perceived quality and increase “gap complaints” in public-facing sites. Once installed, changing density means replacing panels—not an easy fix. If the site is a visible frontage or has climb-control concerns, consider denser layouts before ordering.
Trap #12: Choosing 18 uprights without matching posts—dense panels still fail on weak posts.
A dense upright layout does not compensate for weak posts or under-sized rails. Projects often overspend on dense panels but keep small posts, then watch the line lean anyway. Balance the system: uprights + rails + post size + post wall thickness must match the real load.
Trap #13: Assuming powder coat is “all the same” and discovering early chalking or scratches.
Powder coat performance varies by powder quality, thickness control, curing, and handling discipline. Weak coating scratches during unloading and starts looking tired fast, especially in harsh sun and high-touch environments. Specify coating expectations clearly and ensure packing prevents rub damage that ruins the finish before installation.
Trap #14: Ignoring surface prep steps that decide coating adhesion.
Surface preparation is what makes powder coating stick: poor cleaning or pretreatment leads to peeling, edge-lift, and premature corrosion points. The fence may look fine at first, then fail early in high-wear areas like clip points and lower rails. Require stable prep processes so coating life matches the project expectation.
Trap #15: Forgetting corner and end-post upgrades—failure often starts at the ends.
Corners and ends carry concentrated loads from tension, alignment, and impact—this is where movement begins and then spreads down the line. If these posts aren’t upgraded (larger size, thicker wall, better anchoring), the fence develops rattles, looseness, and visible misalignment first at the ends. Plan corner/end posts intentionally as “load points,” not as standard bays.
Trap #16: Ordering panels without the right accessory pack (clips/fixings) for clean alignment.
Even excellent panels look bad when the clip and fixing system is wrong or incomplete. Improvised fixings create uneven gaps, noisy panels, and a fence line that never looks professionally “straight.” Lock a complete accessory set with the panel/post specification so every bay installs the same way.
Trap #17: Underestimating transport damage—bad packing destroys coating before installation.
Scratched coating and bent corners frequently come from poor pallet stacking, missing separators, and loose straps. Damage that happens before the fence reaches site becomes instant quality complaints and sometimes full replacement. Use protective packing methods (film, corner guards, stable pallets) to protect finish and geometry.
Trap #18: Choosing rail thickness too light (1.6mm) for a high-contact perimeter.
High-contact zones (public edges, vehicle-adjacent boundaries, busy facilities) punish light rails through repeated leaning and vibration. Light rails flex, which loosens connections and increases noise, and eventually the fence loses that “tight line” look. For high-contact perimeters, step up rail thickness (2.0mm / 2.5mm / 3.0mm) and match posts accordingly.
Trap #19: Buying “cheap posts” that twist under tension and pull the line off square.
Posts that twist—even slightly—cause chain misalignment: clips no longer sit true, panels skew, and the fence line drifts out of square bay after bay. This is especially visible on long runs where small twist becomes big misalignment. Stronger post wall thickness and consistent manufacturing tolerance prevent this drift.
Trap #20: Using 2.4m panels where 2.45m is needed to match site set-out—and forcing ugly gaps.
Some projects are set out for 2450mm runs, and forcing 2400mm panels into that layout creates gap workarounds—extra posts, filler sections, or uneven bay spacing. Those “small fixes” become big visual defects and weak points. Confirm panel width (2400mm vs 2450mm) against the site set-out before ordering.
Trap #21: The Painful Loss—A Fence Line That Fails Expectation and Triggers Rework.
The fence may look fine during early install, then problems appear: posts lean, panels rattle, spacing looks inconsistent, and the line fails the project’s acceptance expectations. The result is rework, extra labour, delayed handover, and downtime that costs far more than “saving a few dollars per panel.” The cure is simple but strict: lock the full system specification (rails, uprights, spacing, posts, post height rule, coating, accessories) and keep it consistent across the job.
Trap #22: Choosing 40×40 rails for 2.4m wide runs in high-use zones, then watching the line loosen.
Width amplifies flex: on busy sites, long 2.4m bays can loosen faster if rails are light and the fence is frequently contacted. Over time, panels shift at connections and the line stops looking “tight.” For high-use zones, upgrade rail frame size or thickness (or both) to keep alignment stable.
Trap #23: Ignoring site conditions (wet ground, coastal air, cleaning cycles) that punish weak coating.
Wet ground accelerates corrosion at the base, coastal air attacks exposed steel aggressively, and repeated cleaning introduces abrasion at contact points. If coating and prep aren’t chosen for the environment, the fence ages fast and looks “old” even when new. Match finish and maintenance reality to the site—don’t treat environment as “normal.”
Trap #24: Ordering different batches with slight geometry changes—panels stop matching.
Small differences in hole location, rail length, upright spacing, or clip points make panels incompatible across batches. The fence line then shows inconsistent gaps, awkward fitting, and visible misalignment at batch transitions. Standardize drawings and tolerances so every batch installs as one system.
Trap #25: Not standardizing upright spacing—visual inconsistency becomes a complaint magnet.
Even when strength is acceptable, inconsistent spacing is instantly visible and makes the fence look “unprofessional.” This is a common reason for rejection on high-visibility jobs. Choose one spacing strategy (100mm or 108mm or 115mm) and enforce it across the full project.
Trap #26: Skipping spare accessories—small missing parts become stop-work moments.
Clips and fixings are high-cycle items: they get lost, bent, or damaged during handling. Without spares, installation stops or crews improvise with mismatched hardware that creates weak points and ugly results. Always include spare clips/fixings so the fence line stays consistent under real site pressure.
Trap #27: Chasing the lowest price and getting the highest cost-per-use after damage and rework.
The “cheap” option often fails on hidden costs: bent uprights, thin rails, weak posts, scratched coating, and missing accessories. That leads to re-ordering, replacing sections, and labour spend that erases any upfront savings. Cost-per-use is won by durability, consistency, and system fit—not by the cheapest line item.
Trap #28: Buying without installation planning—good product can still look bad if set-out is sloppy.
Even strong panels can look terrible if post spacing, levels, and alignment aren’t planned and controlled. Sloppy set-out creates uneven gaps, leaning posts, and “rattle points” that undermine the whole job. Plan set-out, corner strategy, post depth, and consistent fixing practice so the installed fence matches the spec and looks professional.
Usages

FAQs
FAQ 1: What is the most common size for AU market garrison panels?
A widely used AU format is 1.8m(H) × 2.4m(W), chosen for strong presentation and practical installation speed.
FAQ 2: Which rail frame should I pick: 40×40, 45×45, or 50×50?
40×40 suits value-focused boundaries, 45×45 is a strong general upgrade, and 50×50 is commonly selected for heavier-duty runs and higher stability expectations.
FAQ 3: How many uprights should I choose?
Typical options include 16 pcs (115mm), 17 pcs (108mm), and 18 pcs (100mm). Denser uprights increase rigidity and tighten the visual gap.
FAQ 4: How do I choose the post height correctly?
A practical rule is post height = panel height + 600mm for in-ground stability targets (e.g., 1800mm panel pairs with 2400mm posts).
FAQ 5: What are common post size options?
Common post options include 60×60, 65×65, 75×75, 80×80, and 100×100 with wall thickness options such as 1.6mm, 2.00mm, and 2.50mm.
FAQ 6: What is the typical delivery time?
Delivery is commonly arranged in 7–15 days depending on order quantity.
FAQ 7: What payment terms are used?
Common terms: payment ≤ 1000 USD: 100% in advance; payment ≥ 1000 USD: 30% T/T in advance, balance before shipment.
FAQ 8: How are panels packed?
Fence panels are commonly packed with air bubble film + metal pallet, posts are packed with plastic film bag + pallet, and accessories are packed in cartons to reduce damage and missing parts. For buyers who want to understand why consistent steel grade selection matters for weld stability and repeated handling strength, see Q235 steel.