Your One-Stop Wire Mesh Fence Supplier | POLYMETAL


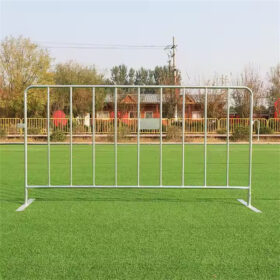
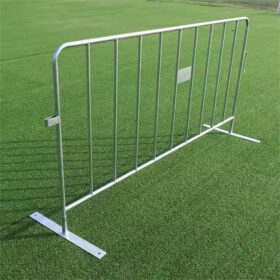
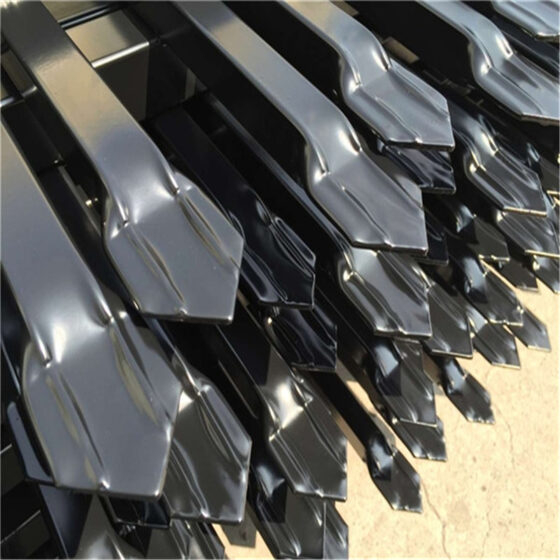
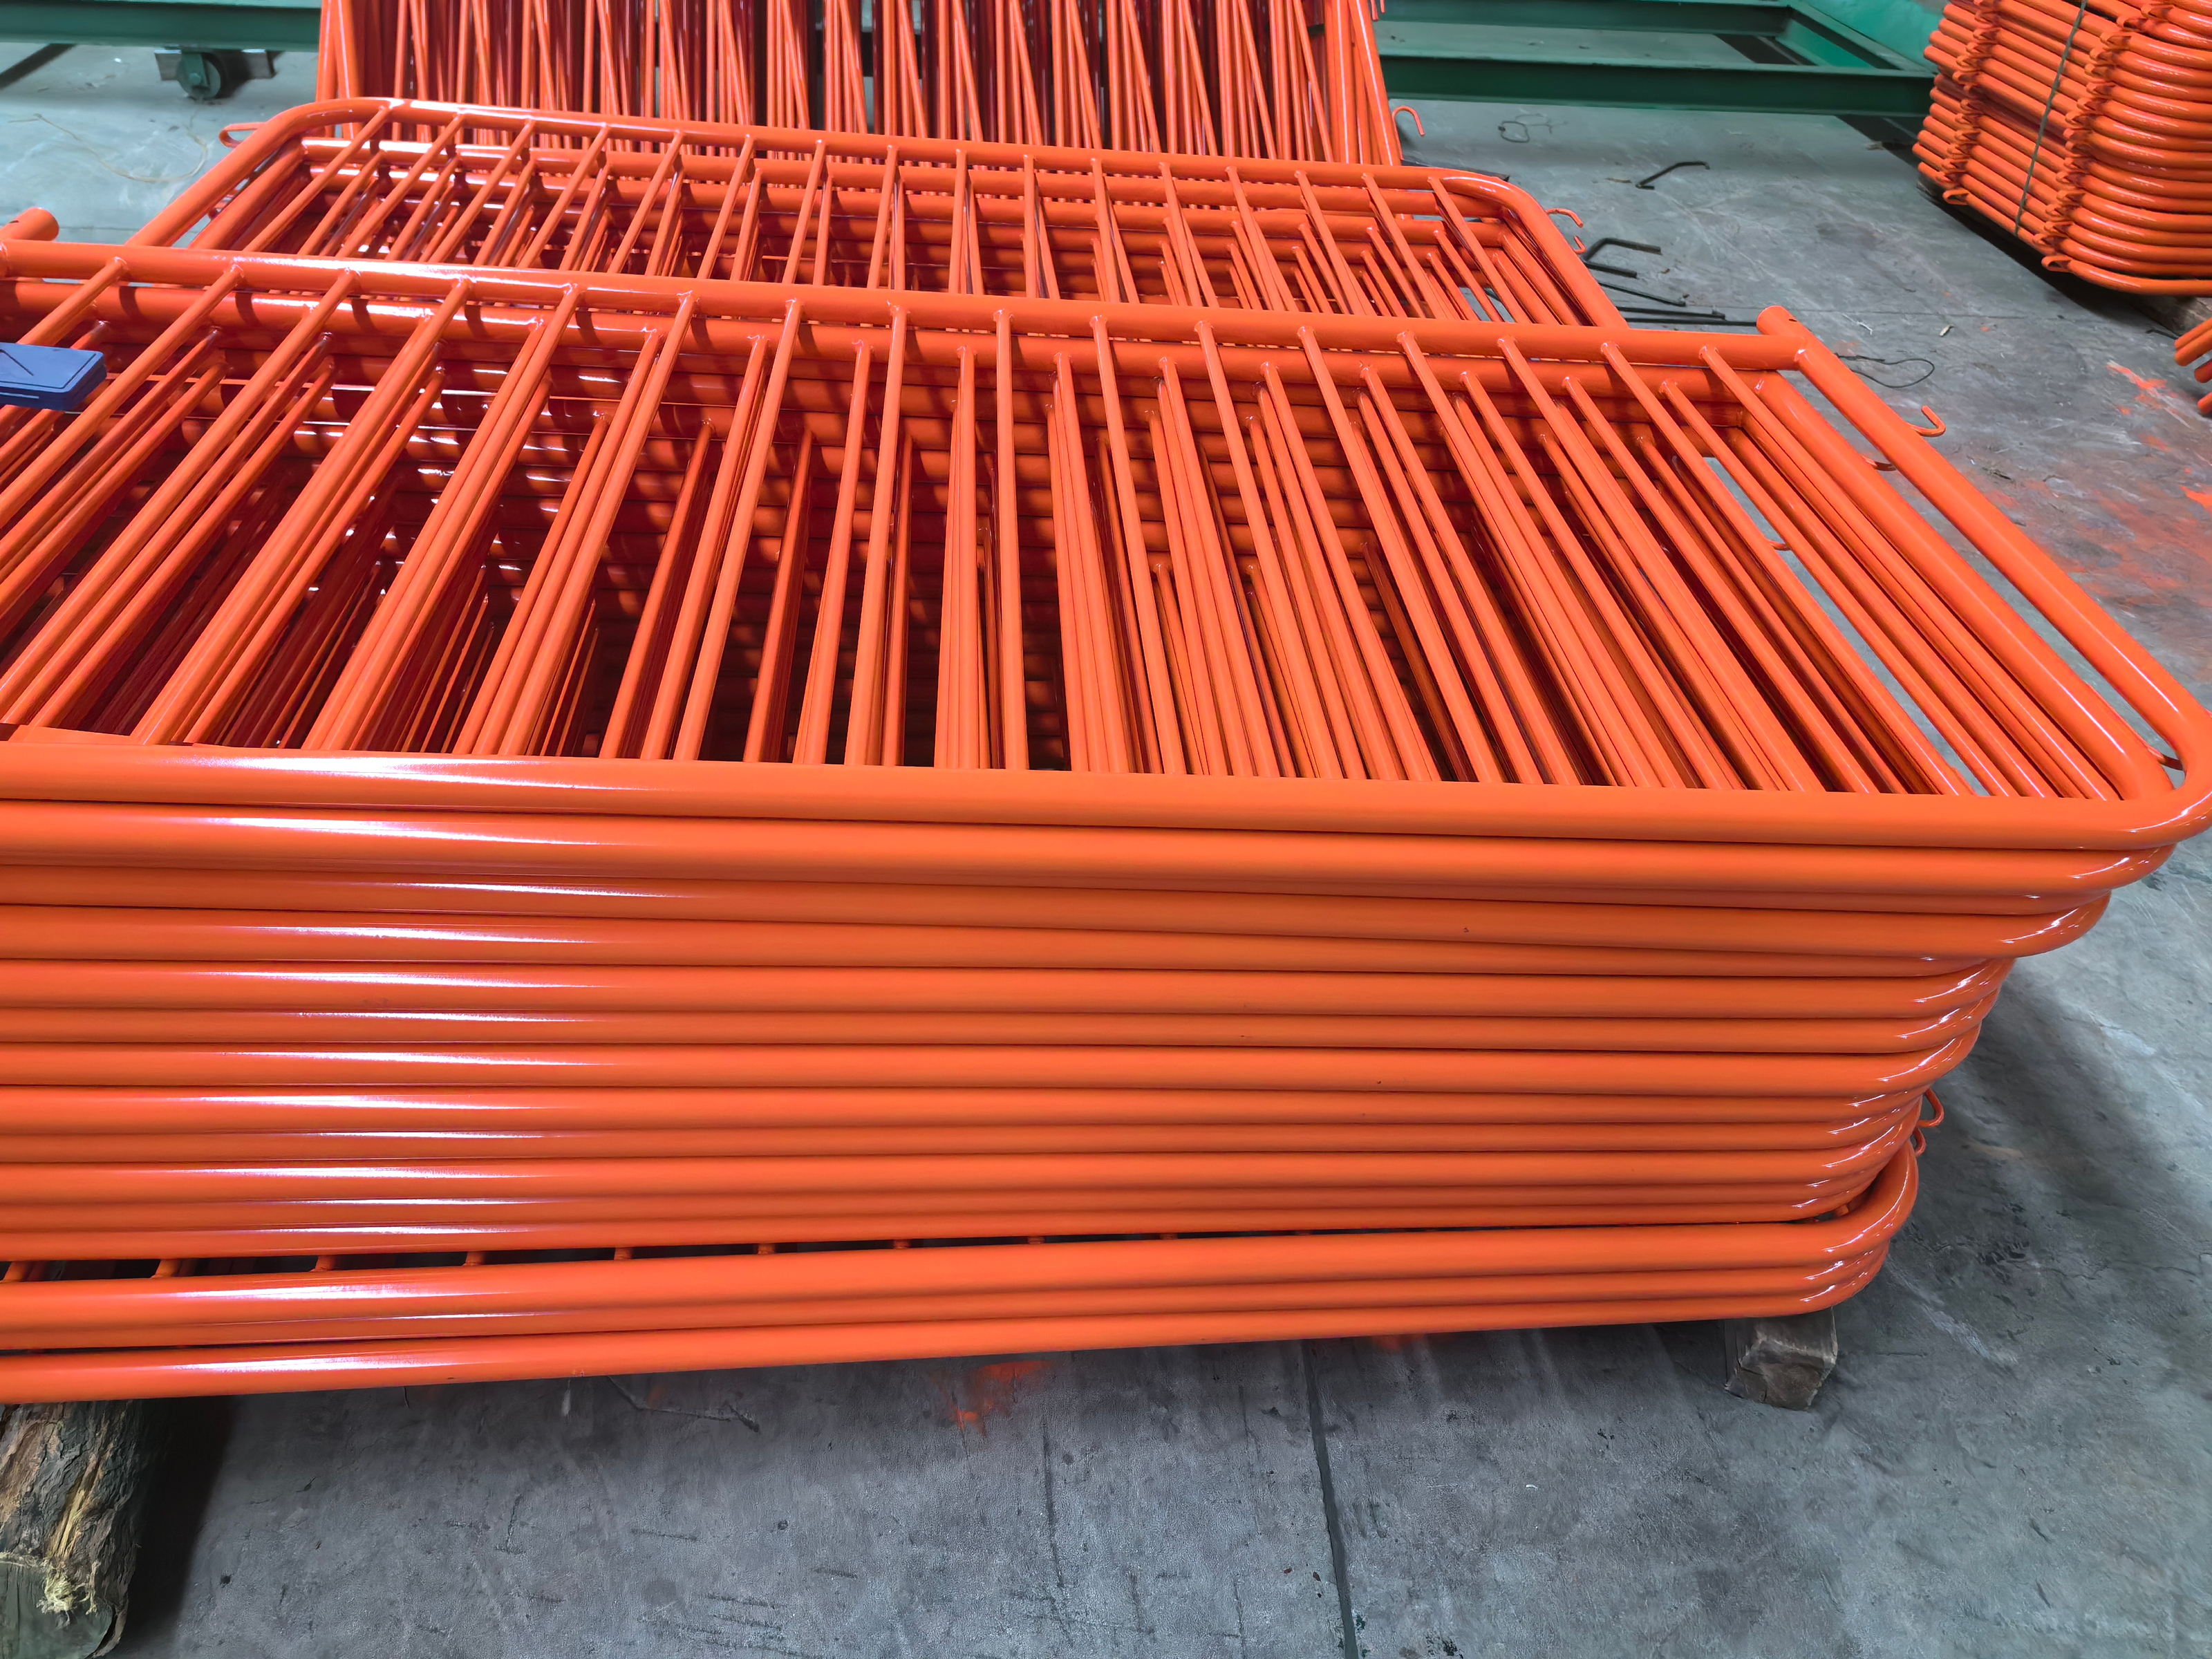
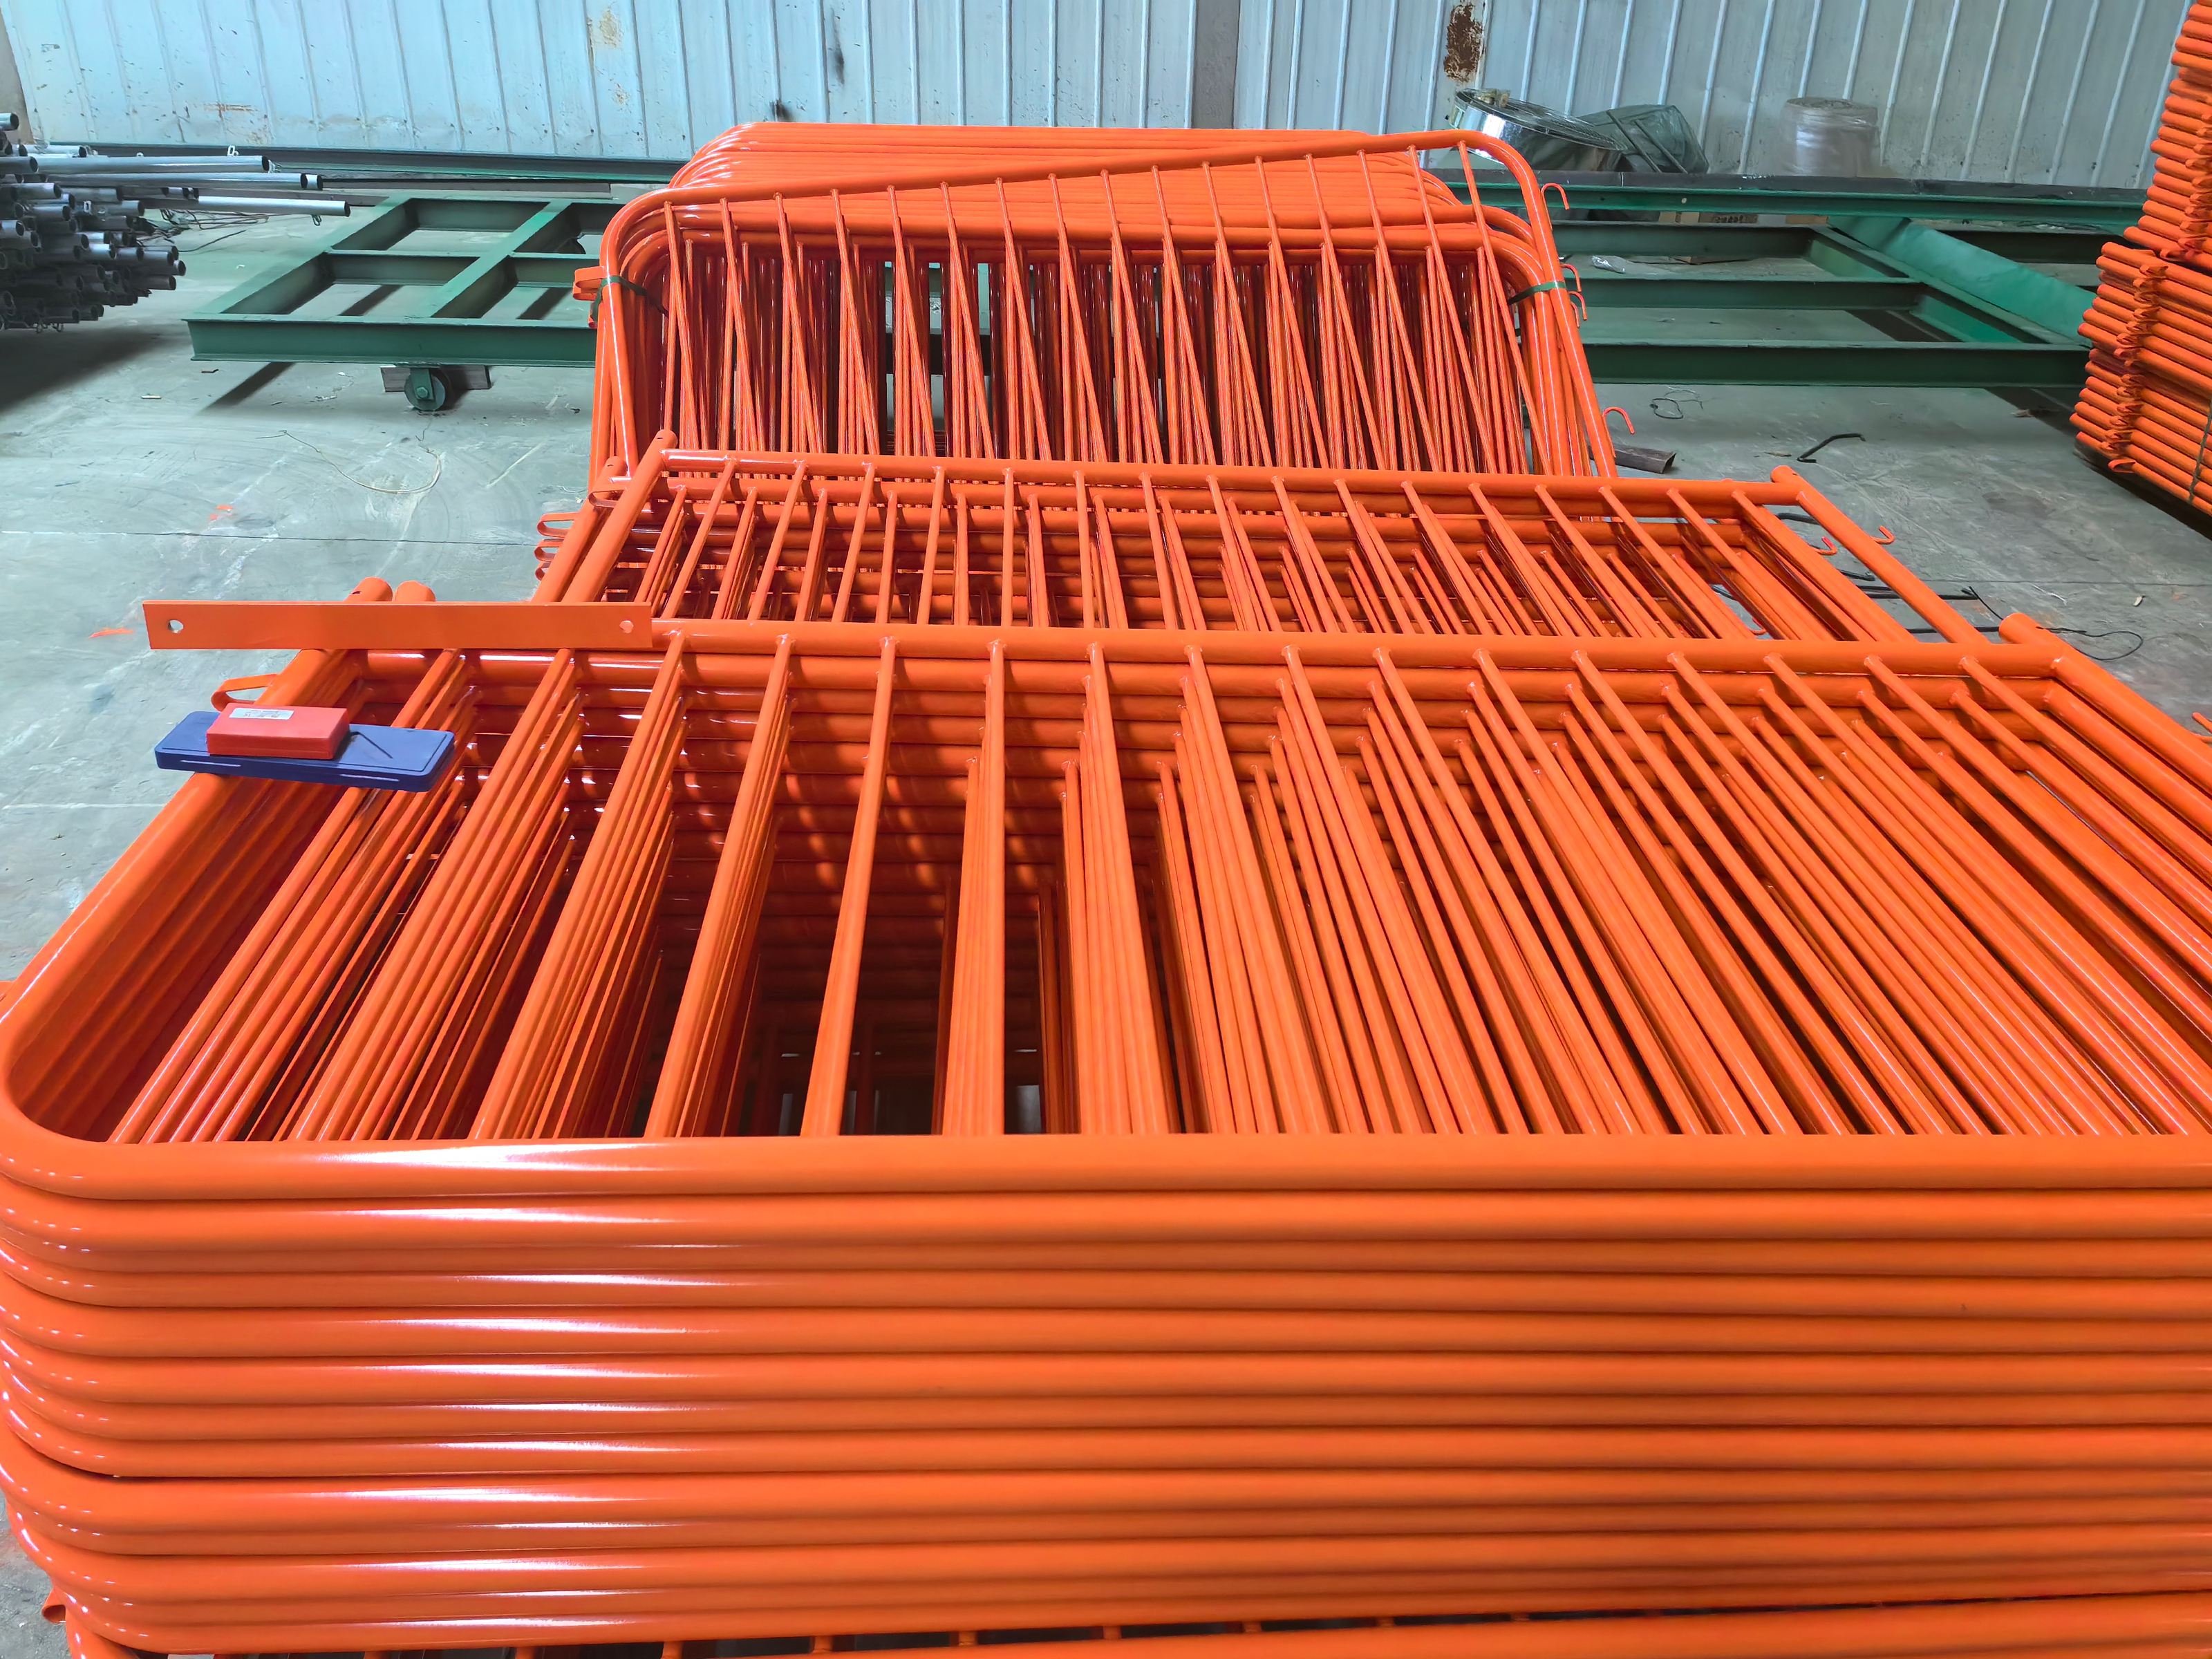
Perth Crowd control barriers are also called crowd control fencing, removable barriers, barricades, pedestrian barriers, and portable fences. They are built for large crowds and fast deployment, and bridge feet are commonly selected to minimize tripping hazards while keeping the line stable on uneven surfaces. The risk is that Perth Crowd control barriers can look identical in photos yet perform completely differently once forklift handling, transport stacking, uneven ground, daily repositioning, and pushing loads start testing the barrier line.
Because supervisors judge Perth Crowd control barriers after delivery rather than at quotation stage, small specification gaps can trigger sorting, rejected bundles, safety complaints, and last-minute replacement costs. POLYMETAL manufactures Perth Crowd control barriers as commercial-class welded steel tube systems with measurable specifications and controlled finish options such as hot dipped galvanized, pre-galvanized, and powder coating so the barrier line stays straight, interlocks cleanly, and resists corrosion in real outdoor exposure—especially for buyers who also source perimeter systems like steel hercules fence for sale.


Perth Crowd control barriers Top 18 Costly Traps You Must Lock Before You Buy (Especially #17)
Trap #1: The “secret” that hides downgraded frame tube OD
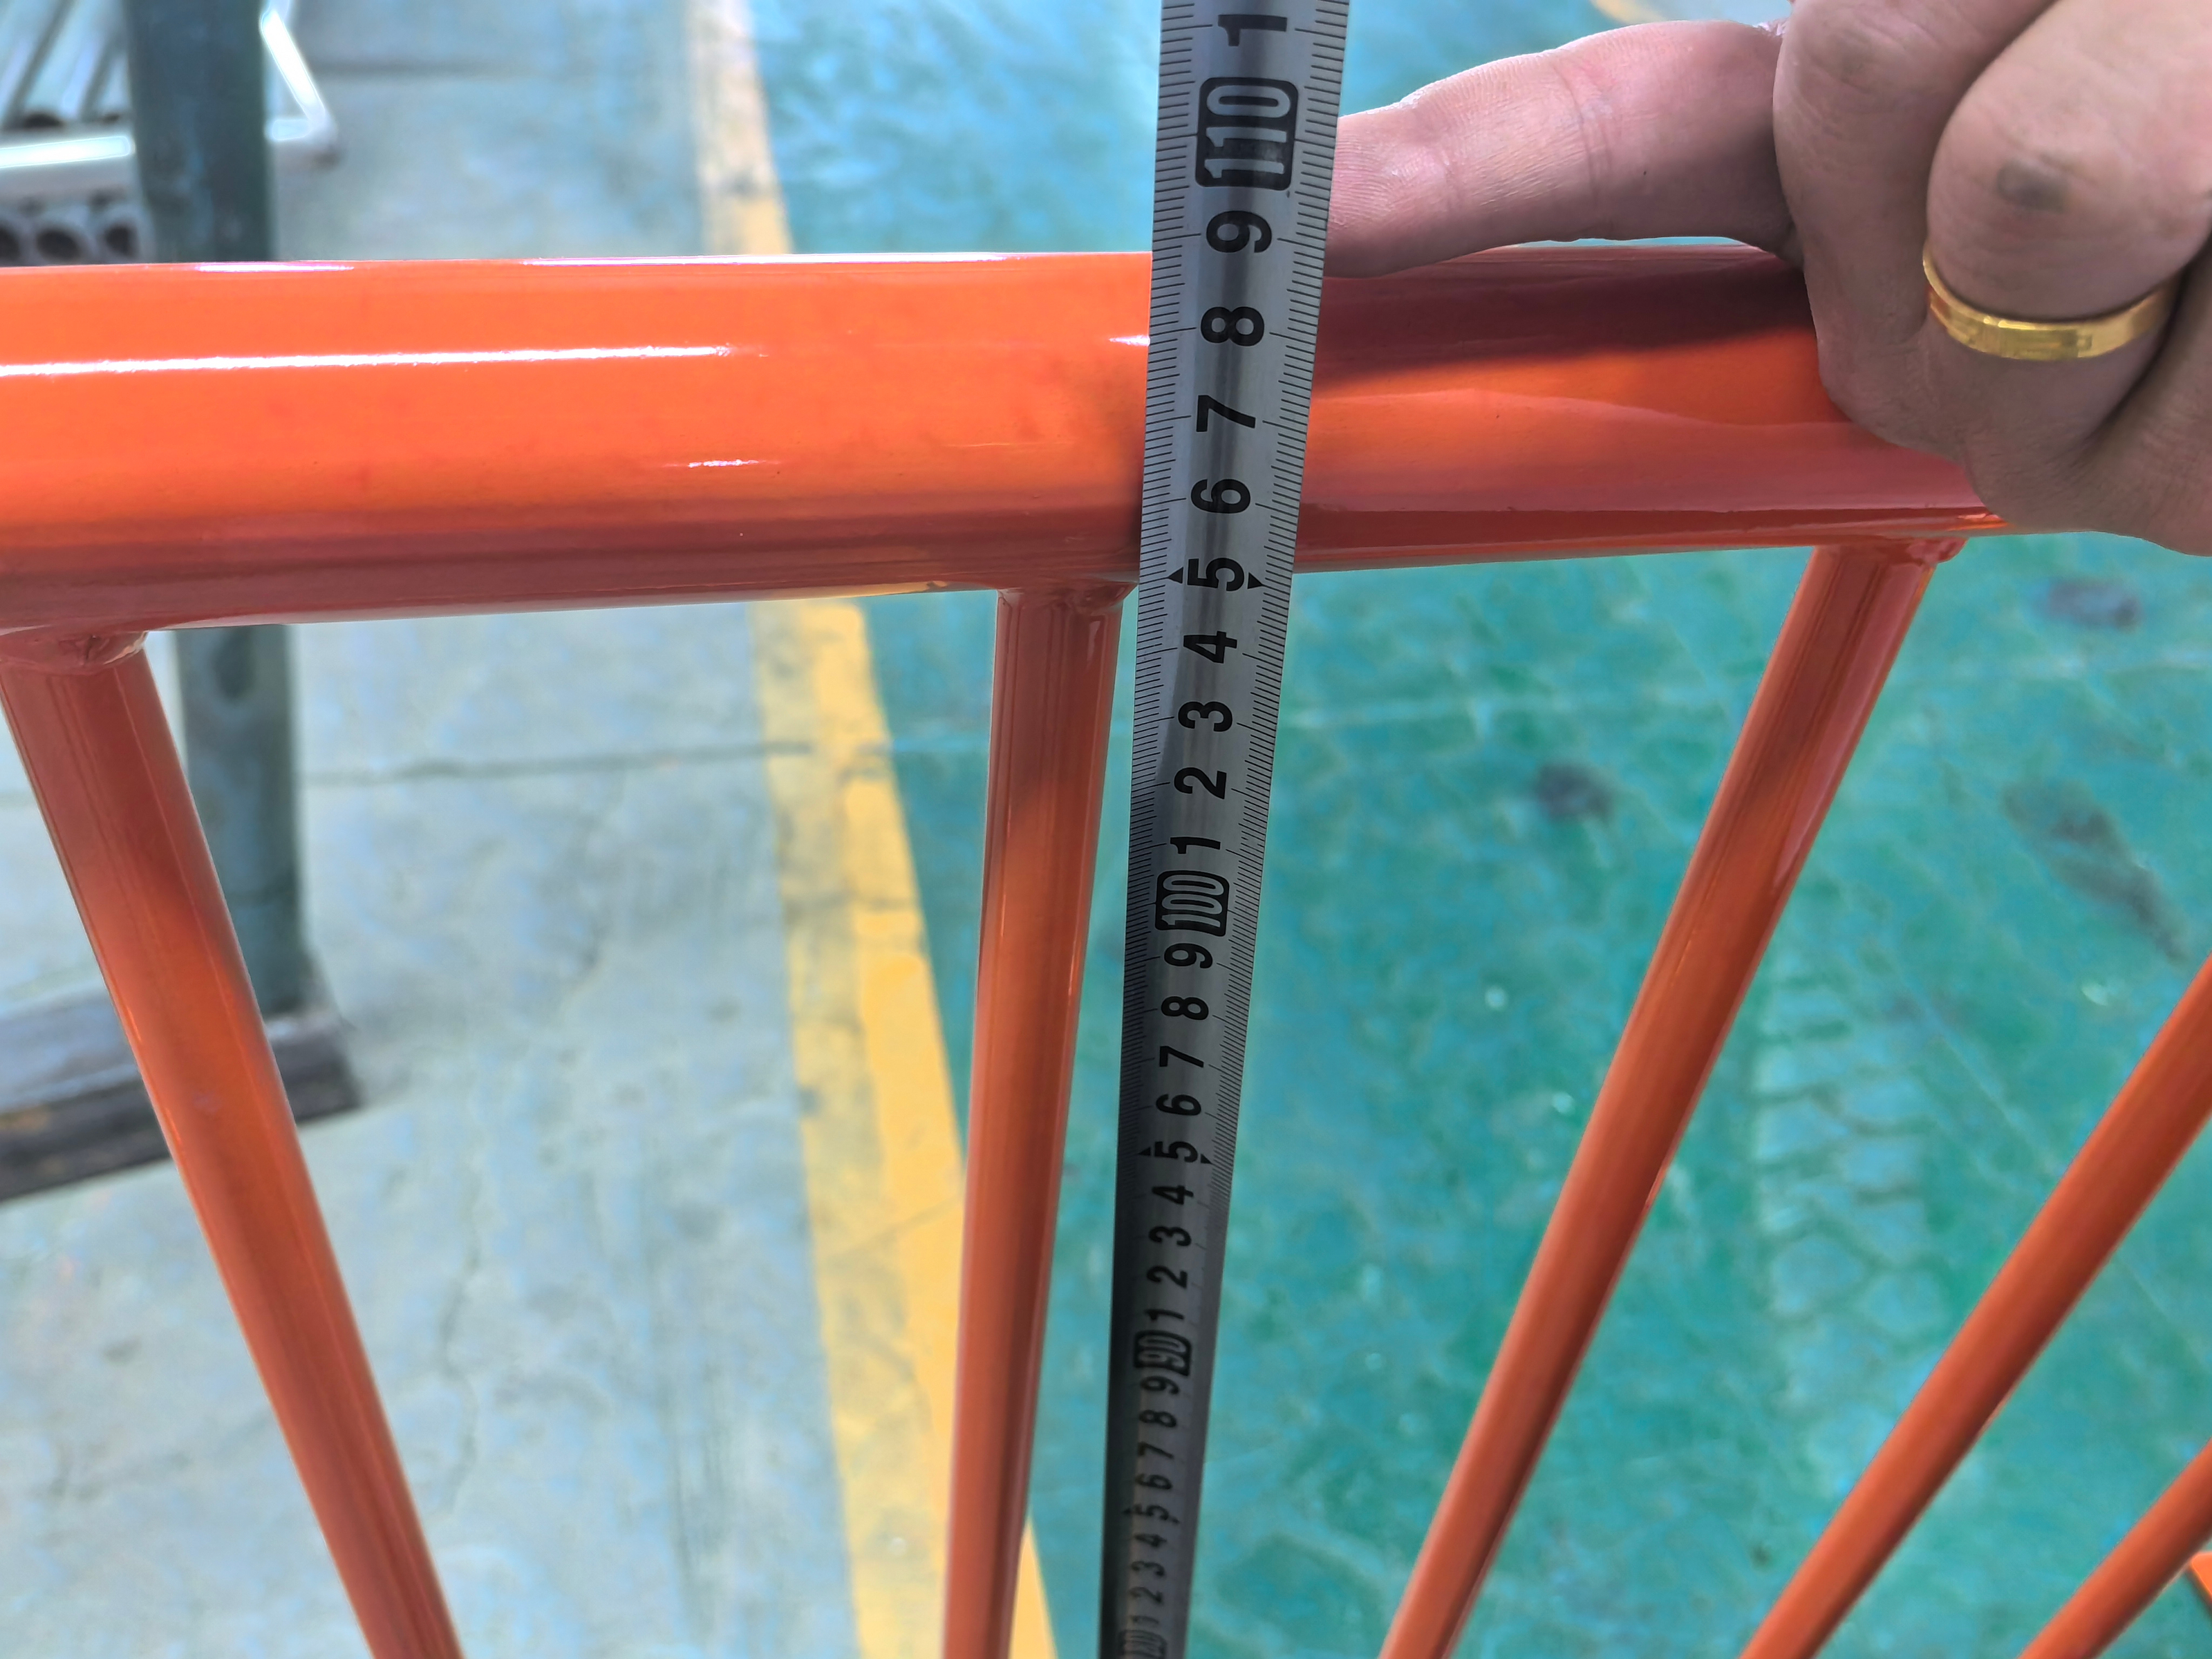
Perth Crowd control barriers can be sold as “heavy duty” without defining frame tube OD. If the purchase order does not lock OD25, OD32, OD35, or OD38, the same-looking barrier can arrive with lighter tube that dents, flexes, and feels unstable under pressure.

Trap #2: The “detail” about wall thickness that turns rigid into wobble
Wall thickness is the stiffness engine. When frame wall thickness drops from 2.00mm to 1.50mm or 1.60mm without being stated, Perth Crowd control barriers can rack at connection points and drift out of line after repeated handling cycles.
Trap #3: The “fact” about infill/upright OD that controls real impact survival
Upright tube OD is not cosmetic. OD12, OD16, and OD19 uprights behave very differently after dragging, stacking, and crowd pressure. If upright OD is not locked, Perth Crowd control barriers can bend at pickets and look damaged even when the main frame still stands.
Trap #4: The “truth” about upright thickness that decides long-term straightness
Upright thickness (0.7mm, 0.80mm, 1.0mm, 1.2mm) controls buckling resistance. Perth Crowd control barriers can arrive straight but deform after one rough handling cycle if vertical thickness is quietly reduced.
Trap #5: The “point” about spacing that changes crowd-control behavior
Spacing (90mm, 100mm, 150mm, 200mm) changes reach-through, foot placement, and perceived control. If spacing is not specified, Perth Crowd control barriers can arrive too open for safety expectations or too dense for cost and weight targets.
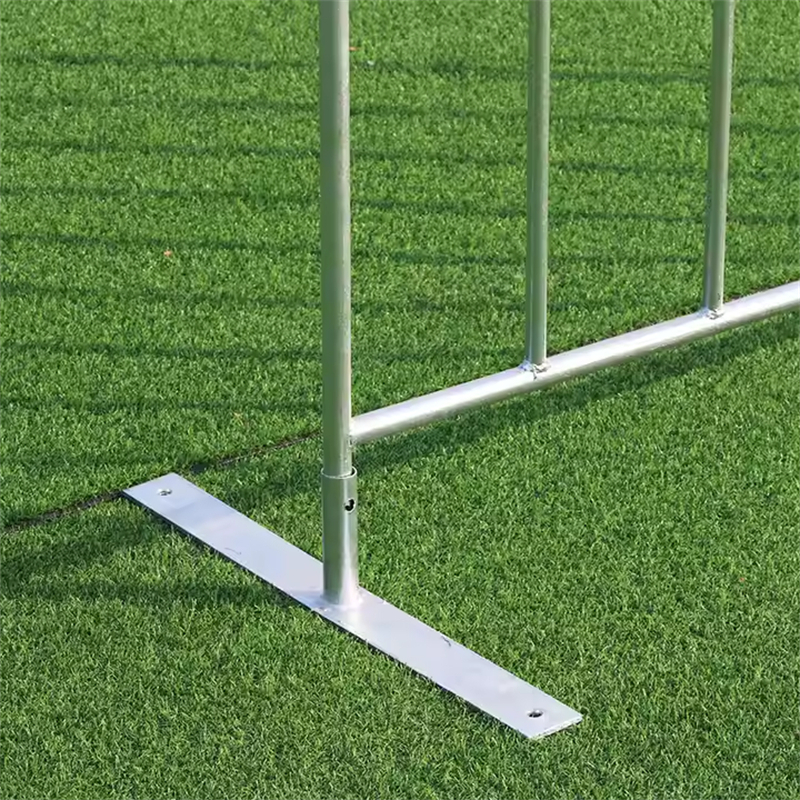
Trap #6: The “note” about feet style that decides stability on real ground
Feet are not accessories. Flat feet, wheel feet, bridge feet, and V feet produce different stability and reposition speed. If feet type is not locked, Perth Crowd control barriers can rock, drift, or create tripping hazards where the crowd load is highest.
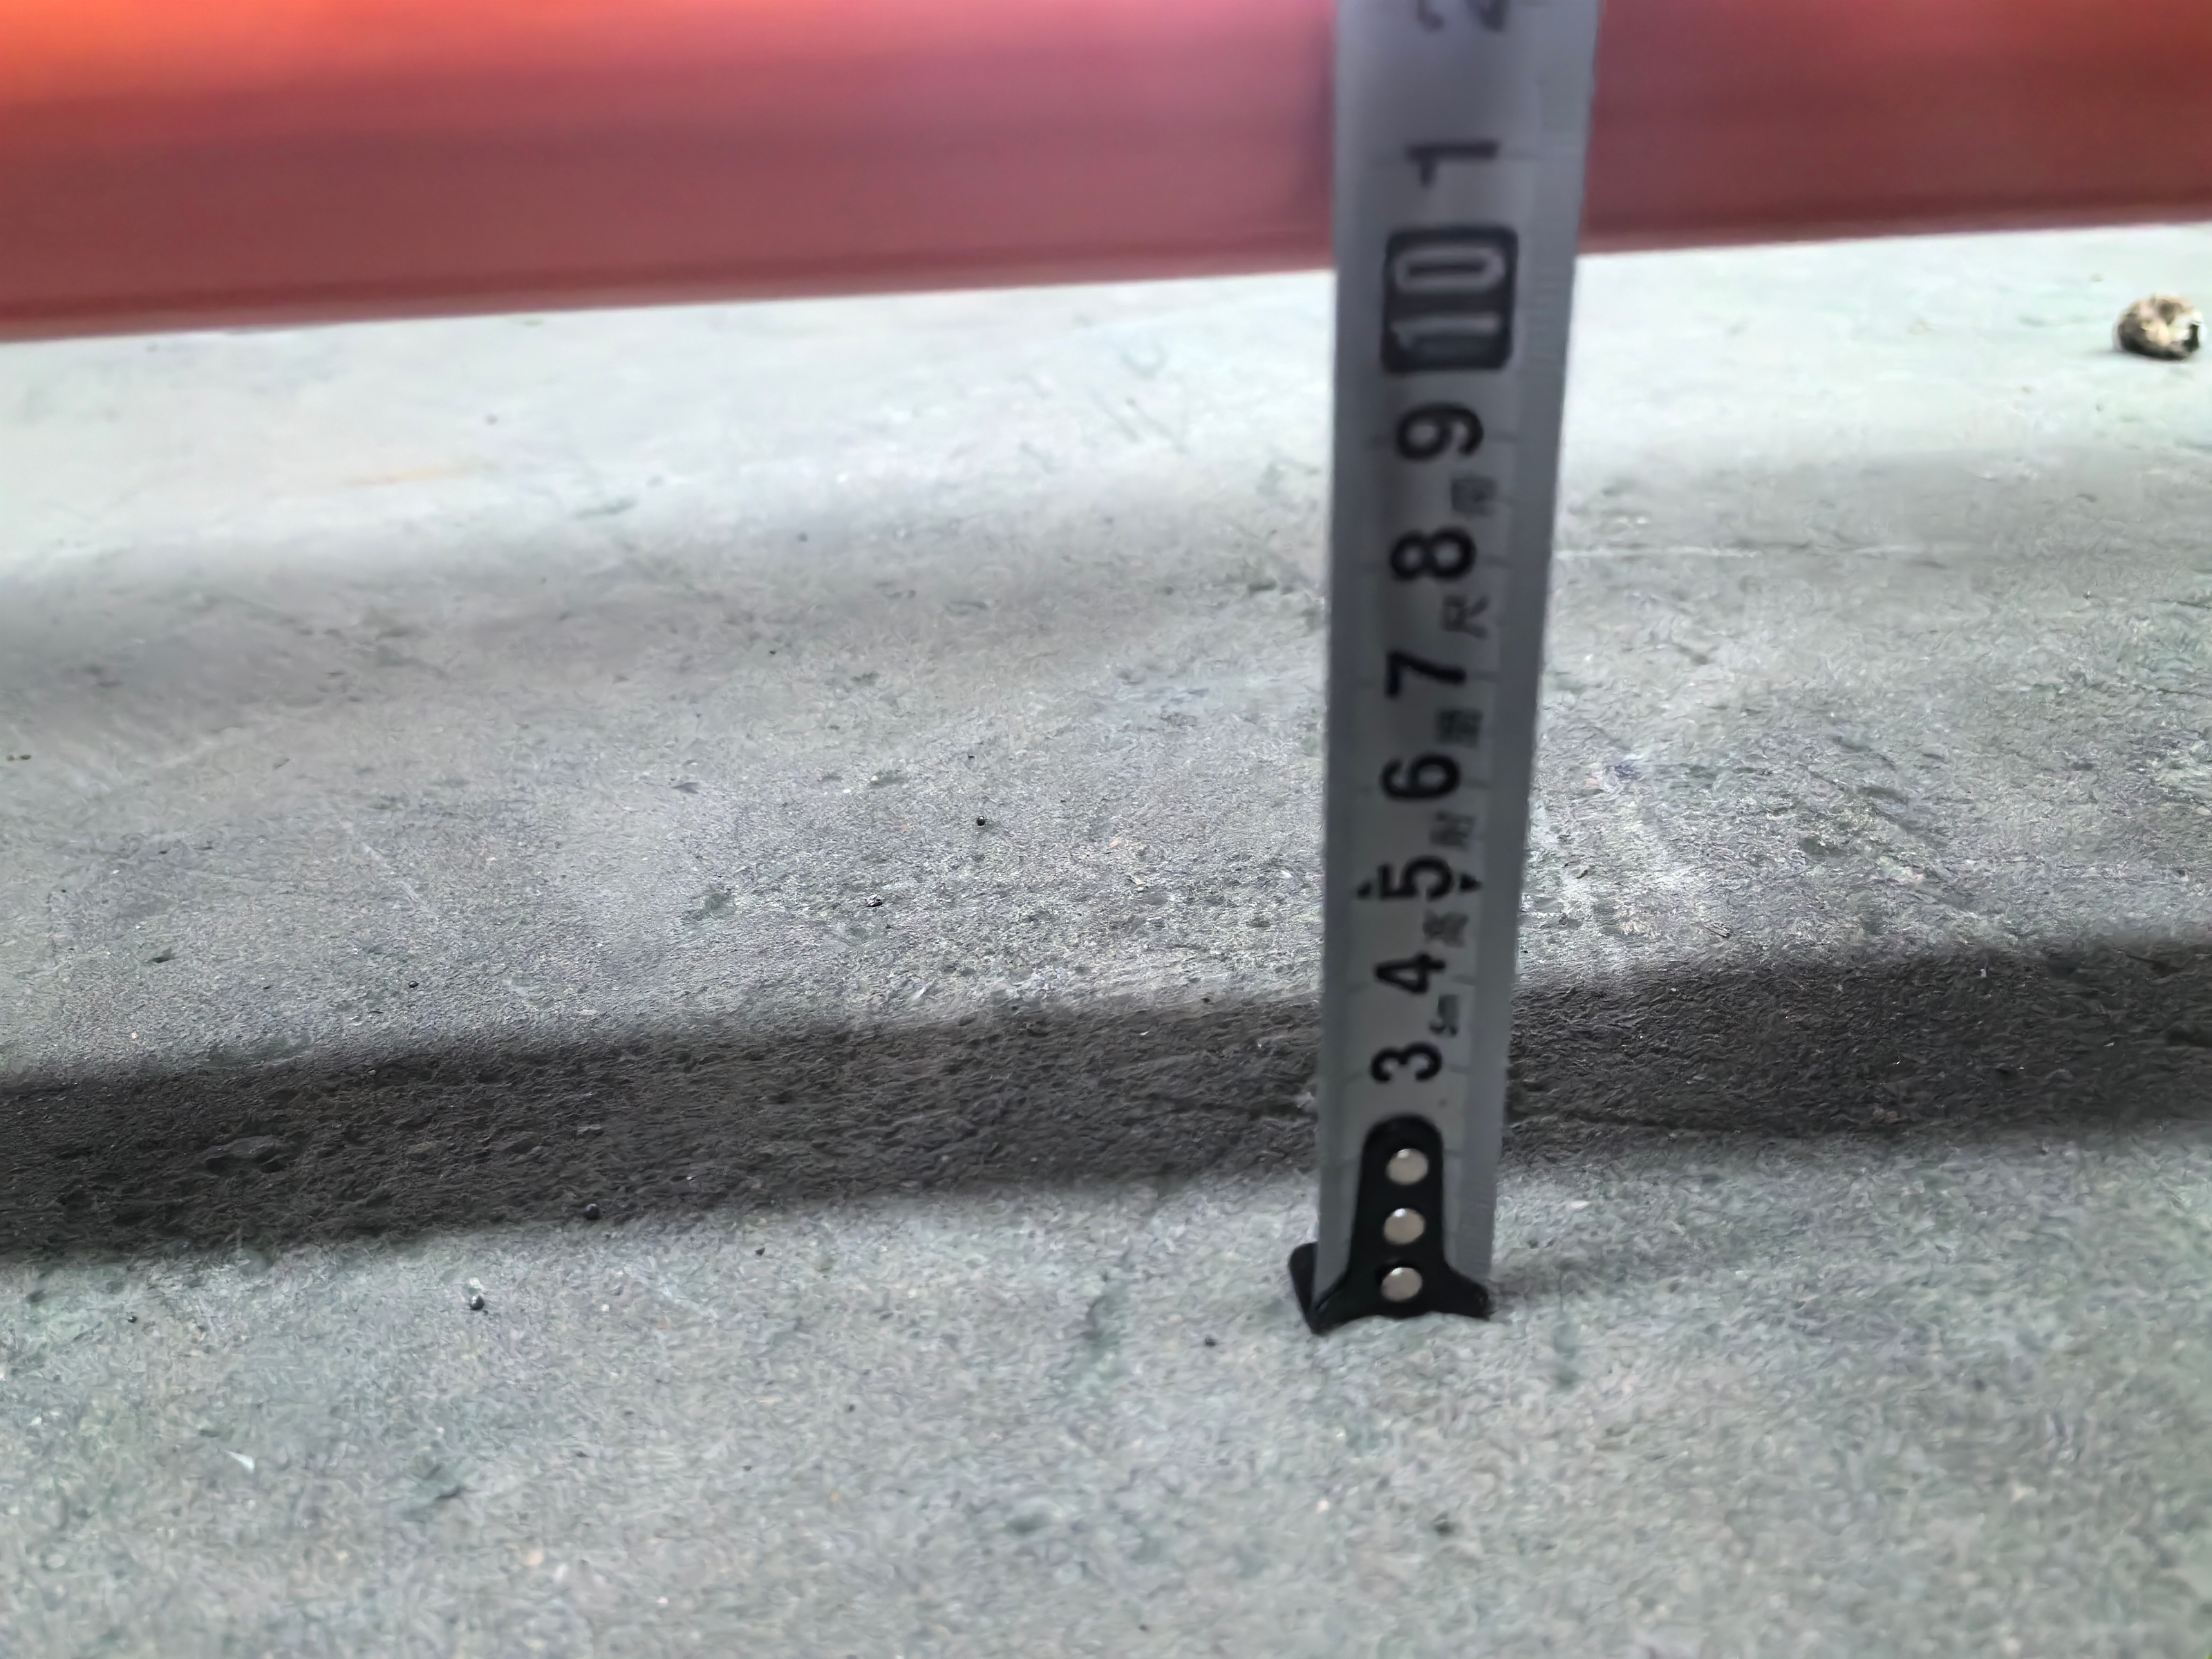
Trap #7: The “tip” about flat steel base size that prevents sink and twist
Flat steel base size and thickness decide whether the barrier sinks into soft ground or twists under lateral load. If the base plate is undersized, Perth Crowd control barriers lose line alignment and look “repaired” instead of professional.
Trap #8: The “hint” about removable feet that creates hidden losses
Removable feet improve transport efficiency, but if tolerances and locking geometry are not controlled, parts loosen, go missing, and slow deployment. That hidden labor cost can erase the savings on Perth Crowd control barriers.
Trap #9: The “idea” about interlock hook geometry that controls “no-gaps” performance
Hooks and interlocking ends prevent line separation. If hook geometry and weld quality are not specified, Perth Crowd control barriers can separate under pushing loads, creating gaps that become a security and safety crisis during peak flow.
Trap #10: The “angle” about galvanizing method that starts rust where everyone looks
Hot dipped galvanized after welding, pre-galvanized tube builds, and powder coating do not perform the same. If zinc level and surface preparation are not locked, corrosion often starts at weld zones and contact points—exactly where cameras and supervisors focus.
Trap #11: The “aspect” about coating thickness that becomes a durability problem
When zinc coating or powder film is not controlled, outdoor exposure quickly reveals weak zones. Perth Crowd control barriers can look acceptable on day one but show premature rusting at welds and rubbing points after repeated stacking.
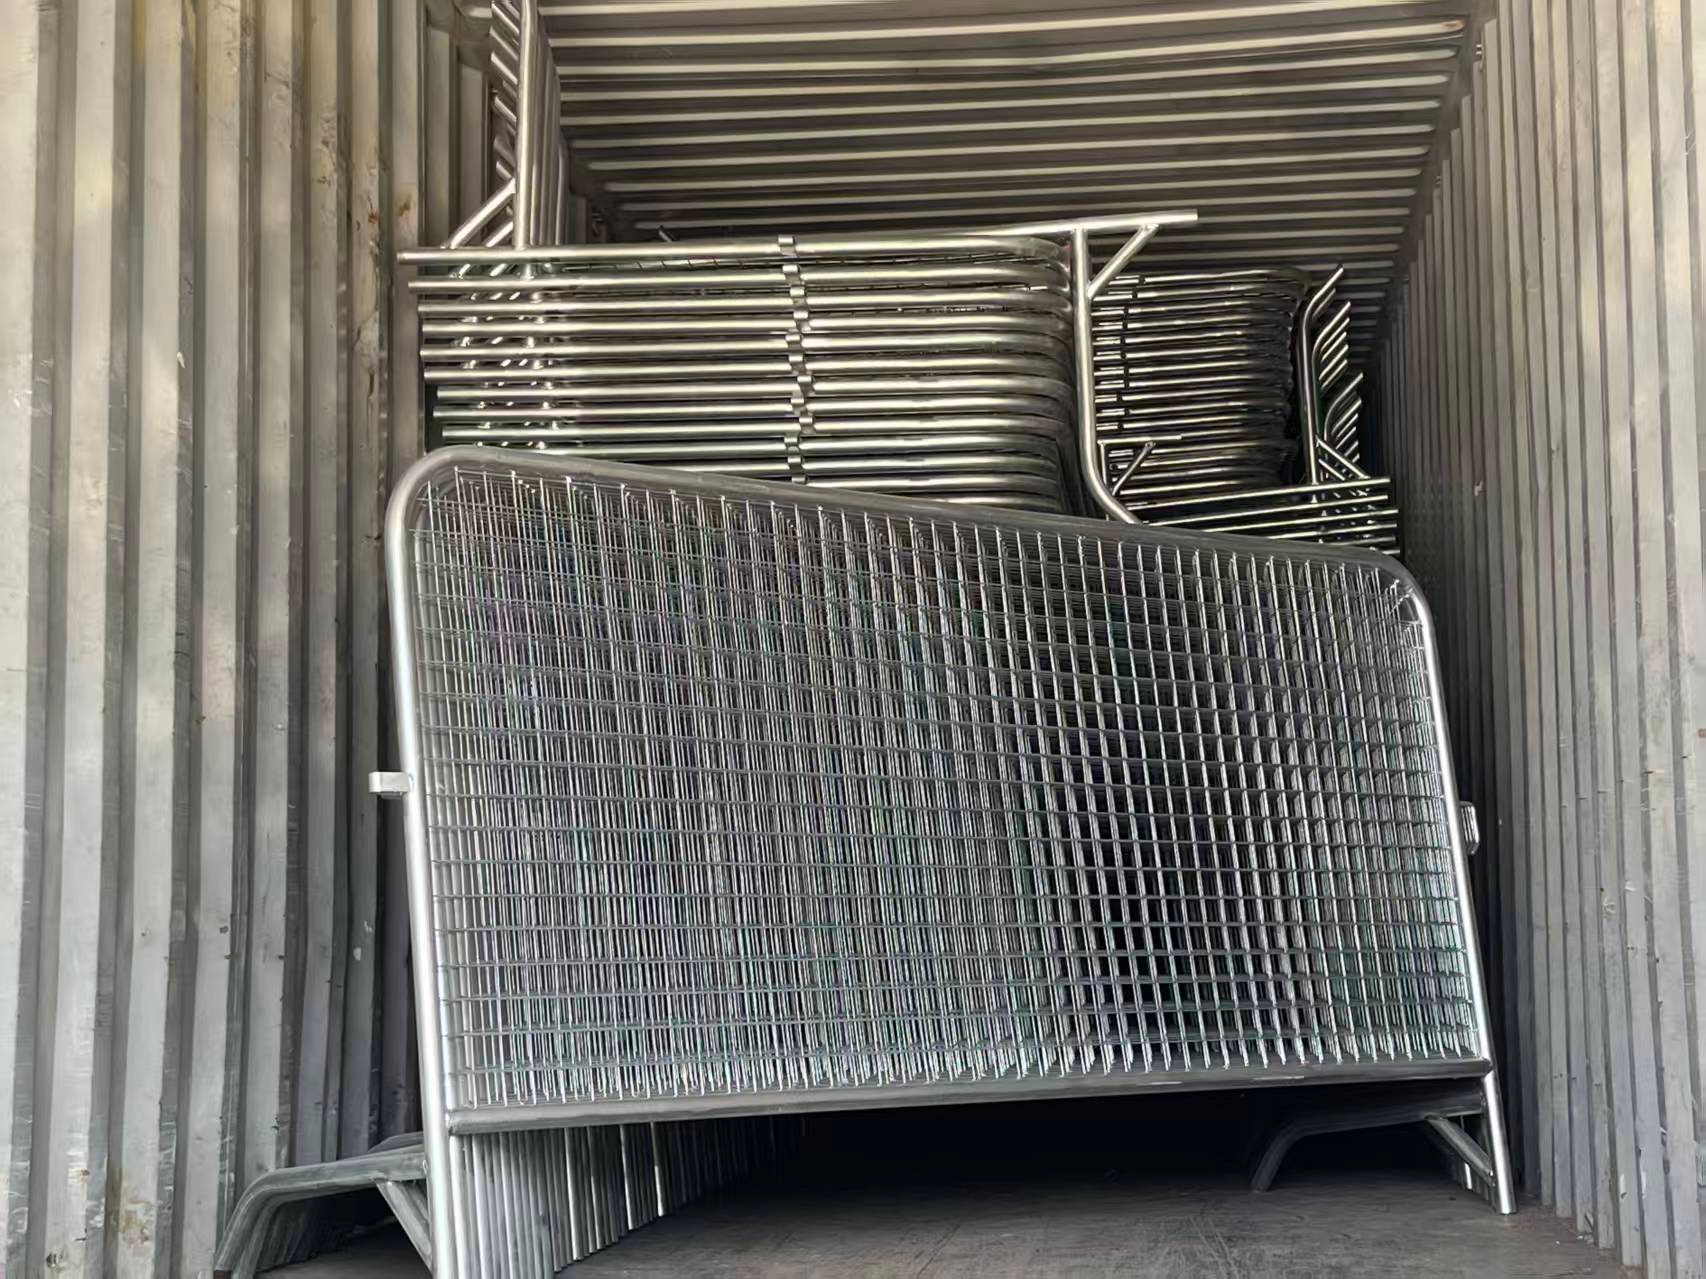
Trap #12: The “element” about packing damage that bends barriers before installation
Metal-to-metal abrasion, uncontrolled stacking, and unprotected hooks deform barriers before they reach site. Without separators and controlled bundling, Perth Crowd control barriers may arrive with bent corners and misaligned interlocks.
Trap #13: The “feature” about triangle reinforcement that matters in push zones
High-pressure crowd areas often need reinforcement plates or gussets. If reinforcement is omitted, predictable joints deform under load and Perth Crowd control barriers fail where the risk is highest.
Trap #14: The “trait” about bridge feet that must match venue hazards
Bridge feet reduce tripping hazard, but only when dimensions and stability are matched to the surface. Poorly matched feet can still rock or snag, creating complaints and safety risk during deployment of Perth Crowd control barriers.
Trap #15: The “view” about “lightweight” claims that sacrifice robustness
A barrier can be “easy to handle” while still being strong, but only when tube OD and wall thickness are controlled. If “lightweight” becomes “thin-wall,” Perth Crowd control barriers lose stiffness and look unstable under real pressure.
Trap #16: The “insight” about inconsistent batches that create disputes
If different batches use different tube OD, thickness, spacing, or feet, the barrier line becomes inconsistent. That inconsistency is one of the fastest ways to trigger receiving disputes for Perth Crowd control barriers.
Trap #17: The “finding” that triggers the biggest loss—mixed specs in one shipment
The most expensive failure is not a scratch—it is receiving Perth Crowd control barriers where frame OD, wall thickness, upright OD, upright thickness, spacing, and feet type vary within the same order. This causes instant sorting, rejected bundles, mismatched interlock behavior, safety complaints, and rework costs that destroy the whole savings plan. Lock one approved build per SKU with signed drawings, fixed tables, and inspection criteria so every barrier behaves the same on site.
Trap #18: The “lesson” about “compliance” claims without documentation
Barriers can be described as meeting standards without evidence. If material grade, thickness, finish method, and inspection acceptance are not written into the PO, Perth Crowd control barriers risk last-minute rejection when replacement is most expensive.
Product Description: POLYMETAL Perth Crowd control barriers
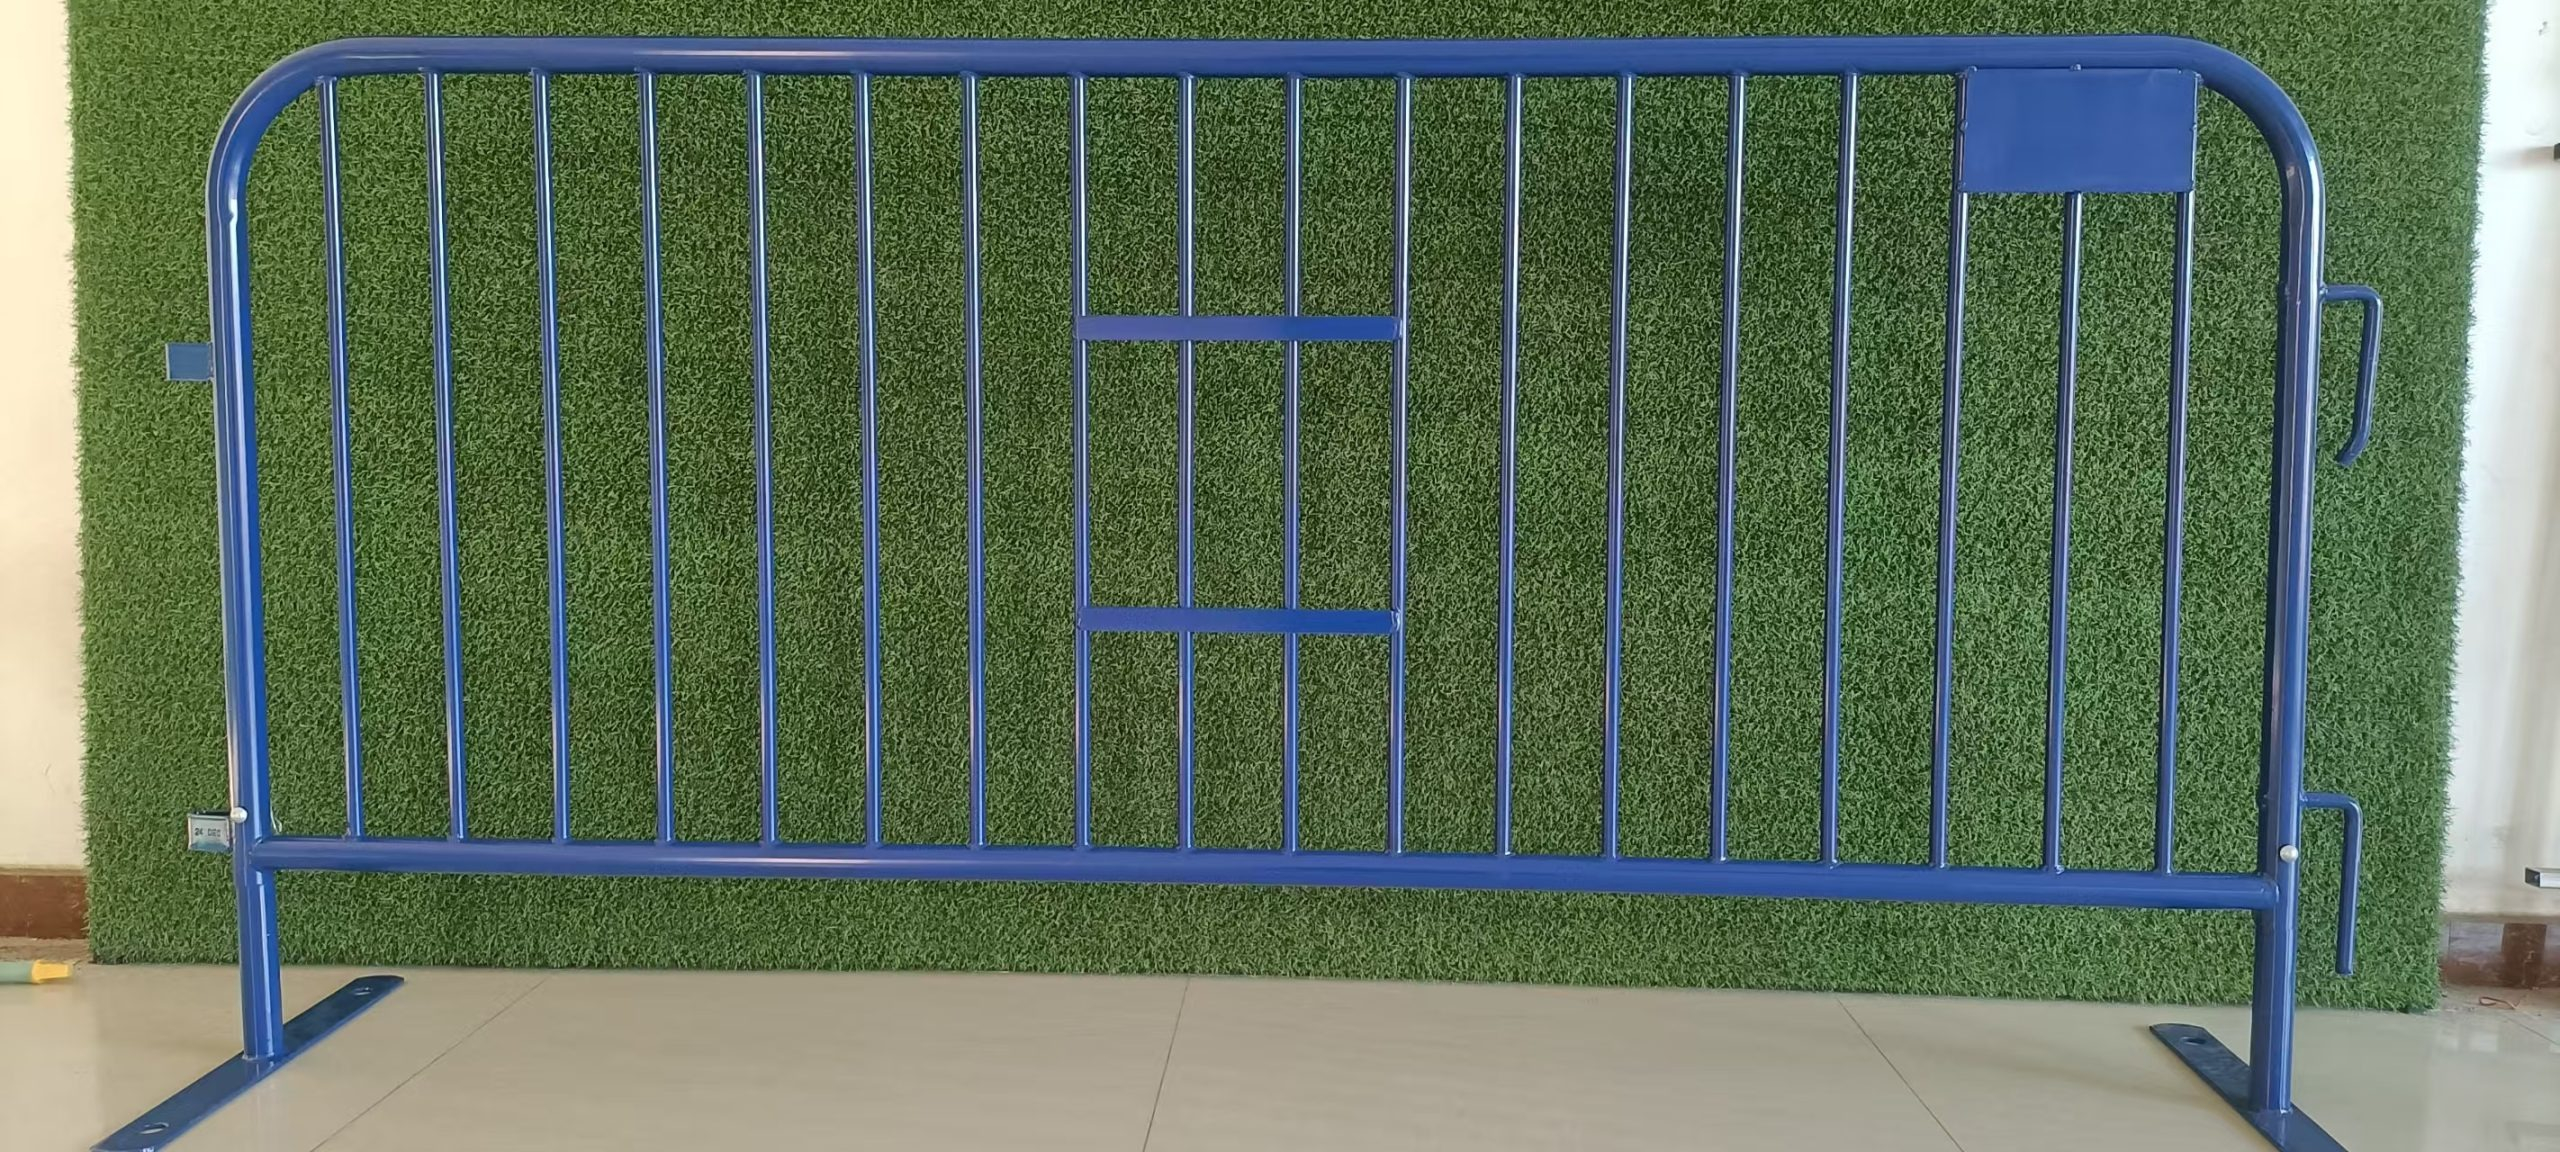
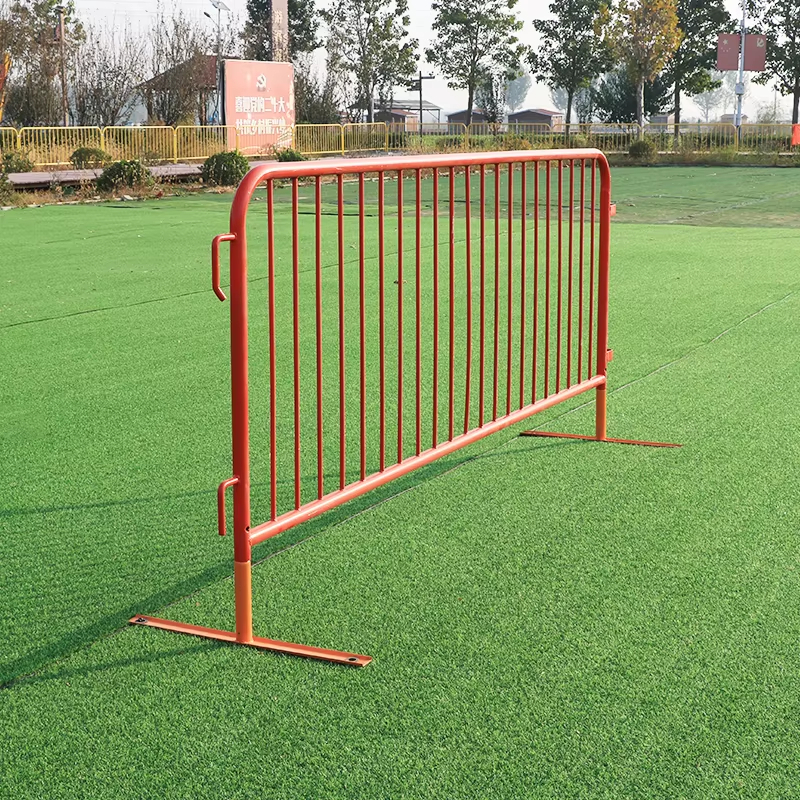
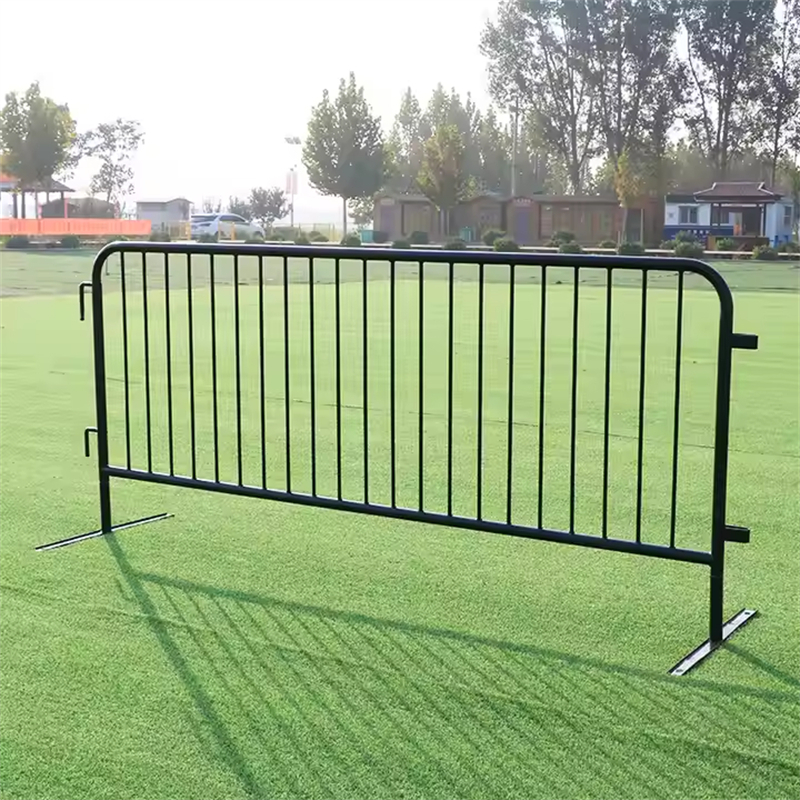
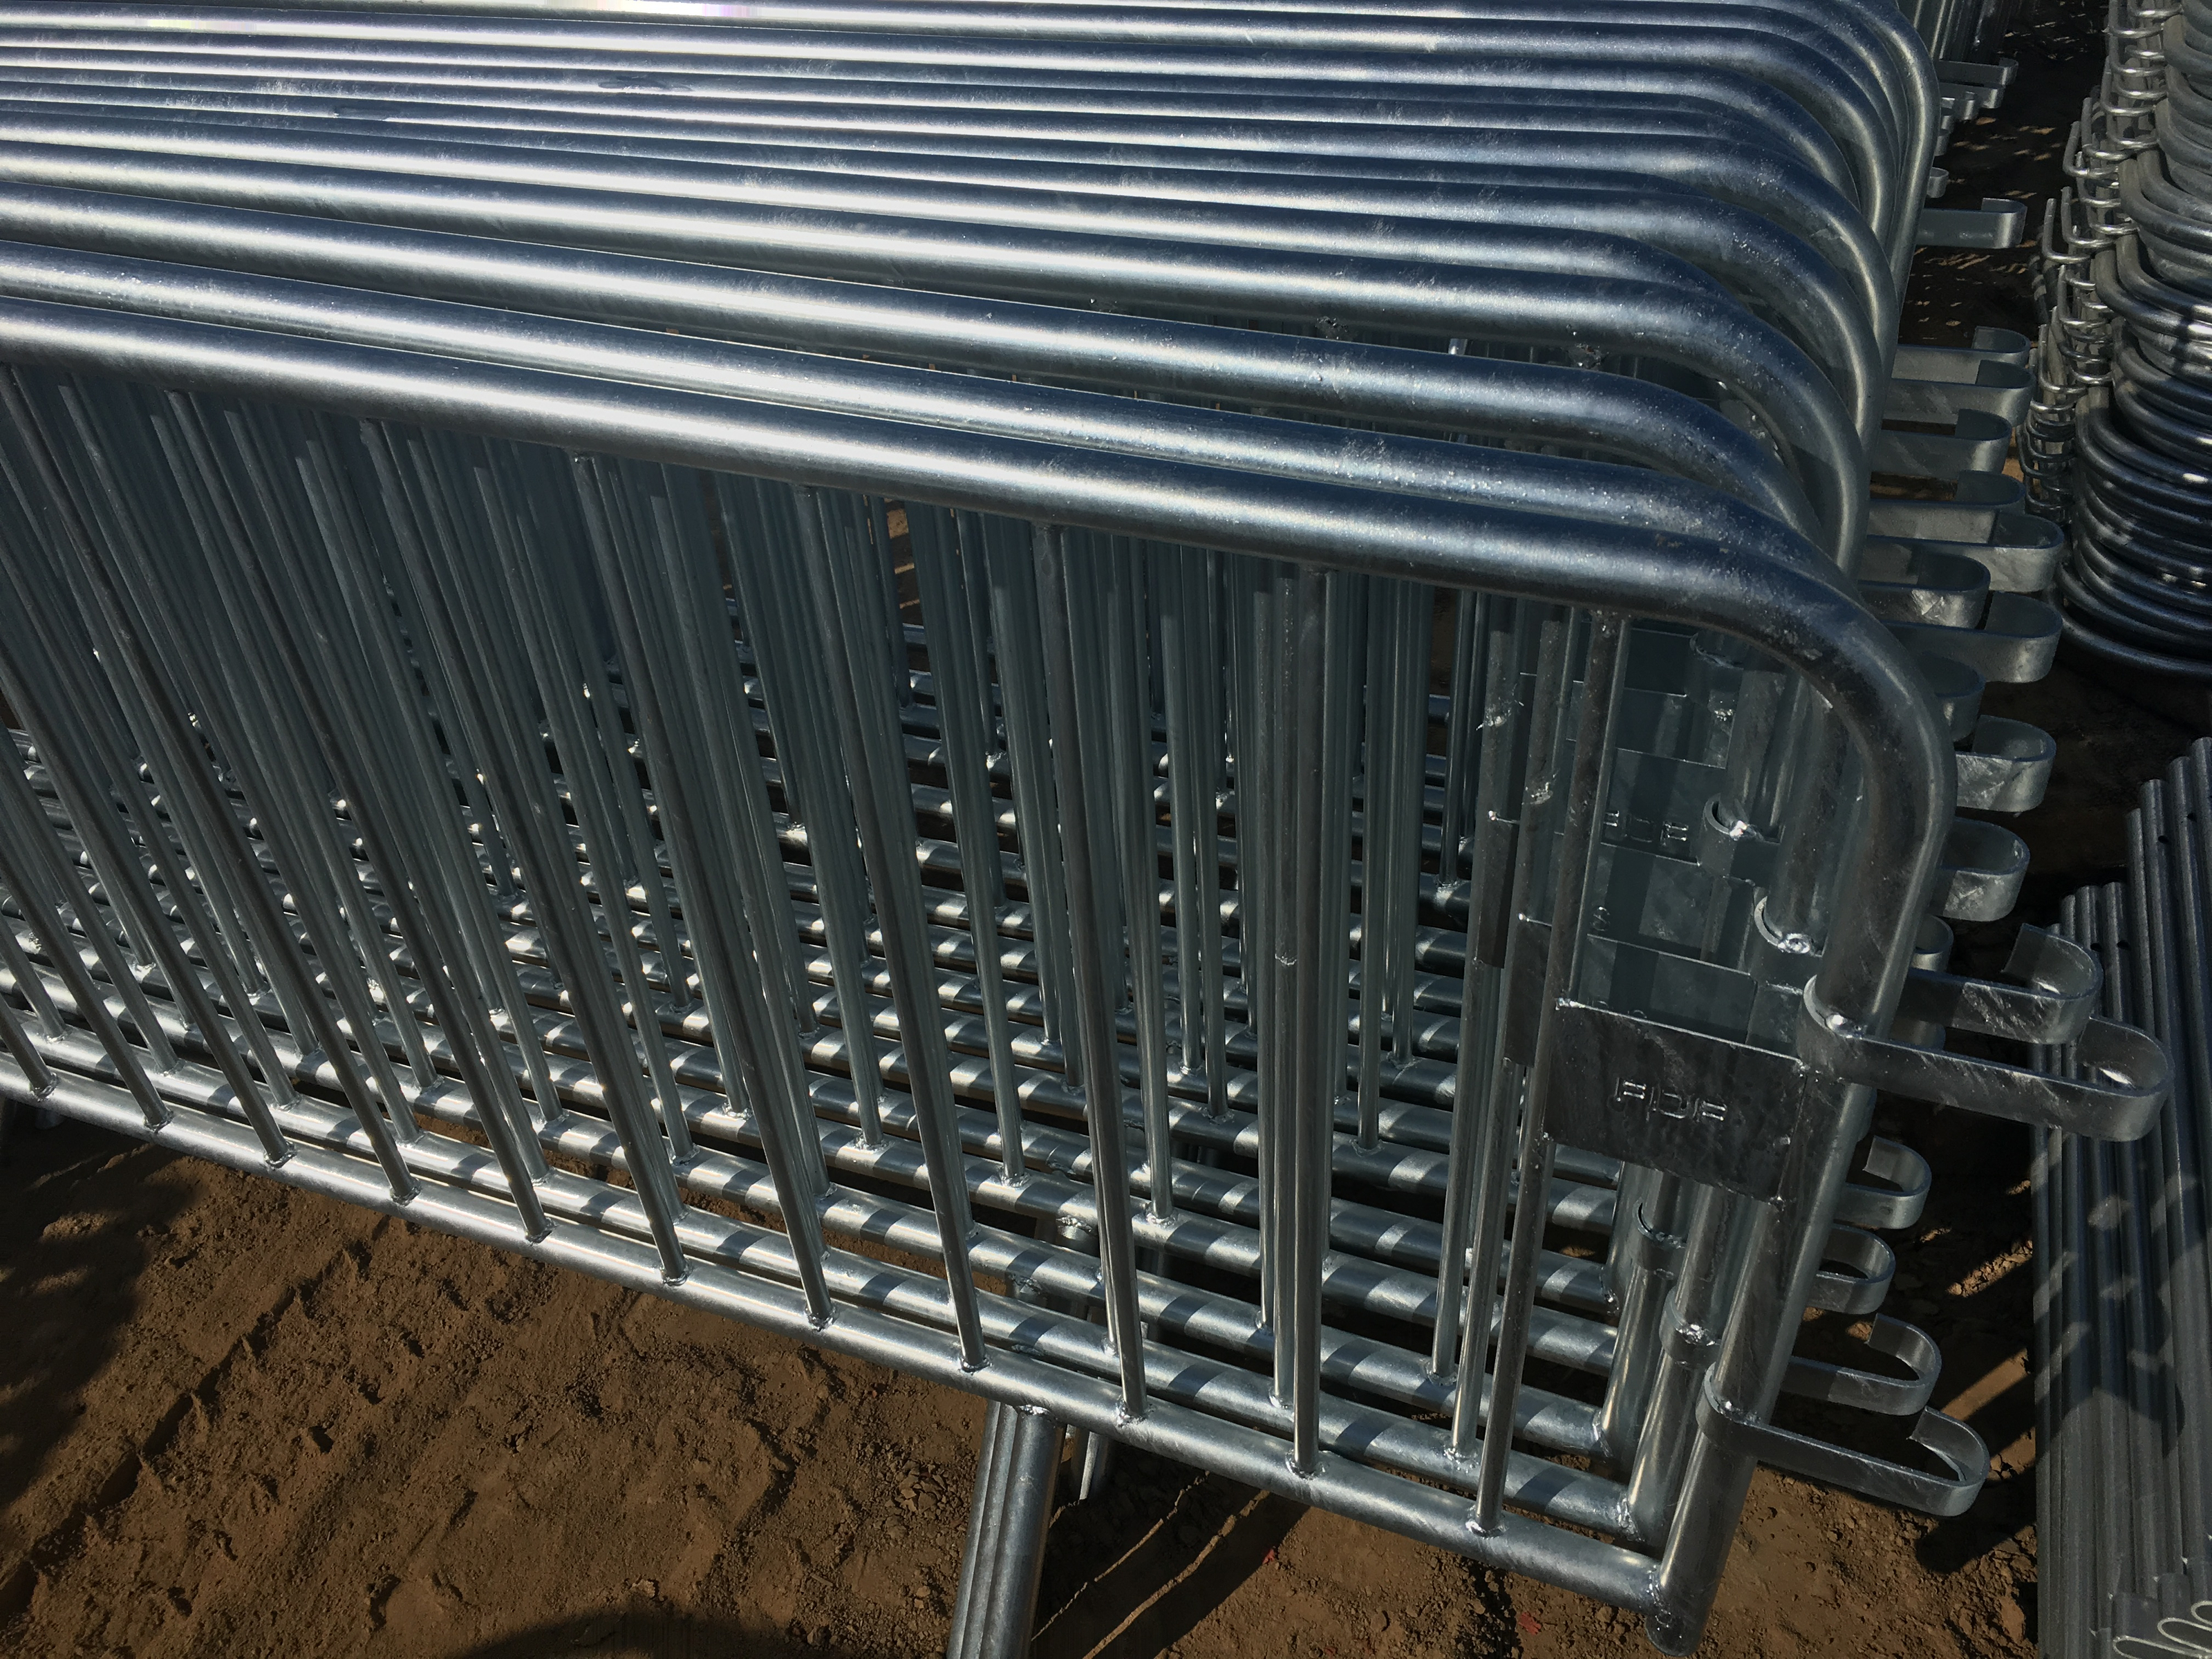
POLYMETAL Perth Crowd control barriers are manufactured from carbon steel pipes and engineered for fast deployment, reliable interlock alignment, and repeatable straightness under real crowd pressure and handling cycles. The barrier system supports multiple feet options including flat steel feet, bridge feet to minimize tripping hazards, wheel feet for rapid repositioning, and V feet for directional stability on long runs. Frame tube OD and wall thickness, upright OD and thickness, spacing targets, and reinforcement options can be locked as measurable specifications so each shipment installs consistently without on-site sorting.
Surface treatment options include hot dipped galvanized after welding for full weld-zone protection, pre-galvanized tube builds for controlled cost, and powder coating for premium appearance. With disciplined surface preparation and inspection checkpoints, POLYMETAL Perth Crowd control barriers reduce early corrosion at weld zones and contact points, helping prevent rework, disputes, and schedule loss after delivery.


Specifications: Perth Crowd control barriers (3 Tables, 10+ Specs Each)
Table 1: Perth Core Series (10 Common Builds)
| Height | Width | Frame Tube (OD) | Frame Wall | Upright Tube (OD) | Upright Thickness | Spacing | Feet Type | Flat Steel Base | Finish |
|---|---|---|---|---|---|---|---|---|---|
| 1.00 m | 2.00 m | 25 mm | 1.5 mm | 12 mm | 0.7 mm | 150 mm | Flat feet | 580×50×10 mm | HDG after welding |
| 1.00 m | 2.20 m | 32 mm | 1.6 mm | 16 mm | 0.80 mm | 100 mm | Bridge feet | 580×50×10 mm | HDG after welding |
| 1.00 m | 2.50 m | 35 mm | 2.00 mm | 19 mm | 1.0 mm | 200 mm | V feet | 580×50×10 mm | Pre-galv + powder |
| 1.06 m | 2.00 m | 25 mm | 1.6 mm | 12 mm | 0.80 mm | 90 mm | Bridge feet | 580×50×10 mm | Powder coated |
| 1.06 m | 2.20 m | 32 mm | 2.00 mm | 16 mm | 1.0 mm | 150 mm | Flat feet | 580×50×10 mm | HDG after welding |
| 1.06 m | 2.60 m | 38 mm | 2.00 mm | 19 mm | 1.2 mm | 100 mm | Wheel feet | 580×50×10 mm | HDG + powder |
| 1.10 m | 2.00 m | 35 mm | 1.6 mm | 12 mm | 0.7 mm | 200 mm | V feet | 580×50×10 mm | Pre-galvanized |
| 1.10 m | 2.20 m | 38 mm | 2.00 mm | 16 mm | 1.0 mm | 150 mm | Bridge feet | 580×50×10 mm | HDG after welding |
| 1.10 m | 2.50 m | 32 mm | 1.5 mm | 19 mm | 1.2 mm | 100 mm | Flat feet | 580×50×10 mm | Powder coated |
| 1.20 m | 2.60 m | 38 mm | 2.00 mm | 19 mm | 1.2 mm | 90 mm | Bridge feet | 580×50×10 mm | HDG after welding |
Table 2: Perth Heavy Duty & Push-Zone Series (10 Detailed Configurations)
| Height | Width | Frame Tube (OD) | Frame Wall | Upright Tube (OD) | Upright Thickness | Spacing | Feet Type | Flat Steel Base | Finish |
|---|---|---|---|---|---|---|---|---|---|
| 1.00 m | 2.50 m | 38 mm | 2.00 mm | 16 mm | 1.0 mm | 150 mm | Bridge feet | 580×50×10 mm | HDG after welding |
| 1.06 m | 2.20 m | 35 mm | 2.00 mm | 19 mm | 1.2 mm | 100 mm | Flat feet | 580×50×10 mm | HDG 70+ μm zinc |
| 1.06 m | 2.50 m | 38 mm | 2.00 mm | 19 mm | 1.2 mm | 90 mm | Bridge feet | 580×50×10 mm | HDG + powder |
| 1.10 m | 2.20 m | 32 mm | 2.00 mm | 16 mm | 1.0 mm | 150 mm | V feet | 580×50×10 mm | HDG after welding |
| 1.10 m | 2.50 m | 38 mm | 2.00 mm | 16 mm | 1.2 mm | 100 mm | Wheel feet | 580×50×10 mm | Powder coated |
| 1.10 m | 2.60 m | 35 mm | 1.6 mm | 19 mm | 1.0 mm | 200 mm | Flat feet | 580×50×10 mm | Pre-galv + powder |
| 1.20 m | 2.00 m | 32 mm | 2.00 mm | 12 mm | 0.80 mm | 150 mm | Bridge feet | 580×50×10 mm | HDG after welding |
| 1.20 m | 2.20 m | 38 mm | 2.00 mm | 16 mm | 1.2 mm | 100 mm | Bridge feet | 580×50×10 mm | HDG 84 μm option |
| 1.20 m | 2.50 m | 35 mm | 2.00 mm | 19 mm | 1.2 mm | 90 mm | V feet | 580×50×10 mm | HDG + powder |
| 1.20 m | 2.60 m | 38 mm | 2.00 mm | 19 mm | 1.2 mm | 150 mm | Wheel feet | 580×50×10 mm | HDG after welding |
Table 3: Feet & Finish Selection Matrix (10 Detailed Configurations)
| Height | Width | Frame Tube (OD) | Frame Wall | Upright Tube (OD) | Upright Thickness | Spacing | Feet Type | Flat Steel Base | Finish |
|---|---|---|---|---|---|---|---|---|---|
| 1.00 m | 2.60 m | 32 mm | 1.5 mm | 12 mm | 0.7 mm | 200 mm | V feet | 580×50×10 mm | Pre-galvanized |
| 1.06 m | 2.00 m | 25 mm | 1.6 mm | 16 mm | 0.80 mm | 100 mm | Wheel feet | 580×50×10 mm | Powder coated |
| 1.06 m | 2.20 m | 35 mm | 2.00 mm | 12 mm | 0.7 mm | 150 mm | Bridge feet | 580×50×10 mm | HDG after welding |
| 1.10 m | 2.00 m | 32 mm | 1.6 mm | 19 mm | 1.0 mm | 90 mm | Bridge feet | 580×50×10 mm | HDG + powder |
| 1.10 m | 2.20 m | 25 mm | 1.5 mm | 12 mm | 0.80 mm | 150 mm | Flat feet | 580×50×10 mm | Pre-galv + powder |
| 1.10 m | 2.50 m | 35 mm | 1.6 mm | 16 mm | 1.0 mm | 100 mm | Wheel feet | 580×50×10 mm | Powder coated |
| 1.10 m | 2.60 m | 38 mm | 2.00 mm | 19 mm | 1.2 mm | 150 mm | V feet | 580×50×10 mm | HDG after welding |
| 1.20 m | 2.00 m | 25 mm | 1.6 mm | 16 mm | 0.80 mm | 200 mm | Flat feet | 580×50×10 mm | Hot dipped galvanized |
| 1.20 m | 2.20 m | 32 mm | 2.00 mm | 19 mm | 1.0 mm | 100 mm | Bridge feet | 580×50×10 mm | HDG 70+ μm zinc |
| 1.20 m | 2.50 m | 38 mm | 2.00 mm | 16 mm | 1.2 mm | 90 mm | Wheel feet | 580×50×10 mm | HDG + powder |
Applications
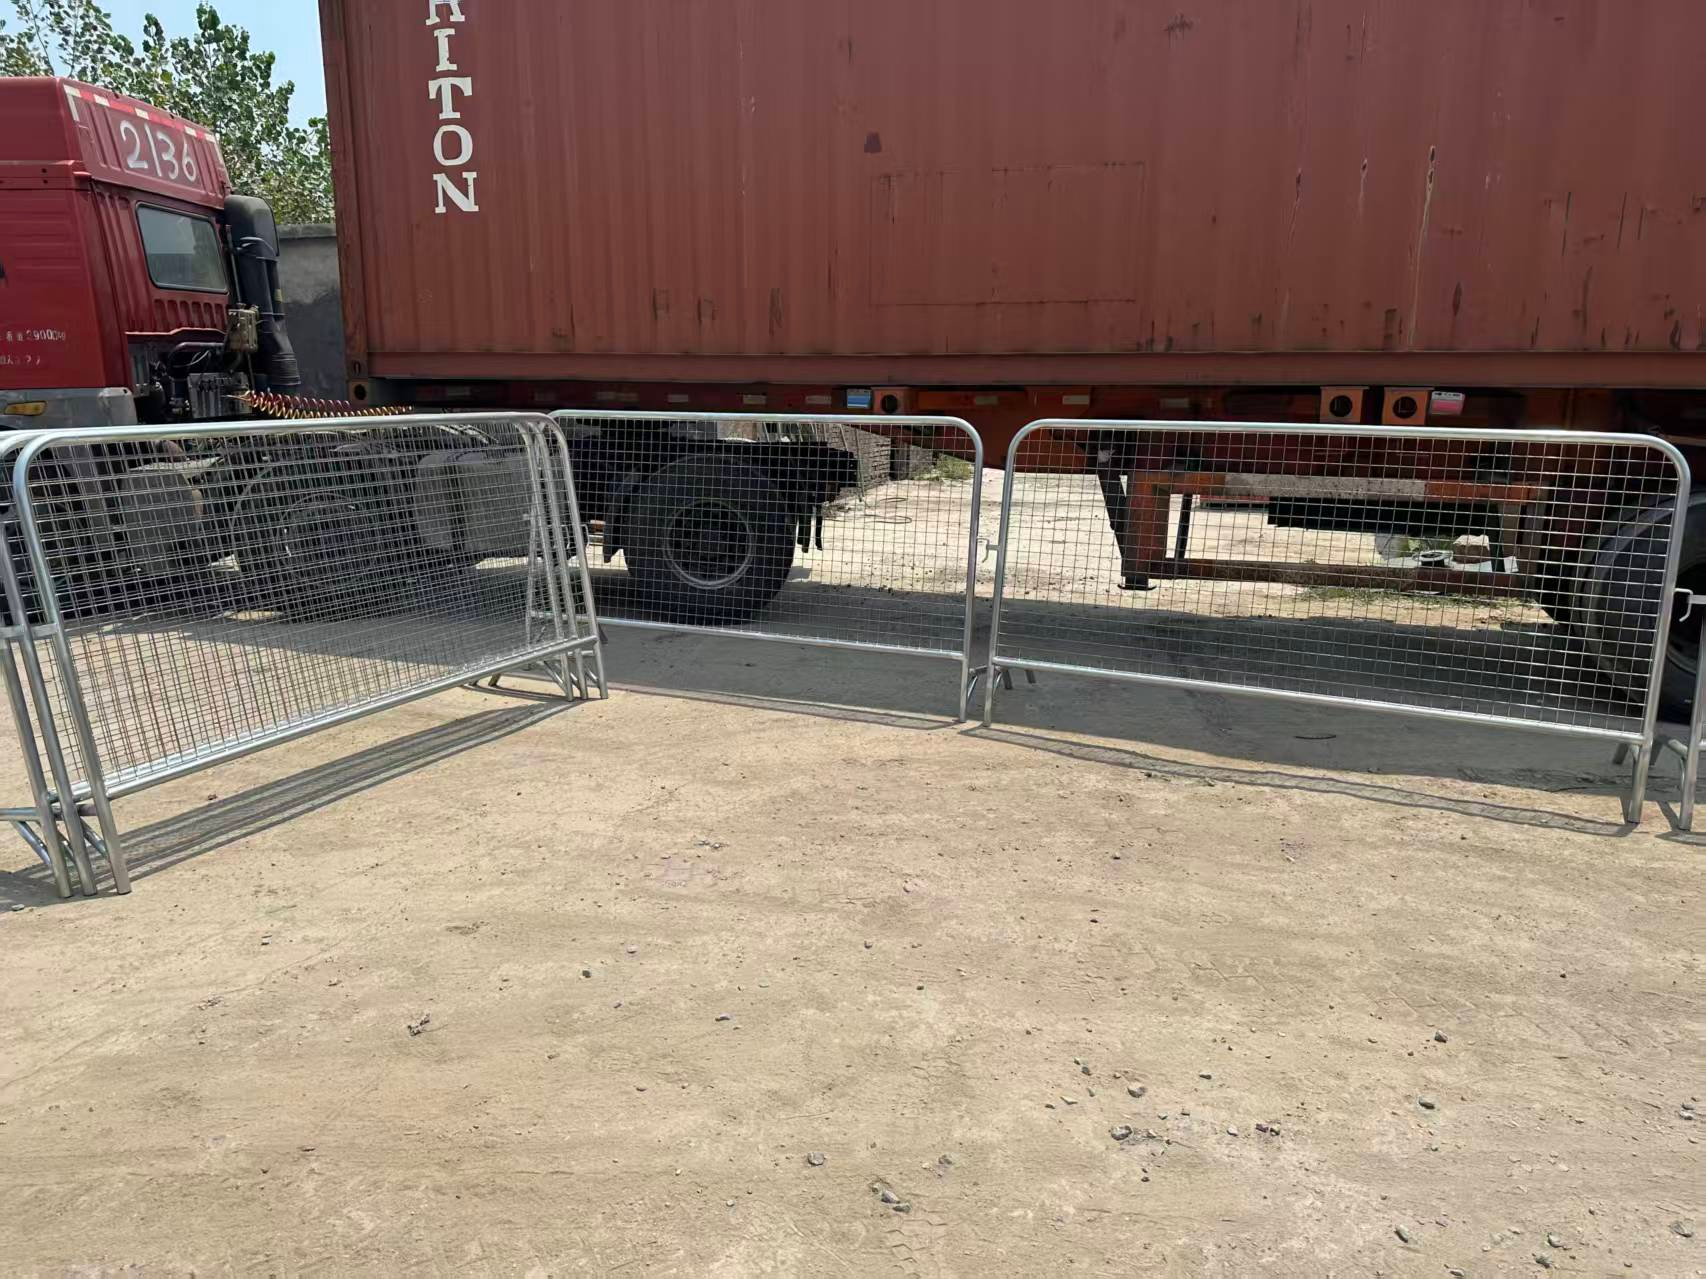
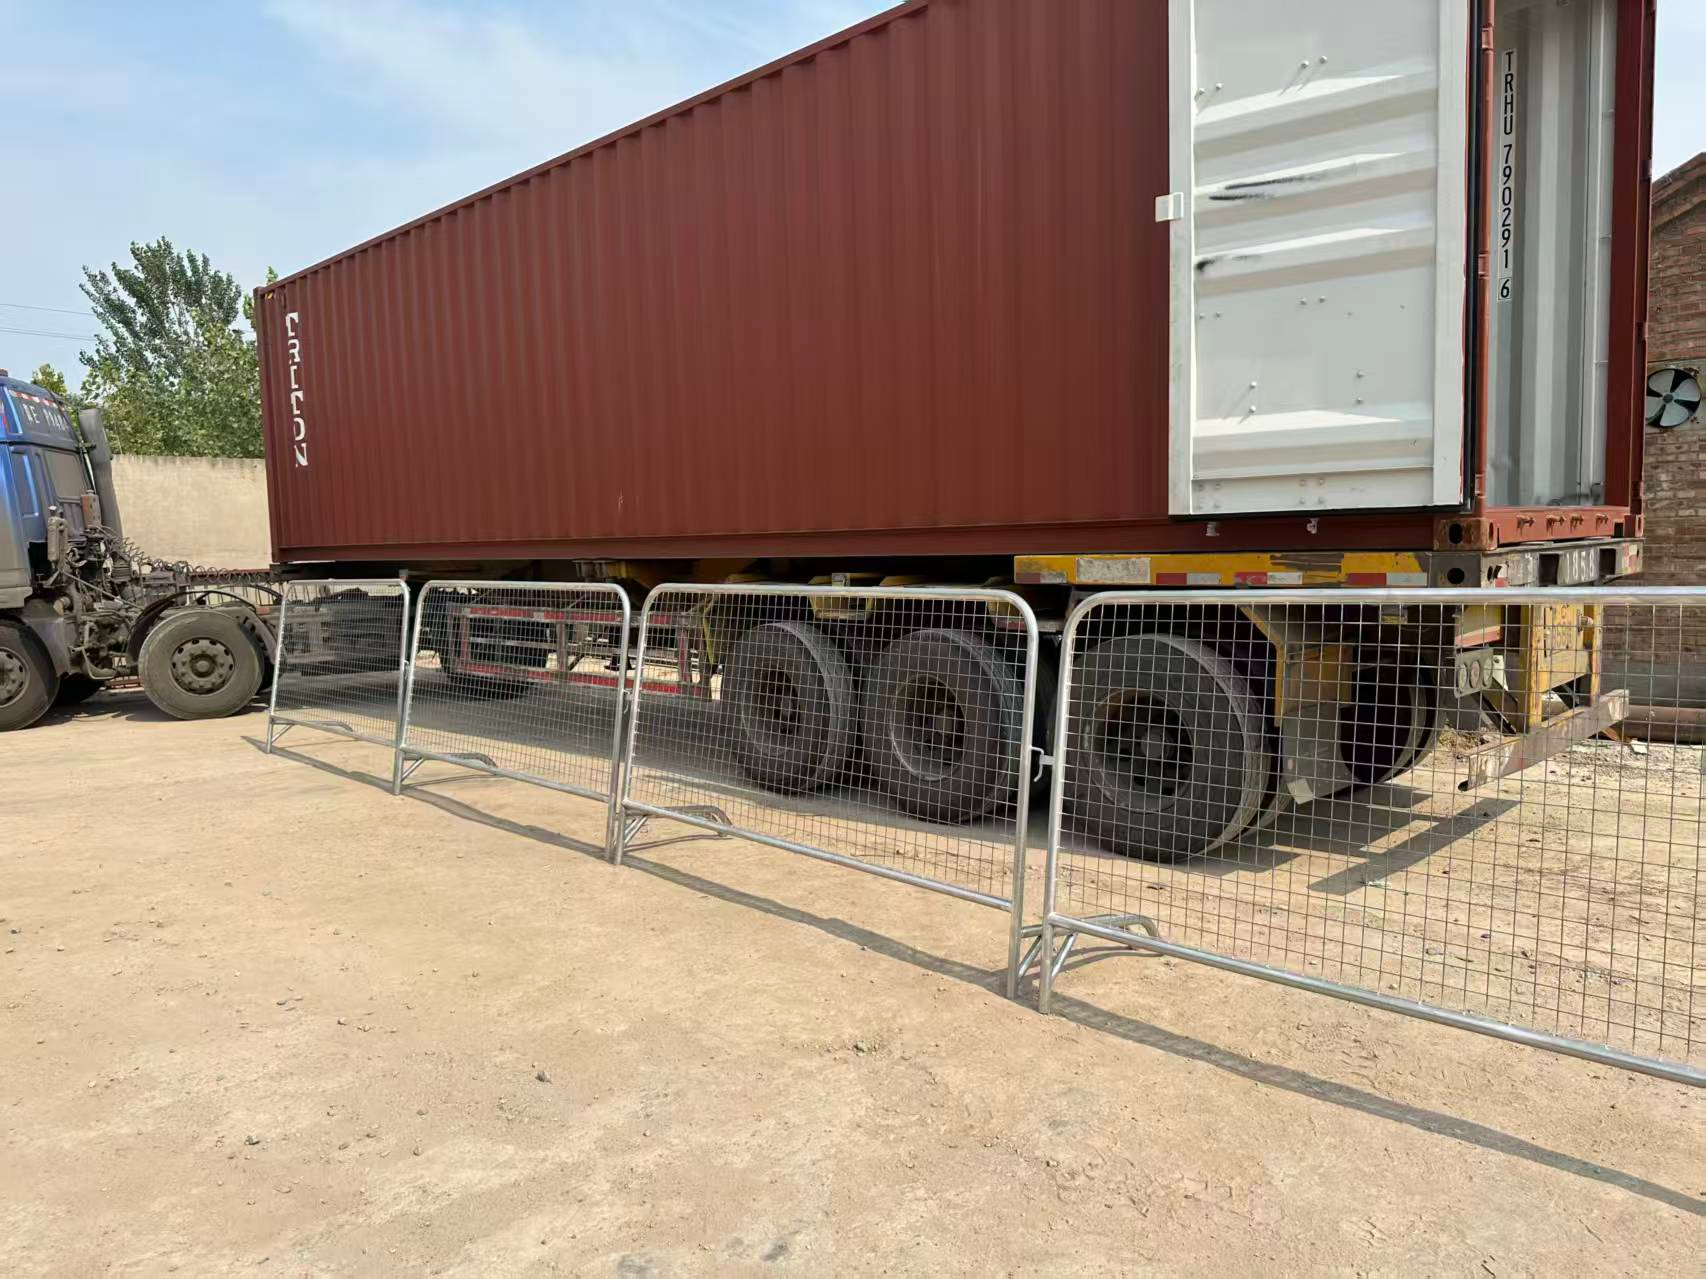
Perth Crowd control barriers are used for concerts, festivals, sporting events, public gatherings, stadium queues, transport hubs, construction site pedestrian routing, and any restricted area where the public must be diverted or kept away from a designated zone. Perth Crowd control barriers support fast setup, controlled flow, and clear sight lines while maintaining a stable line under real pushing loads.
Benefits
POLYMETAL Perth Crowd control barriers reduce hidden losses by locking measurable tube OD and thickness, controlled upright spacing, and stable feet options for real ground conditions. The system improves setup speed, reduces wobble and line separation, supports strong corrosion resistance through controlled finishes, and prevents mixed-spec disputes that trigger rework and schedule loss.
Packing
Perth Crowd control barriers are packed using controlled stacking, protective separators, and steel strapping to reduce hook deformation and tube abrasion. Feet sets are bundled and labeled by model to prevent missing parts and speed up receiving. Pallet or stillage packing options protect barrier geometry through container loading, sea freight, unloading, and site staging.


Standard and inspection expectations
Perth Crowd control barriers can be produced to meet ASTM and AS/NZS expectations for commercial-class steel performance and outdoor exposure when the purchase order states frame tube OD and wall thickness, upright OD and thickness, spacing, feet type, finish method, and inspection criteria. For hot dipped galvanized, pre-galvanized, and powder coating, disciplined surface preparation and acceptance checks reduce early corrosion at weld zones and contact points—especially for teams coordinating barrier lines with site stability systems and reviewing temporary fence blocks choosing tips.
FAQs
FAQ 1: Are you a factory or trading company?
POLYMETAL is a direct manufacturer with production lines for Perth Crowd control barriers fabrication, welding, finishing, and packing, supporting consistent specification control and flexible configurations.
FAQ 2: What surface treatments are available?
Perth Crowd control barriers can be supplied as hot dipped galvanized after welding, pre-galvanized tube builds, or powder coated finishes depending on appearance and corrosion exposure requirements.
FAQ 3: What feet options are available?
Common options include flat steel feet (580×50×10mm), bridge feet to reduce tripping hazard, wheel feet for rapid repositioning, and V feet for directional stability on long runs.
FAQ 4: How do you prevent mixed specifications in one shipment?
POLYMETAL controls Perth Crowd control barriers supply by SKU-based production routing, labeled bundling, controlled packing, and defined inspection checks so tube OD, thickness, spacing, feet, and finish remain consistent across the order.
FAQ 5: Do you inspect before shipment?
Yes. A 100% inspection can be performed before packing, and third-party testing can be arranged as appointed to match project requirements.