Your One-Stop Wire Mesh Fence Supplier | POLYMETAL


x tend mesh looks simple on the surface – just a flexible stainless steel cable net. But behind every safe, profitable project is a set of choices that either protect you or quietly create long-term risk. If you treat x tend mesh like generic wire netting, you are opening the door to unnecessary danger, unexpected cost and painful rework. This comprehensive guide exposes 9 facts, traps, warnings and payoffs about x tend mesh that serious buyers must understand. Fact #9 is the one careless competitors skip – and it is exactly where their biggest losses and failures usually begin.
What x tend mesh actually is and why spec errors hurt so much
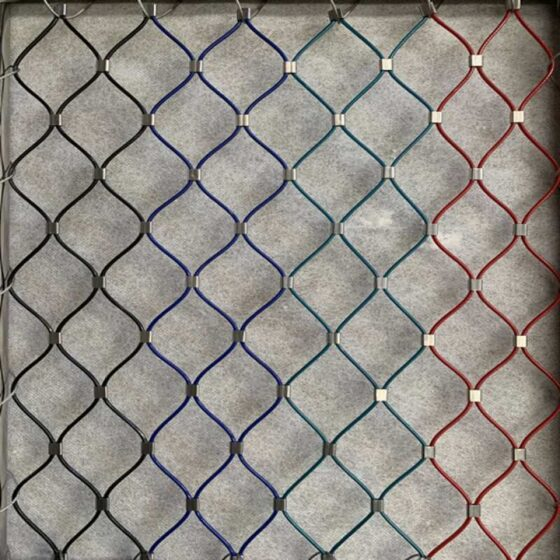
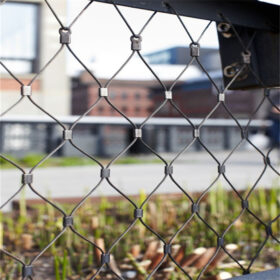
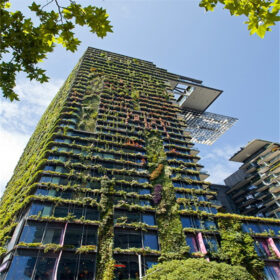
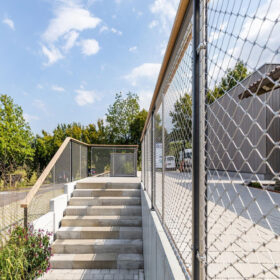
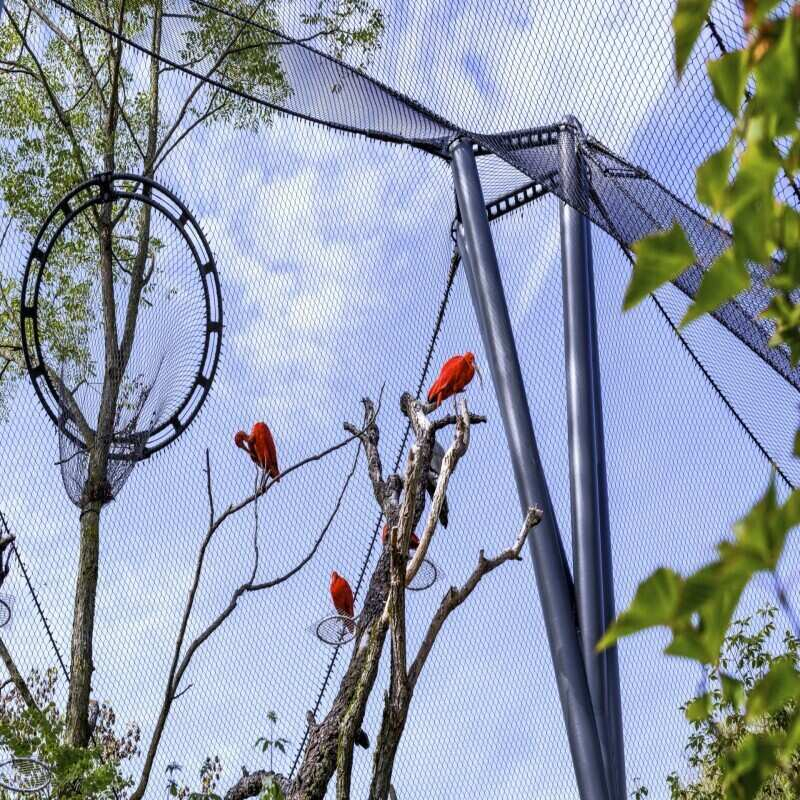
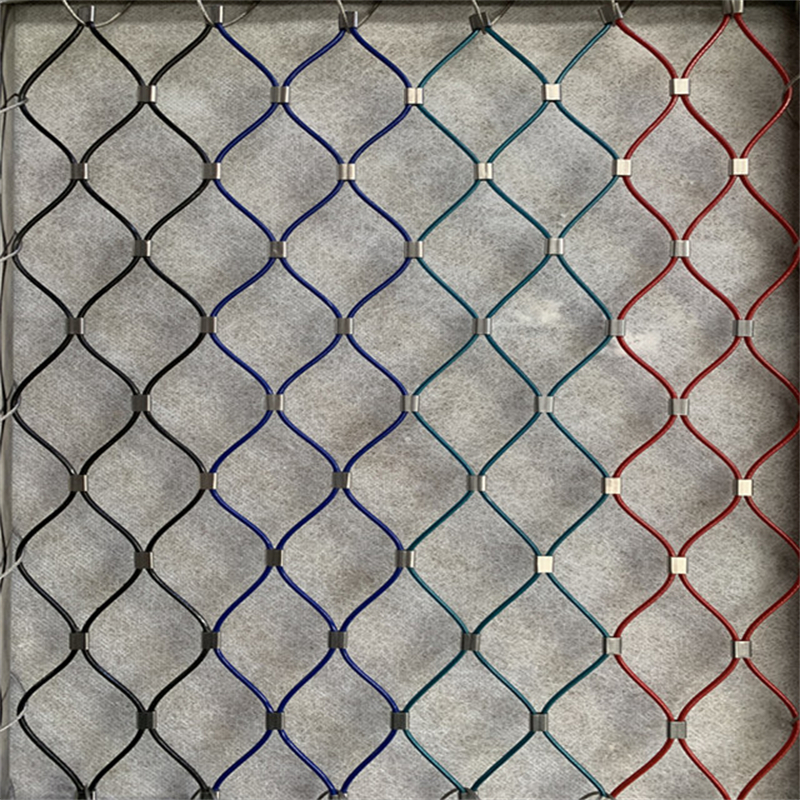
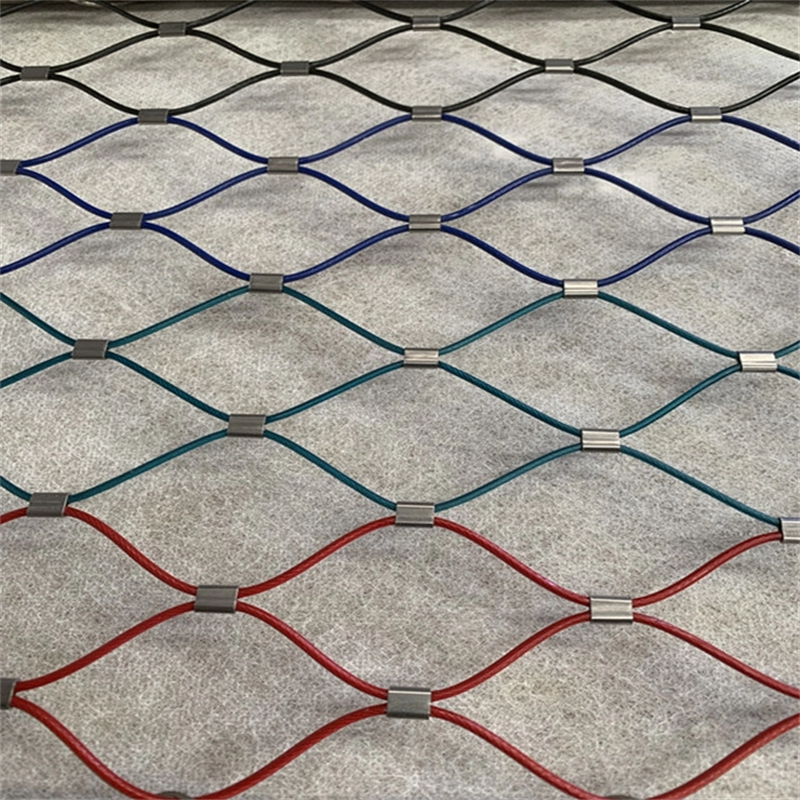
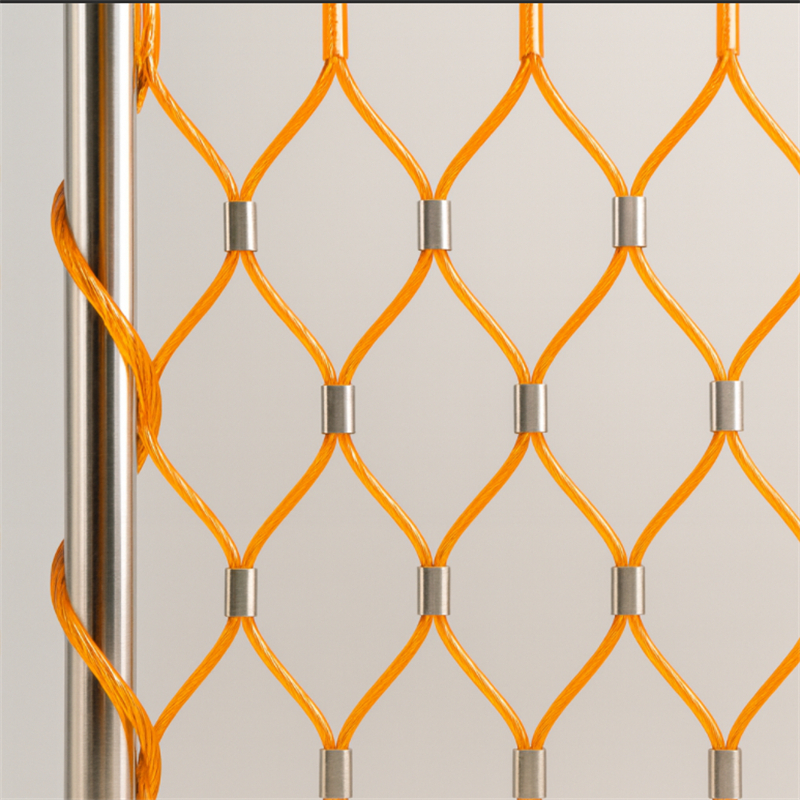
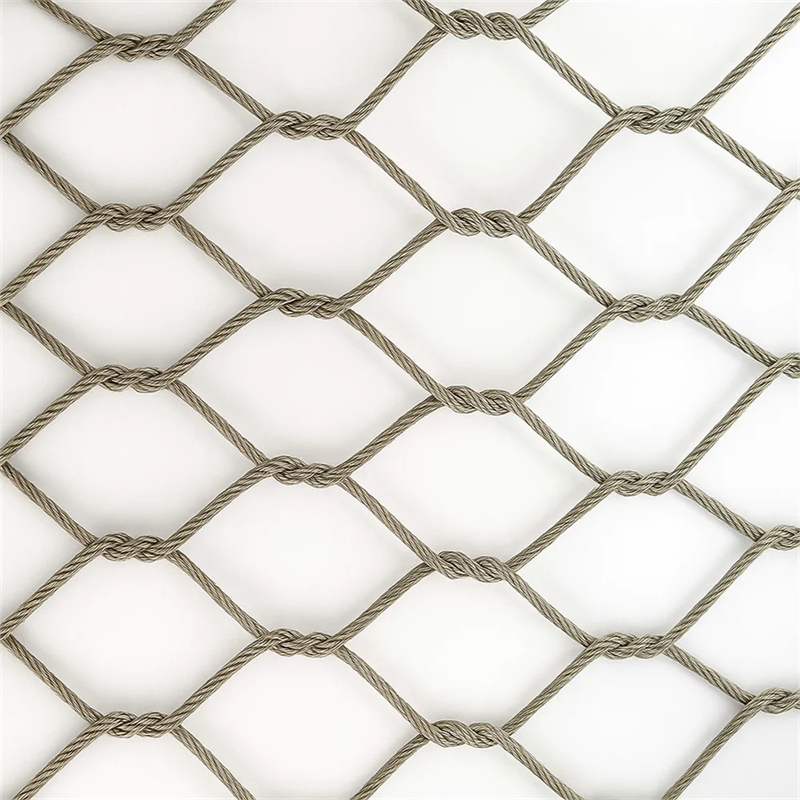
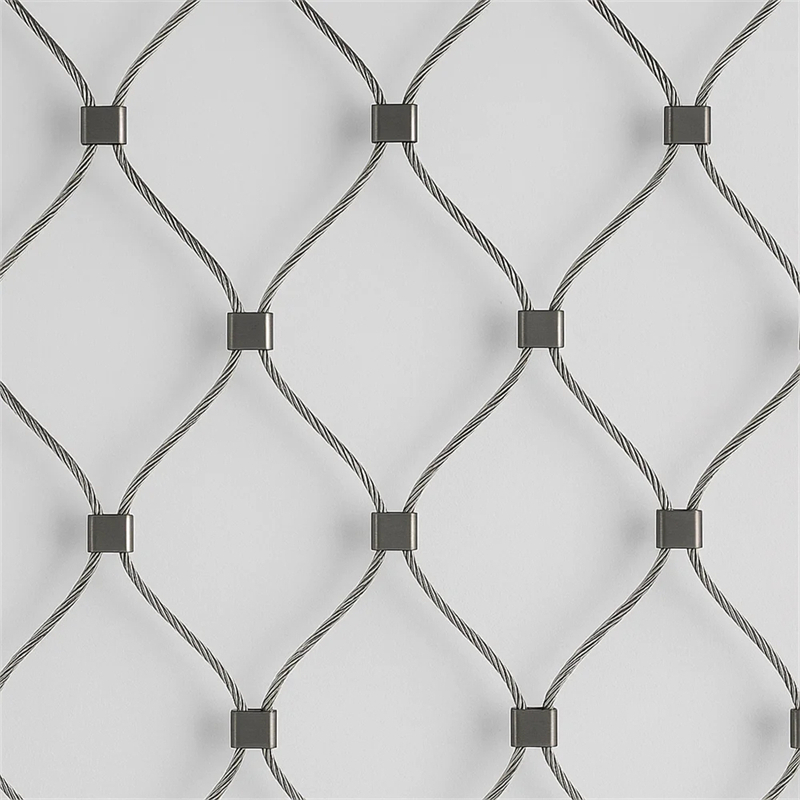
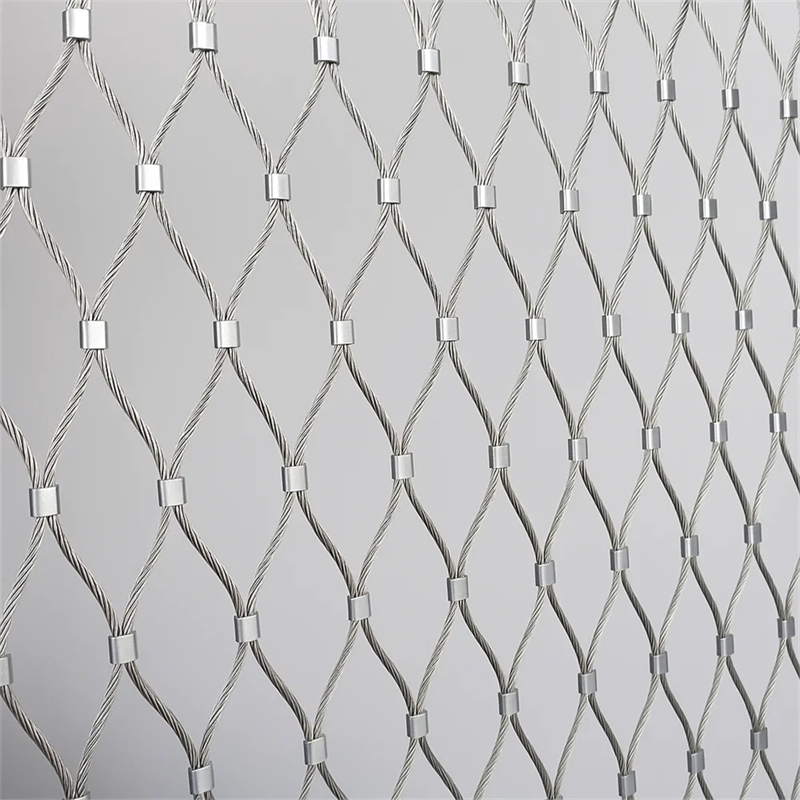
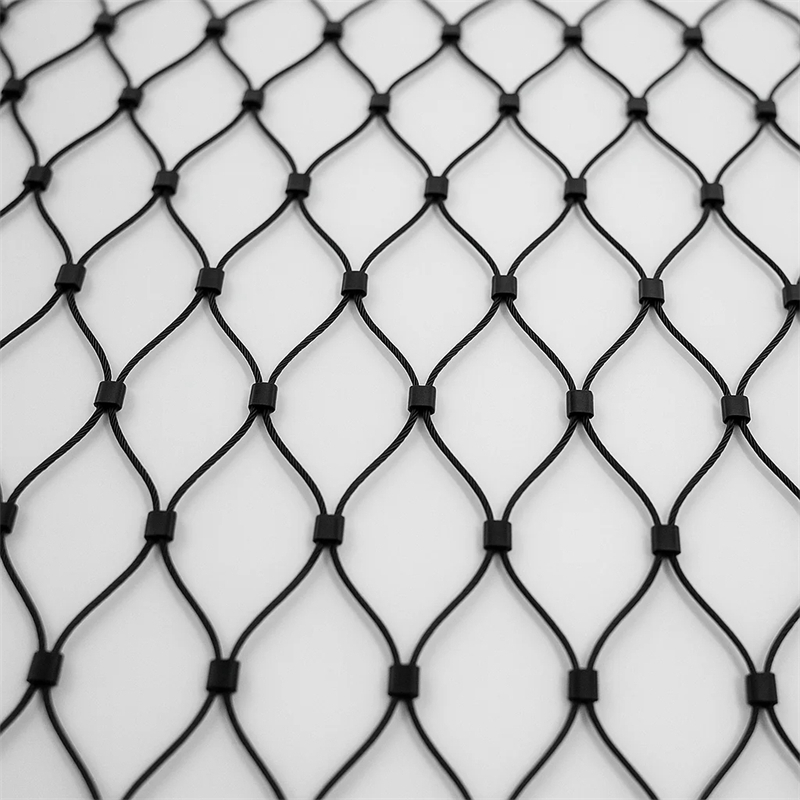
x tend mesh is a flexible stainless steel cable mesh made from high-tensile wire ropes that are crimped or ferruled together into a diamond or square pattern. It is widely used for balustrades, railings, fall protection, zoo enclosures, façades and green walls because it combines high strength with transparency and elegant design. Because x tend mesh is often custom-made, every decision – wire rope diameter, mesh aperture, angle degrees, material grade and edge structure – directly affects safety, visual impact and total lifetime cost.
x tend mesh fact #1 – Mesh aperture silently decides who is really safe
Choose the wrong mesh aperture and you create a dangerous illusion of safety. Aperture that is too large for a balcony or stair can allow a child to slip through or climb; aperture that is too small for a façade or aviary can waste money, overload structure and kill the open design feeling. The right x tend mesh aperture is always matched to human or animal size, fall-protection rules and design intent. Get this fact wrong and every other decision becomes a patch-up.


Four core x tend mesh parameters that control safety and cost
When engineers design x tend mesh systems, they always start with four specification levers: rope diameter, mesh aperture, angle degrees and wire rope structure. Together, these decide how your mesh behaves under impact, how it looks and how much you pay.
1. Wire rope diameter – the backbone of strength
Thicker wire rope equals higher breaking load and higher safety margin, but also higher cost and weight. Typical x tend mesh systems use stainless steel cables from around 1.2 mm up to 3.2 mm, with thicker sizes reserved for high loads, zoo enclosures for big animals and bridge or airport railings.
x tend mesh warning #2 – Undersized wire diameter is a hidden structural risk
If you let price pressure push you toward a smaller wire rope diameter than your loading requires, you do not just save a little. You create a dangerous mismatch between expectation and reality: the mesh looks robust, but its real breaking load is quietly too low. Under crowd load, animal impact or wind, that mistake shows up as deformation, permanent sagging or complete failure, and the blame falls directly on whoever approved that specification.
2. Mesh aperture and angle – not just aesthetics
Mesh aperture defines the size of each opening, while angle degrees (often 60° for diamond orientation or 90° for square) decides how force flows through the mesh. For the same aperture, changing the angle alters stiffness, deflection and visual texture.
x tend mesh trap #3 – Wrong angle degrees quietly destroys load capacity
Many non-specialists assume mesh is mesh and ignore angle degrees when they copy a drawing. That is a brutal trap. A panel designed at 60° but installed closer to 90° no longer behaves like the calculations predicted. Deflection increases, edge loads change and the system can fail inspection or worse, fail in service. Once the x tend mesh is fabricated, fixing this trap means painful re-ordering and delay.
Light, transparency and the illusion of “looks good = works good”
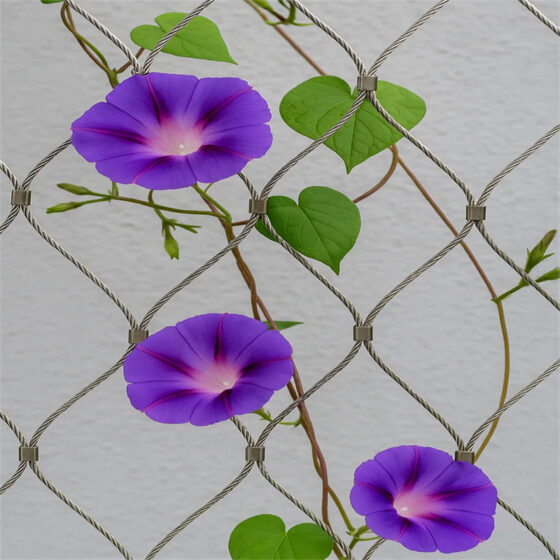
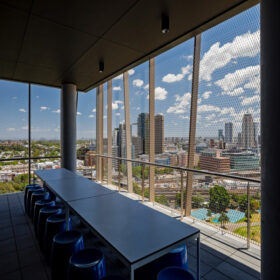
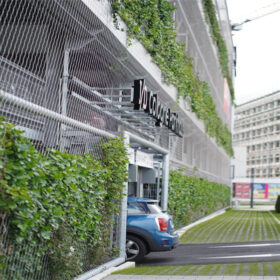
One of the biggest advantages of x tend mesh is its transparency. With the right specification, you can achieve high light transmittance, creating open façades and airy stairwells while still delivering serious fall protection. But transparency is not just about beauty. It controls how safe the space feels, how plants grow on a green wall and how animals behave in an enclosure.
x tend mesh drawback #4 – Ignoring light transmittance wrecks design intent
If you choose a combination of small aperture and thick wire rope just to be safe, you can suddenly find your façade looks like a cage, not a premium architectural feature. Sightlines are blocked, interiors darken, plants struggle and the owner feels cheated. Light transmittance is a design parameter, not an afterthought. Fail to calculate it and you pay for a system that technically passes but visually fails.
Materials and wire rope structures that separate winners from failures
High-quality x tend mesh relies on stainless steels such as AISI 304, 304L, 316 and 316L. These alloys provide excellent corrosion resistance, especially in coastal or polluted environments, while maintaining high tensile strength. Inside each cable, the rope construction – often 7×7 or 7×19 – determines how flexible the mesh feels and how it distributes load around each diamond.
x tend mesh benefit #5 – Correct wire rope structure gives you huge strength leverage
When you match rope structure to application, you unlock a powerful advantage. A well-chosen 7×19 structure can deliver impressive flexibility and high breaking load with minimal added cost, allowing larger mesh apertures without sacrificing safety. That leverage turns into slimmer supporting steel, faster installation and a clean, minimalist look that competitors struggle to copy. Use the wrong structure and you lose that edge completely.
Corrosion, lifespan and the real risk behind “cheap stainless”
In aggressive environments, the difference between 304 and 316 stainless steel is the difference between a clean, durable mesh and a stained, weakened system that has to be replaced years too early. 316 and 316L alloy grades add extra corrosion resistance for outdoor x tend mesh near the sea or busy roads.
x tend mesh risk #6 – Cheap material choices multiply long-term danger
Choosing a lower stainless grade to save a little now is a direct risk to safety and reputation. Corrosion does not just change colour. It eats cross-section, lowers breaking load and eventually turns your x tend mesh into a brittle web of failure points. The result is emergency repairs, downtime and a visible public symbol of cost-cutting. That is why serious projects lock in the right material grade from day one.
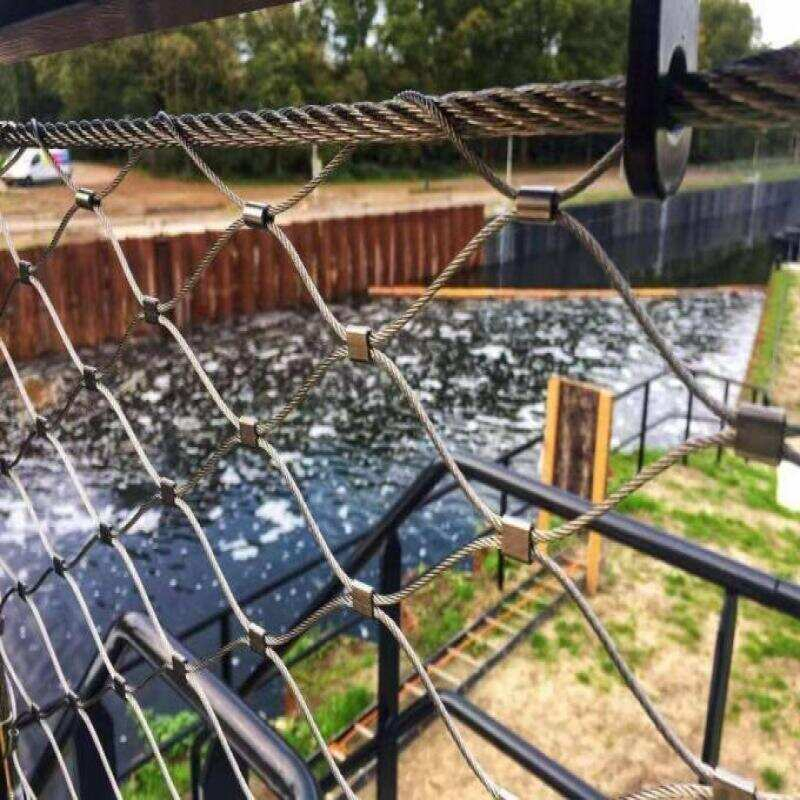
Orientation, edge detailing and why installation is never “just fit it”
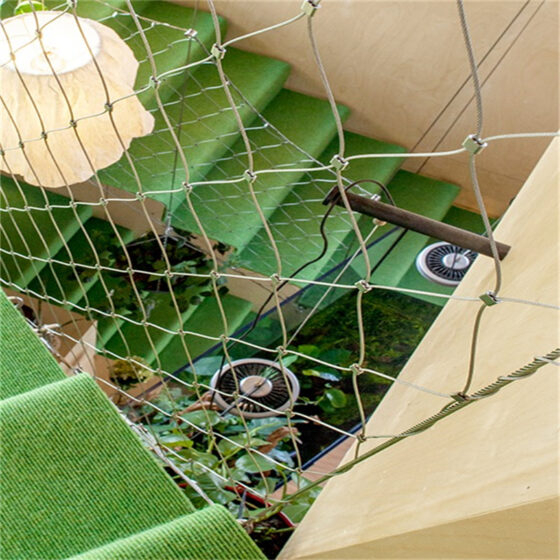
x tend mesh is only as strong as its edges. The mesh panel must be anchored to border cables, tubes or frames that can transfer forces into the main structure. Orientation (vertical, horizontal or 3D) and edge detailing (standard or reinforced) decide how loads flow and where local stress peaks appear.
x tend mesh downside #7 – Random mesh orientation creates inspection nightmares
Installers who randomly rotate panels to make them fit create a nasty downside. The as-built orientation no longer matches the engineer’s calculations. The mesh might still be strong, but the documentation is now wrong and inspectors will notice. That can mean costly re-certification, extra testing or even panel replacement.
x tend mesh hazard #8 – Weak edge fixings trigger progressive failure
If edge fixings, lacing cables or frames are under-sized, a single overload event such as a crowd surge, an animal impact or a fallen object can tear out one corner and then propagate across the whole panel. The mesh itself survives, but the system fails. Strong, properly detailed edges turn x tend mesh into a safe, controlled net instead of a brittle cloth that unzips under pressure.
x tend mesh specification tables you can apply immediately
Below are three wide specification tables you can plug straight into design discussions. They are organised by typical application: balustrades and railings, zoo and animal enclosures, and façades or green walls. Each table shows wire rope diameter, mesh aperture, angle degrees, light transmittance, stainless material, nominal breaking load and wire rope structure – the real-world parameters that keep your x tend mesh projects safe, efficient and profitable.
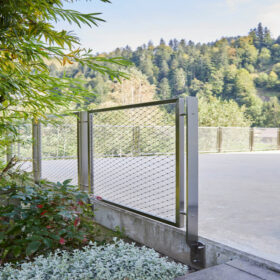
Table 1 – x tend mesh for balustrades and railings
| Model | Wire Rope Diameter (mm) | Mesh Aperture (mm) | Angle Degrees (°) | Light Transmittance (%) | Material | Nominal Breaking Load (lbs) | Wire Rope Structures |
|---|---|---|---|---|---|---|---|
| BR-01 | 1.5 | 50 × 50 | 60 | 78 | AISI 316 | 380 | 7×7 |
| BR-02 | 1.5 | 60 × 60 | 60 | 82 | AISI 316 | 380 | 7×7 |
| BR-03 | 1.5 | 70 × 70 | 60 | 85 | AISI 304 | 380 | 7×7 |
| BR-04 | 1.5 | 80 × 80 | 60 | 87 | AISI 316L | 380 | 7×7 |
| BR-05 | 2.0 | 50 × 50 | 60 | 75 | AISI 316 | 720 | 7×19 |
| BR-06 | 2.0 | 60 × 60 | 60 | 80 | AISI 316 | 720 | 7×19 |
| BR-07 | 2.0 | 70 × 70 | 60 | 83 | AISI 304 | 720 | 7×19 |
| BR-08 | 2.0 | 80 × 80 | 60 | 86 | AISI 316L | 720 | 7×19 |
| BR-09 | 2.0 | 90 × 90 | 60 | 88 | AISI 316 | 720 | 7×7 |
| BR-10 | 2.0 | 100 × 100 | 60 | 90 | AISI 316 | 720 | 7×19 |
| BR-11 | 1.5 | 50 × 80 | 60 | 81 | AISI 304 | 380 | 7×7 |
| BR-12 | 1.5 | 60 × 90 | 60 | 84 | AISI 316L | 380 | 7×7 |
| BR-13 | 2.0 | 70 × 100 | 60 | 88 | AISI 316 | 720 | 7×19 |
| BR-14 | 2.0 | 80 × 120 | 60 | 90 | AISI 316 | 720 | 7×19 |
| BR-15 | 2.0 | 90 × 120 | 60 | 91 | AISI 316 | 720 | 7×7 |
These balustrade configurations balance safe opening sizes with high light transmittance and elegant appearance, ideal for stairs, balconies and bridge railings.
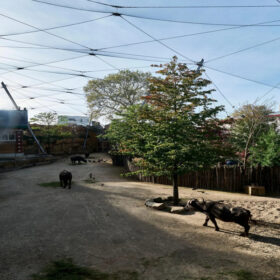
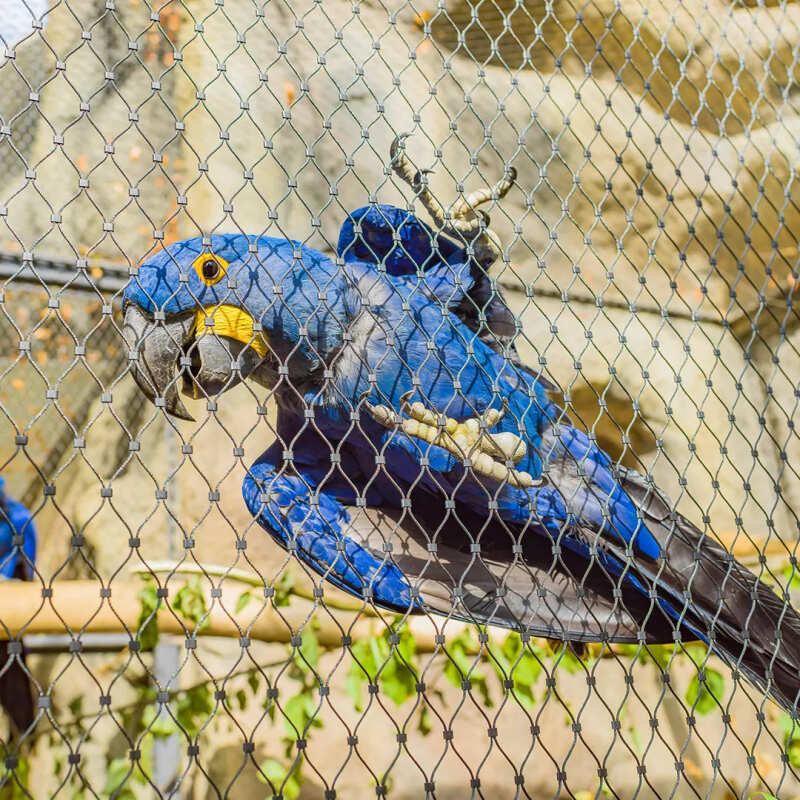
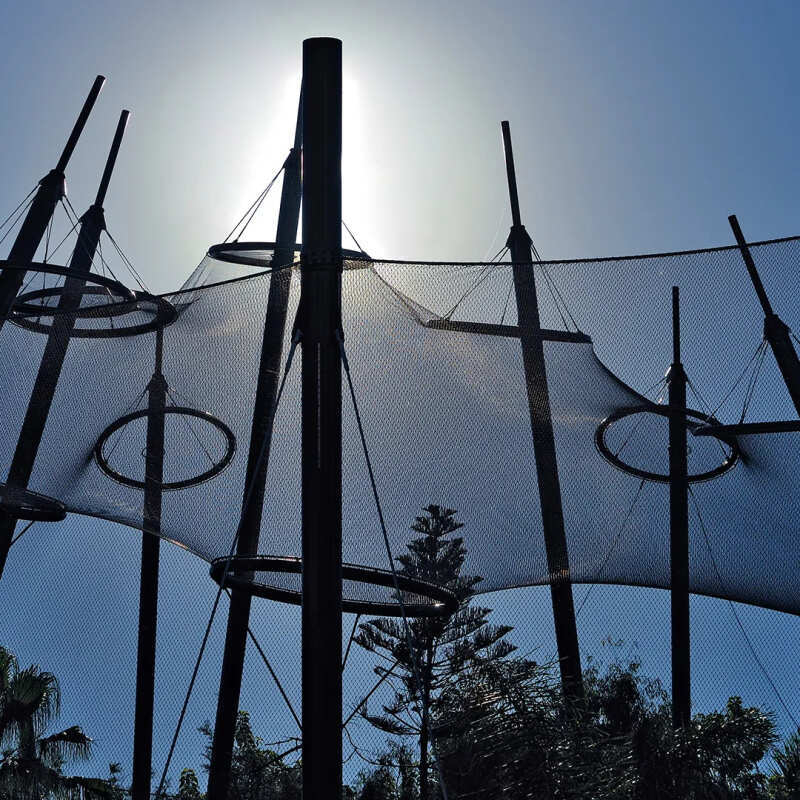
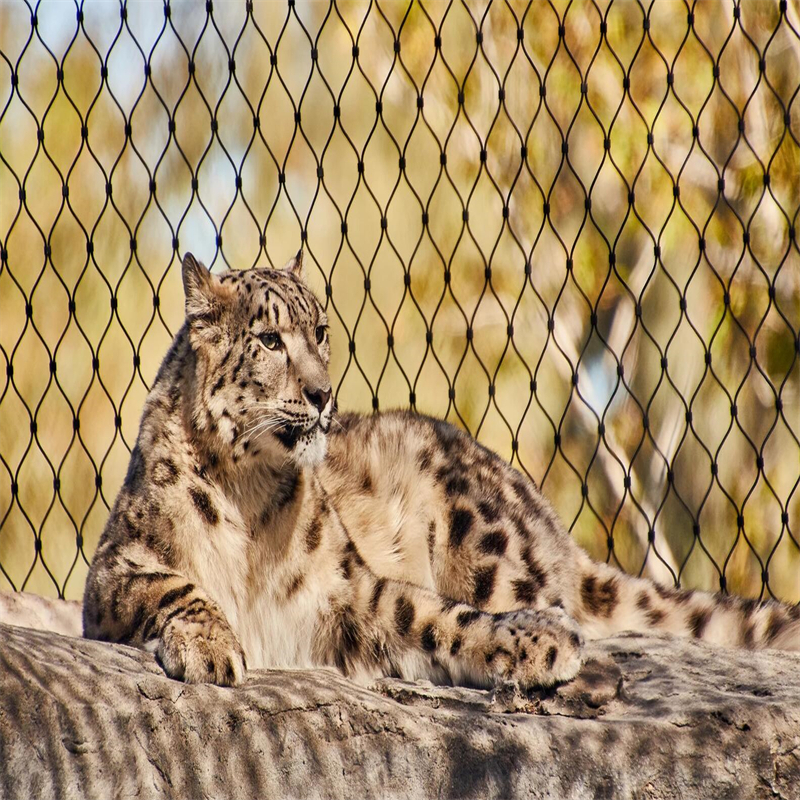
Table 2 – x tend mesh for zoo and animal enclosures
| Model | Wire Rope Diameter (mm) | Mesh Aperture (mm) | Angle Degrees (°) | Light Transmittance (%) | Material | Nominal Breaking Load (lbs) | Wire Rope Structures |
|---|---|---|---|---|---|---|---|
| ZO-01 | 2.0 | 40 × 40 | 60 | 70 | AISI 316 | 720 | 7×19 |
| ZO-02 | 2.0 | 50 × 50 | 60 | 74 | AISI 316 | 720 | 7×19 |
| ZO-03 | 2.4 | 50 × 50 | 60 | 72 | AISI 316 | 980 | 7×19 |
| ZO-04 | 2.4 | 60 × 60 | 60 | 76 | AISI 316 | 980 | 7×19 |
| ZO-05 | 2.4 | 70 × 70 | 60 | 80 | AISI 316L | 980 | 7×19 |
| ZO-06 | 3.0 | 60 × 60 | 60 | 74 | AISI 316 | 1650 | 7×19 |
| ZO-07 | 3.0 | 70 × 70 | 60 | 78 | AISI 316 | 1650 | 7×19 |
| ZO-08 | 3.0 | 80 × 80 | 60 | 81 | AISI 316 | 1650 | 7×19 |
| ZO-09 | 3.0 | 90 × 90 | 60 | 84 | AISI 316L | 1650 | 7×7 |
| ZO-10 | 3.0 | 100 × 100 | 60 | 86 | AISI 316 | 1650 | 7×19 |
| ZO-11 | 2.0 | 30 × 30 | 60 | 65 | AISI 316 | 720 | 7×7 |
| ZO-12 | 2.4 | 40 × 70 | 60 | 77 | AISI 316 | 980 | 7×19 |
| ZO-13 | 3.0 | 60 × 90 | 60 | 82 | AISI 316 | 1650 | 7×19 |
| ZO-14 | 3.0 | 70 × 100 | 60 | 84 | AISI 316 | 1650 | 7×19 |
| ZO-15 | 3.0 | 80 × 120 | 60 | 87 | AISI 316 | 1650 | 7×19 |
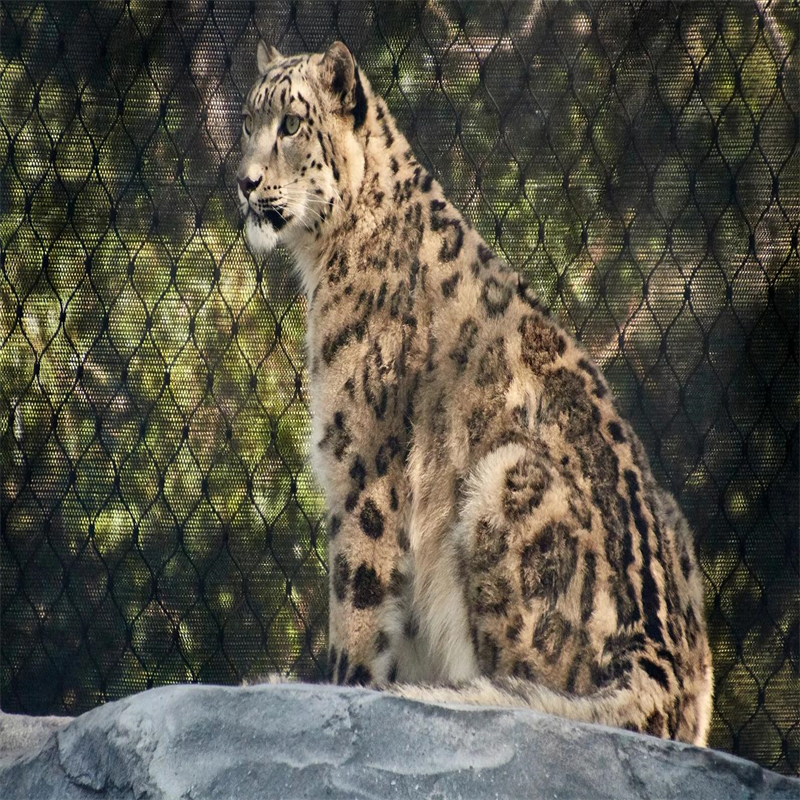
These zoo and enclosure specifications keep large cats, primates and birds safely contained while maintaining high visibility and animal-friendly flexibility.
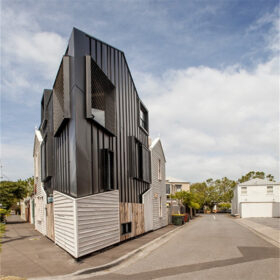
Table 3 – x tend mesh for façades, green walls and fall protection nets
| Model | Wire Rope Diameter (mm) | Mesh Aperture (mm) | Angle Degrees (°) | Light Transmittance (%) | Material | Nominal Breaking Load (lbs) | Wire Rope Structures |
|---|---|---|---|---|---|---|---|
| FA-01 | 1.2 | 60 × 60 | 60 | 88 | AISI 304 | 320 | 7×7 |
| FA-02 | 1.2 | 80 × 80 | 60 | 90 | AISI 316 | 320 | 7×7 |
| FA-03 | 1.5 | 80 × 80 | 60 | 88 | AISI 316 | 380 | 7×7 |
| FA-04 | 1.5 | 100 × 100 | 60 | 91 | AISI 316L | 380 | 7×7 |
| FA-05 | 1.5 | 120 × 120 | 60 | 93 | AISI 316 | 380 | 7×7 |
| FA-06 | 2.0 | 80 × 80 | 60 | 86 | AISI 316 | 720 | 7×19 |
| FA-07 | 2.0 | 100 × 100 | 60 | 89 | AISI 316 | 720 | 7×19 |
| FA-08 | 2.0 | 120 × 120 | 60 | 92 | AISI 316 | 720 | 7×19 |
| FA-09 | 2.0 | 150 × 150 | 60 | 94 | AISI 316 | 720 | 7×19 |
| FA-10 | 2.4 | 120 × 120 | 60 | 90 | AISI 316 | 980 | 7×19 |
| FA-11 | 2.4 | 150 × 150 | 60 | 92 | AISI 316L | 980 | 7×19 |
| FA-12 | 2.4 | 180 × 180 | 60 | 94 | AISI 316 | 980 | 7×19 |
| FA-13 | 2.4 | 200 × 200 | 60 | 95 | AISI 316 | 980 | 7×19 |
| FA-14 | 2.0 | 150 × 200 | 60 | 95 | AISI 316 | 720 | 7×19 |
| FA-15 | 1.5 | 120 × 180 | 60 | 93 | AISI 316 | 380 | 7×7 |
These façade and green-wall options deliver very high light transmittance while still providing reliable fall protection and robust anchor capacity.
x tend mesh payoff #9 – Optimised specification protects safety and locks in profit
When you combine the right wire rope diameter, mesh aperture, angle degrees, transmittance target, stainless grade and rope structure, you do not just meet the minimum. You capture a powerful payoff: lighter main steel, faster installation, fewer callbacks, satisfied inspectors and a stunning visual result that wins repeat business. Skip this payoff and you leave money, reputation and long-term safety on the table, exactly where your competitors lose.
How to choose x tend mesh step by step so you do not miss any critical point
- Define the real risk: Is this x tend mesh for fall protection, animal containment, anti-climb security or pure façades? Safety level always comes first.
- Lock in the material: Choose the correct stainless grade, often 316 or 316L, based on indoor or outdoor use, coastal exposure and cleaning regime.
- Select wire rope diameter and structure: Match breaking load and flexibility to your loads and desired feel.
- Fix mesh aperture and angle: Combine opening size and angle degrees to hit both safety rules and visual transparency.
- Check light transmittance: Confirm that your chosen specification still delivers the open, bright look your design needs.
- Design edges and supports: Specify border cables or frames that can carry the full mesh loads into the main structure.
- Document everything: Show the exact x tend mesh model, material, aperture, angle and breaking load on drawings and schedules so nothing changes during procurement.
Follow these steps with the tables above and you will use x tend mesh as a precise, engineered system, not a generic net.
Final view – read every fact or accept the risk instead
x tend mesh is one of the most powerful combinations of safety and design you can use today, but only when every specification detail is under control. The 9 facts, warnings, traps, drawbacks, risks, hazards, benefits and payoffs in this guide are exactly where real-world failures and unexpected losses usually start. If you read and apply all 9, your x tend mesh projects stay strong, clean and profitable for years. If you skip them, especially payoff #9, you are choosing higher risk, higher cost and the very real danger that your next project becomes an expensive lesson instead of a success story.